27+ Pinch Pot Ideas Transform Clay Into Stunning Functional Art
Pinch pot Ideas are the perfect gateway into ceramic artistry—requiring nothing more than your hands, some clay, and creativity. Whether you’re a complete beginner or an experienced potter looking for fresh inspiration, these handcrafted vessels offer endless possibilities for creating beautiful, functional pieces that bring warmth and personality to your home.
From minimalist planters to sculptural statement pieces, you’ll discover how this ancient technique can produce surprisingly sophisticated results.
This post may contain affiliate links, which could earn me a small commission if you make a purchase—without any additional cost to you.
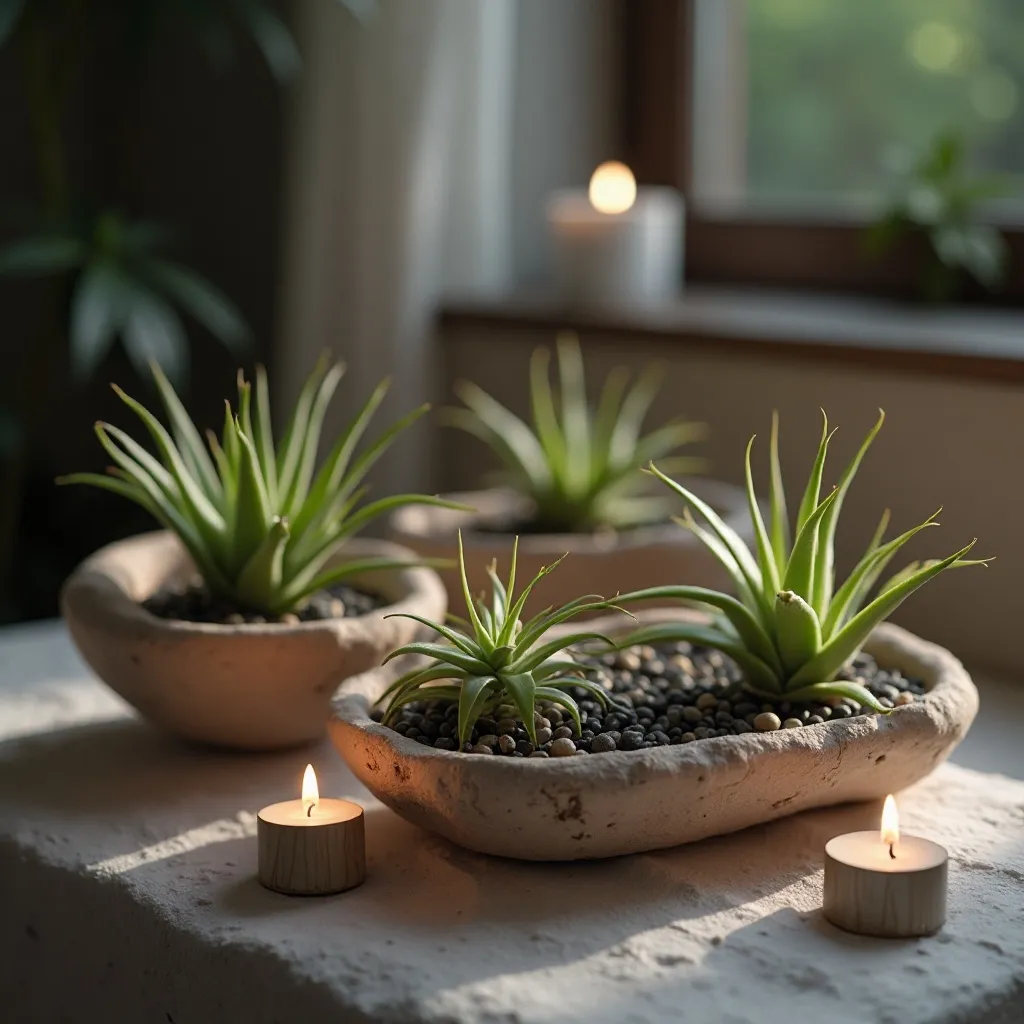
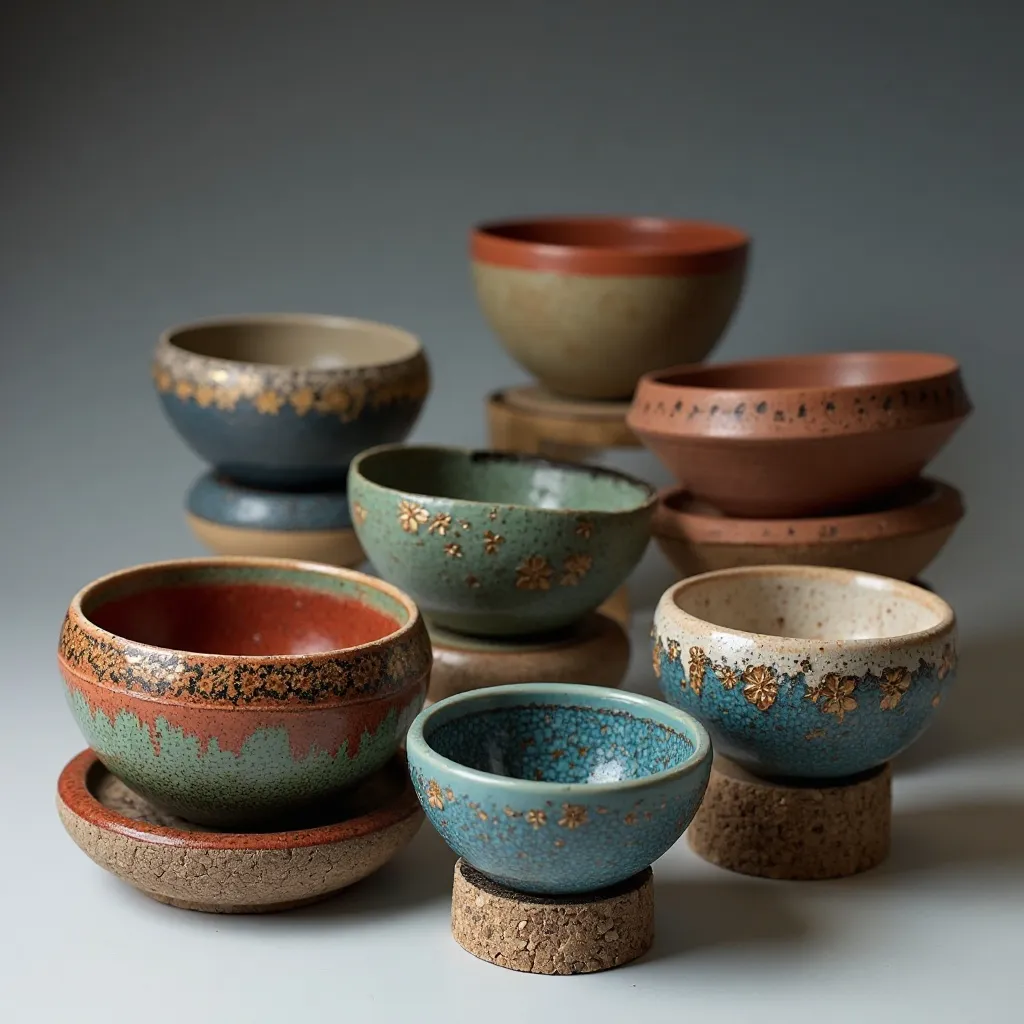
1. Textured Mini Planters
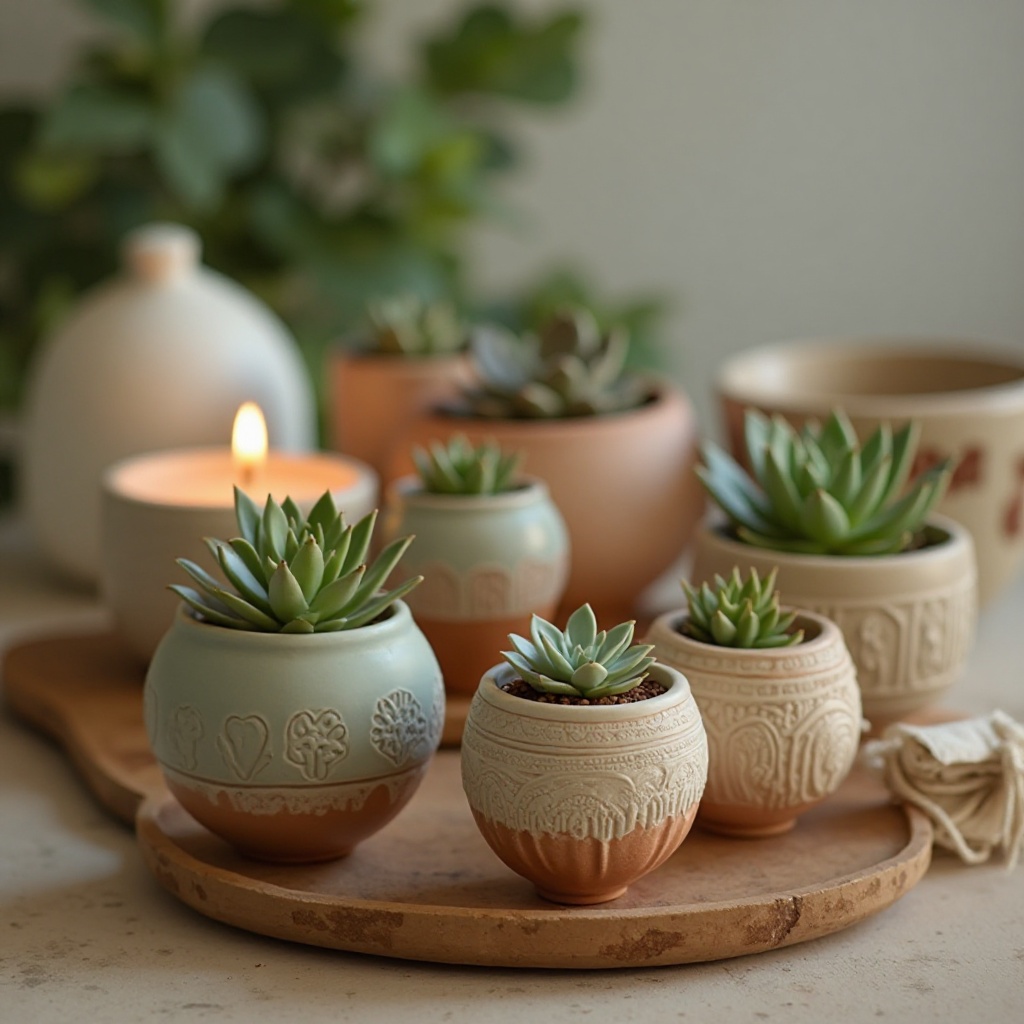
A collection of small pinch pots featuring various surface textures—impressed patterns from lace, leaves, rope, and stamps—glazed in earthy terracottas, sage greens, and warm whites, each holding tiny succulents or air plants. Shop on Amazon
Why It Works: Textured surfaces add visual interest and dimension to even the simplest forms, transforming basic pinch pot into tactile art pieces. The varied patterns catch light beautifully and create a curated, collected-over-time aesthetic when grouped together. These small-scale pieces are forgiving for beginners while offering endless creative possibilities through texture exploration.
How to Style It:
- Press textures into leather-hard clay using fabric, natural objects, or stamps before the final shaping
- Create sets of 3-5 pots in graduating sizes (2-4 inches diameter) with complementary texture patterns
- Use a cohesive glaze palette across different textures—monochromatic schemes work beautifully
- Drill drainage holes before bisque firing, or use as cachepots with plastic inserts for easy plant care
Where to Use It: Kitchen windowsills, bathroom shelves, office desks, bedroom nightstands
Pro Tip: Apply textures when clay is slightly firm but still pliable—too wet and patterns blur, too dry and clay cracks. Test your texture tools on clay scraps first to preview the impression depth.
2. Rustic Salt Cellars with Wooden Spoons
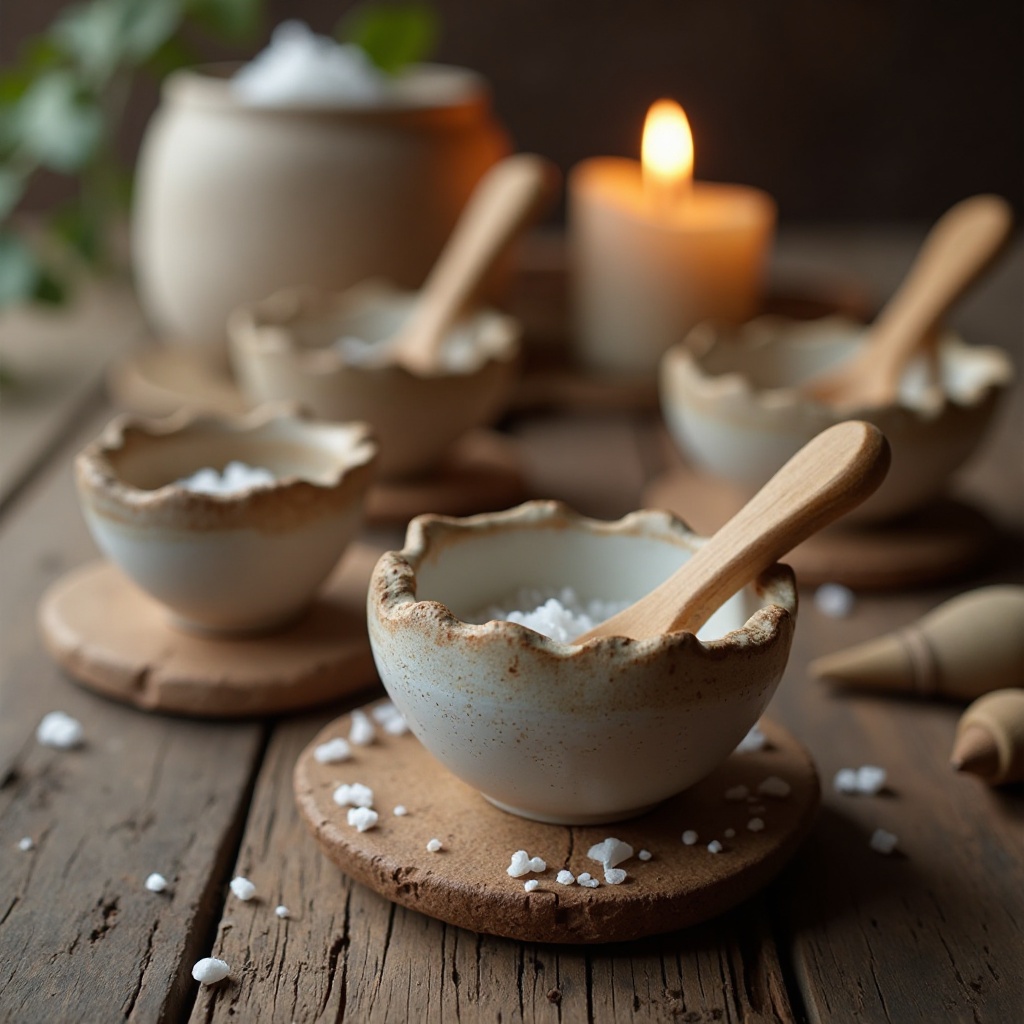
Thumb-sized pinch pots with organic, irregular rims, finished in unglazed clay or matte white interior glaze, paired with hand-carved wooden spoons that rest perfectly across the opening. Shop on Amazon
Why It Works: These petite vessels celebrate the imperfect beauty of handmade objects while serving a genuinely useful purpose. The small scale makes them approachable for beginners, and the unglazed exterior showcases the natural clay body. Keeping one by your stove means finishing salt is always within arm’s reach, elevating everyday cooking into a more intentional experience.
How to Style It:
- Size pots to 2-3 inches wide—large enough to pinch salt but small enough to feel precious
- Leave exterior raw or apply a single food-safe glaze coat to the interior only
- Carve a shallow groove across the rim for the spoon to rest in (optional but elegant)
- Create matching sets with different clay bodies—terracotta, stoneware, and porcelain for visual variety
Where to Use It: Stovetop areas, dining tables, kitchen islands, outdoor grilling stations
Pro Tip: Bisque fire unglazed pieces to cone 04, then burnish with fine sandpaper and seal with mineral oil for a smooth, food-safe finish that highlights the clay’s natural color.
3. Asymmetrical Ring Dishes
Shallow, free-form pinch pot with deliberately irregular shapes—oval, organic curves, and intentionally uneven rims—finished in soft pastels, metallic lusters, or marbled glazes. Shop on Amazon
Why It Works: The asymmetrical form embraces the handmade aesthetic while creating visual movement. Shallow depth (½ to 1 inch) makes rings and small jewelry easily visible and accessible. These pieces work as functional art—beautiful enough to display even when not holding jewelry, transforming countertop clutter into curated vignettes.
How to Style It:
- Start with a slightly flattened ball and pinch outward rather than upward for shallow depth
- Deliberately vary rim heights by ¼ to ½ inch as you work around the edge
- Try ombre glaze effects by dipping one edge deeper than the other
- Add gold leaf or metallic accents to rims after firing for luxe finishing touches
Where to Use It: Bathroom vanities, bedroom dressers, entryway consoles, home office desks
Pro Tip: Pinch a small thumb indent or groove into one side of the dish specifically for removing rings—this thoughtful detail prevents frustration when fingers are soapy or lotioned.
4. Nested Bowl Sets
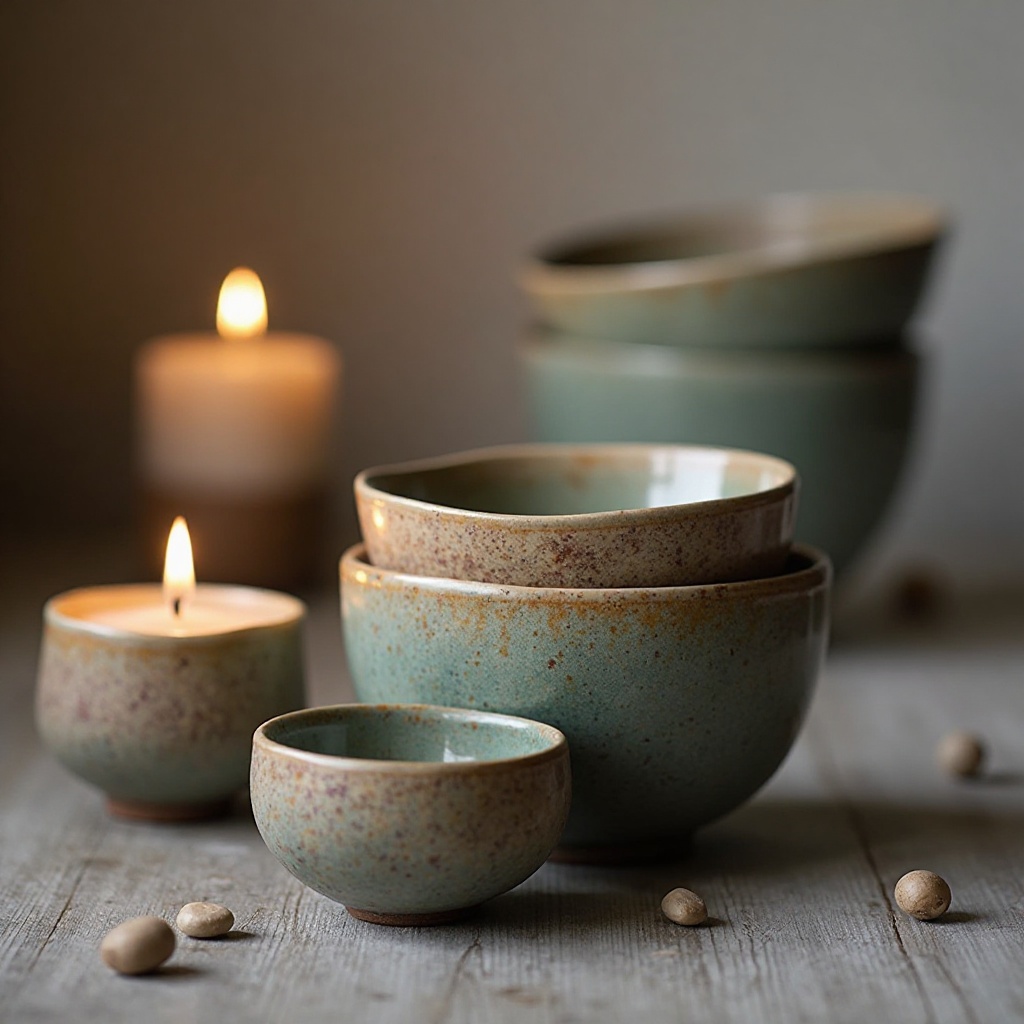
Three to five pinch pots created in graduated sizes that nest perfectly inside each other, finished in complementary glazes that create a gradient effect when stacked or a coordinated pattern when separated. Shop on Amazon
Why It Works: Nested sets are satisfying to make and use, teaching proportion and consistency while creating a cohesive collection. They solve the storage challenge beautifully while displaying as sculptural objects. The graduated sizes offer versatility—use individually for different purposes or together for serving multiple components of a meal.
How to Style It:
- Measure clay balls precisely (use a scale) to ensure consistent size ratios: 100g, 150g, 225g, 350g, 500g
- Use the largest bowl as a sizing guide, testing fit as you work on smaller pieces
- Apply glazes in an ombre progression from lightest to darkest, or alternate between two complementary colors
- Ensure each bowl’s rim is slightly wider than the next size down for proper nesting
Where to Use It: Kitchen counters, dining room sideboards, coffee tables, entryway catch-all stations
Pro Tip: Dry all bowls nested together (with paper between layers) to ensure they maintain compatible curves—clay shrinks as it dries, and this technique helps them shrink uniformly.
5. Sculptural Face Planters
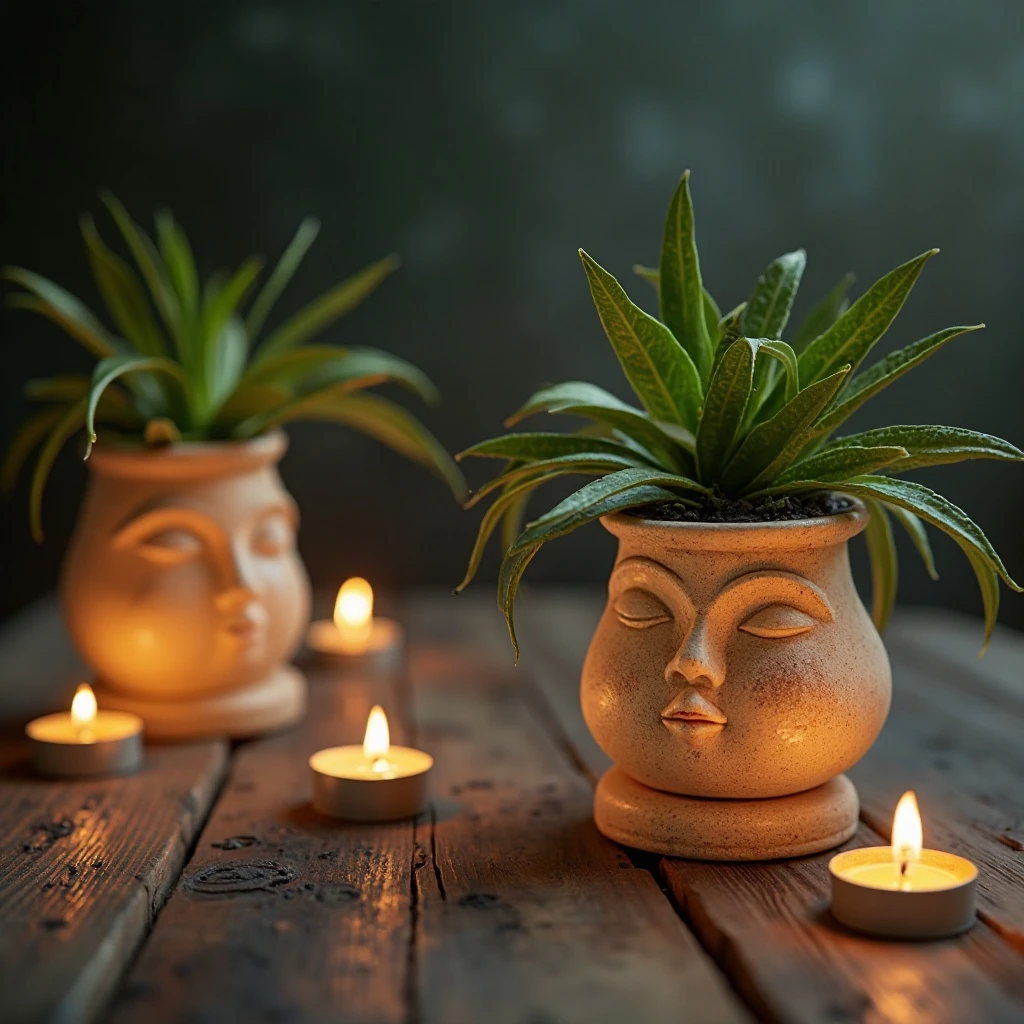
Pinch pot shaped into abstract or stylized faces with carved or sculpted features—closed eyes, serene expressions, or whimsical personalities—with plants growing from the “head” as hair. Shop on Amazon
Why It Works: These playful pieces inject personality and conversation-starting charm into plant displays. The face adds emotional connection to your green space, transforming a simple planter into a character. They work across aesthetics from minimalist modern (abstract faces, neutral tones) to maximalist bohemian (expressive features, bold glazes).
How to Style It:
- Form the basic pot first, then add facial features using clay coils, slabs, or carving tools
- Keep features subtle and stylized rather than realistic for broader appeal and easier execution
- Choose trailing or textured plants that create interesting “hairstyles”—string of pearls, ferns, or curly spider plants
- Vary face directions when grouping multiple planters for dynamic visual conversation
Where to Use It: Living room shelves, sunroom displays, creative studio spaces, children’s rooms
Pro Tip: Score and slip all attached features thoroughly—noses, ears, and protruding elements are prone to cracking if not properly joined. Add a small coil of clay inside the attachment point for extra reinforcement.
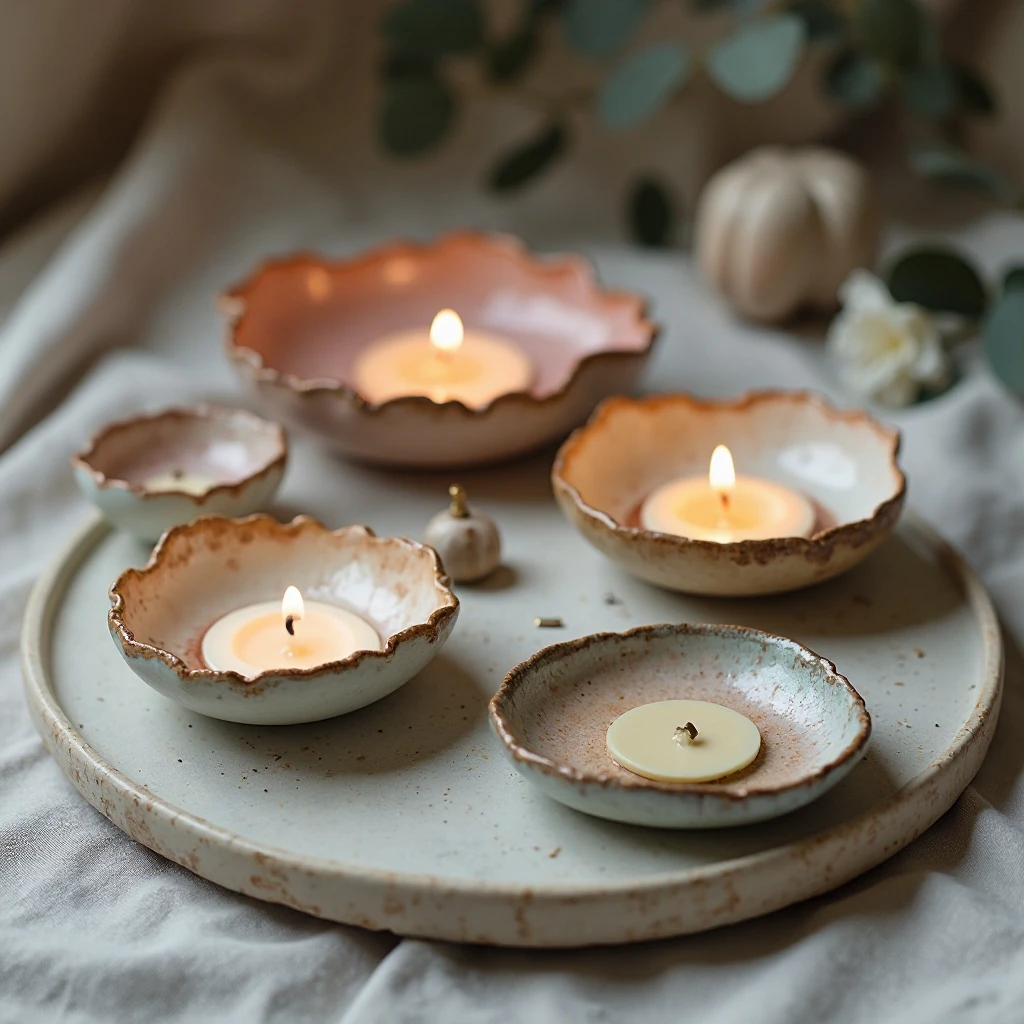
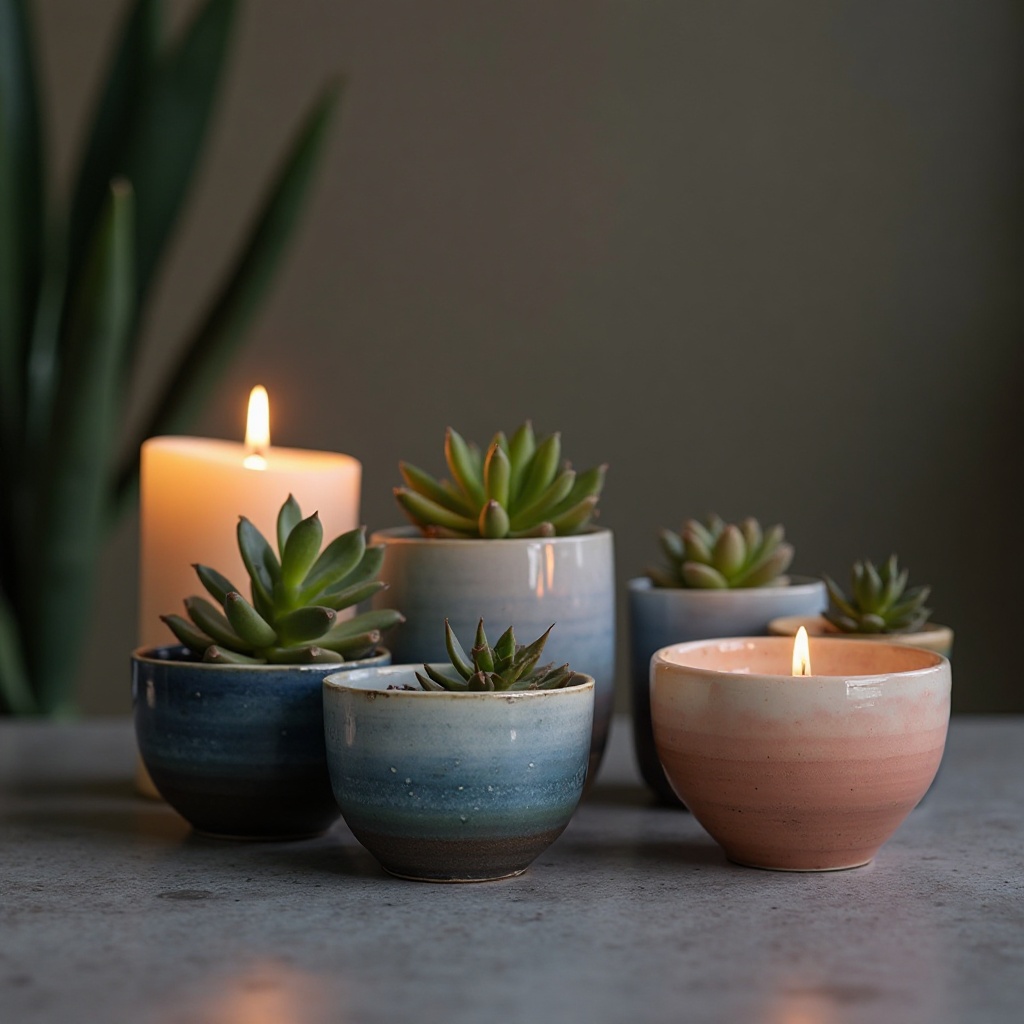
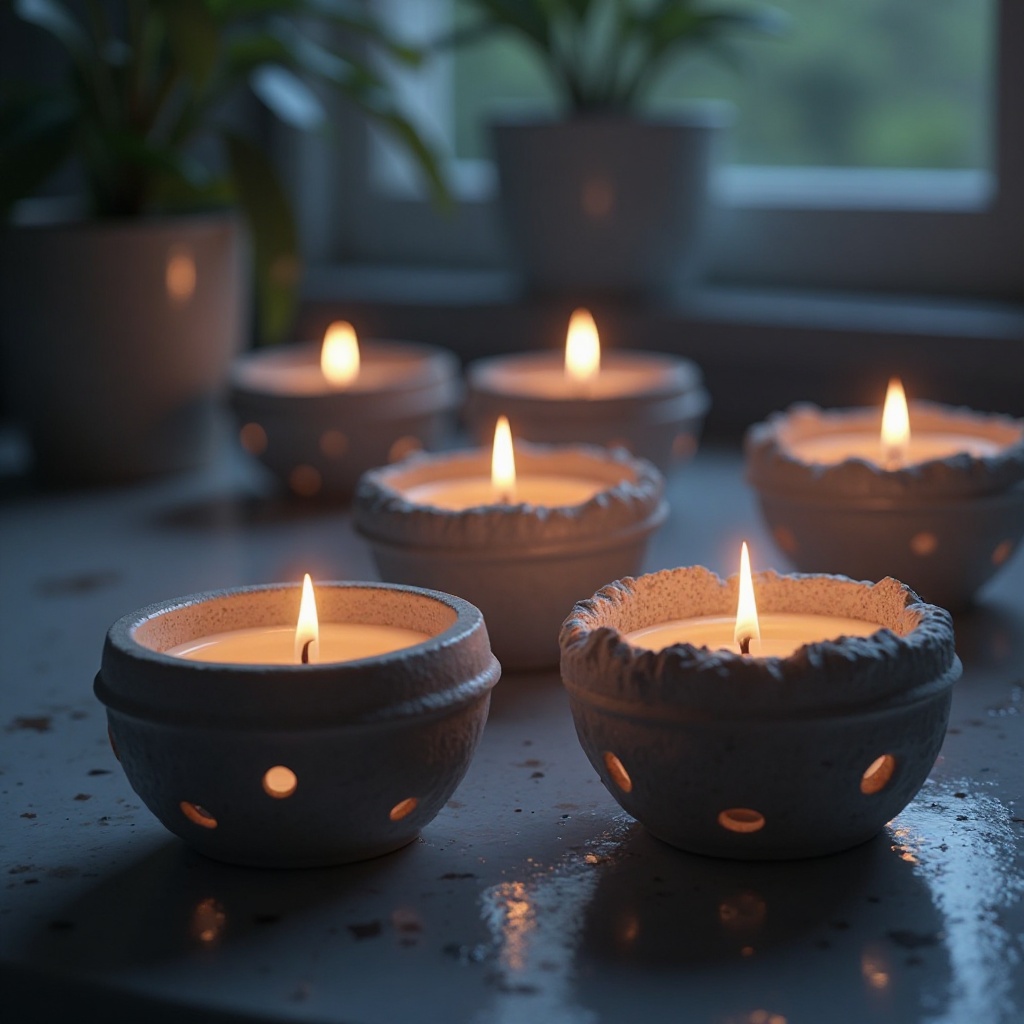
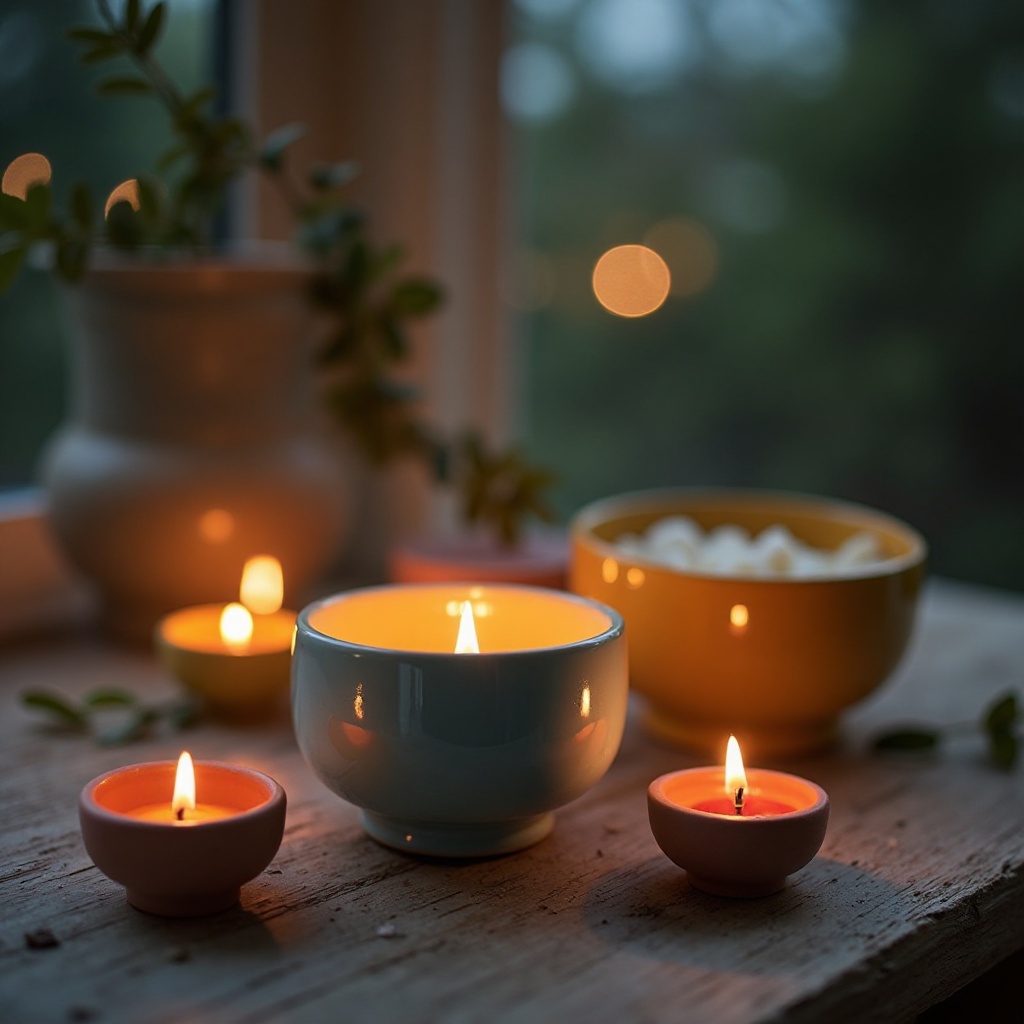
6. Minimalist Tea Light Holders
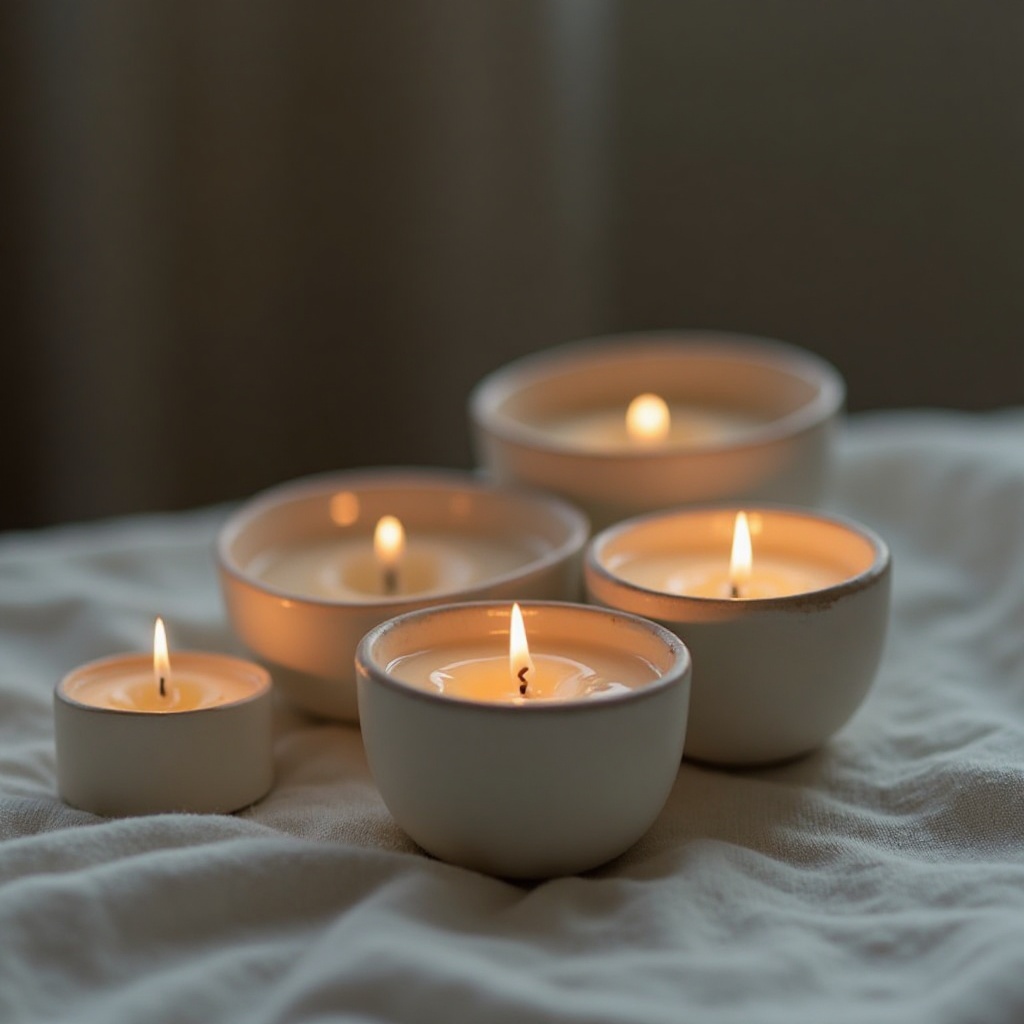
Simple cylindrical or gently tapered pinch pots, approximately 2-3 inches tall, with slightly flared rims, finished in translucent glazes that glow when candles are lit inside. Shop on Amazon
Why It Works: The thick, hand-formed walls diffuse candlelight beautifully, creating ambient warmth without the perfection of store-bought holders. Translucent or semi-opaque glazes in white, honey, or sea glass blue become luminous when backlit. Grouping multiple holders creates instant atmosphere for dining or relaxation.
How to Style It:
- Maintain even wall thickness (approximately ¼ inch) for consistent light diffusion
- Leave the interior unglazed or use clear glaze to maximize light transmission
- Create deliberate thinned areas in walls by pressing gently from inside for brighter light spots
- Size pots to fit standard tea lights with about ¼ inch clearance on all sides
Where to Use It: Dining tables, bathroom counters, bedroom dressers, outdoor patios
Pro Tip: Add a small pinch or pour spout on one side—this makes removing melted wax and candle remnants infinitely easier and extends the life of your holder.
7. Incense Cone Holders with Ash Catchers
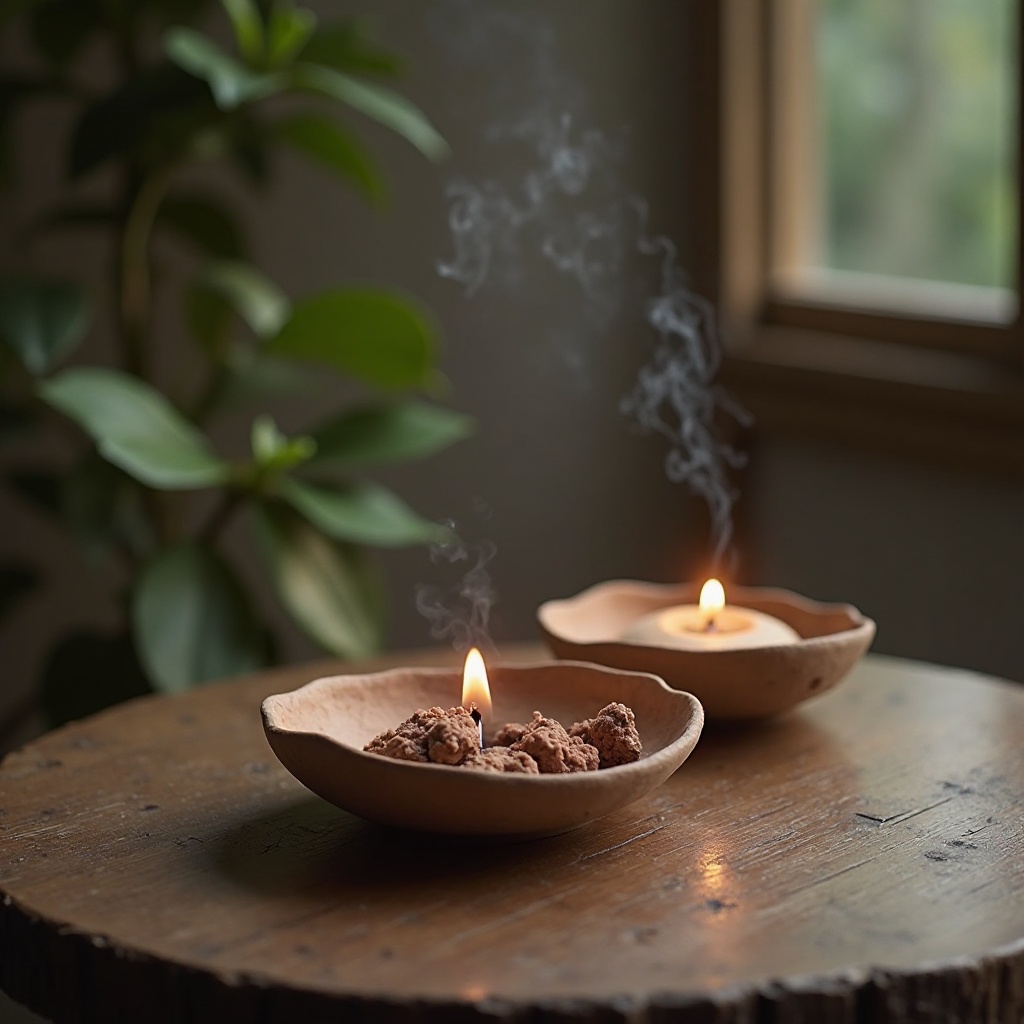
Two-part pinch pot design: a small cone-shaped holder for incense with a coordinating shallow dish underneath to catch falling ash, connected or designed to nest together. Shop on Amazon
Why It Works: This functional design solves the mess problem while creating a complete ritual object. The pinch pot technique is perfect for the small scale required, and the handmade quality enhances the mindful, intentional quality of burning incense. Glazed interiors make ash cleanup effortless.
How to Style It:
- Form the cone holder with a small central peak or indentation to stabilize incense cones
- Size the ash catcher 4-6 inches in diameter to catch all falling debris
- Use coordinating but not identical glazes—perhaps matte exterior with glossy interior
- Add small air holes near the base of the cone holder to support proper burning airflow
Where to Use It: Meditation spaces, bedside tables, bathroom counters, home office desks
Pro Tip: Create a small carved channel from the cone holder down to the ash dish—falling ash follows this path rather than scattering, and it adds an elegant design detail.
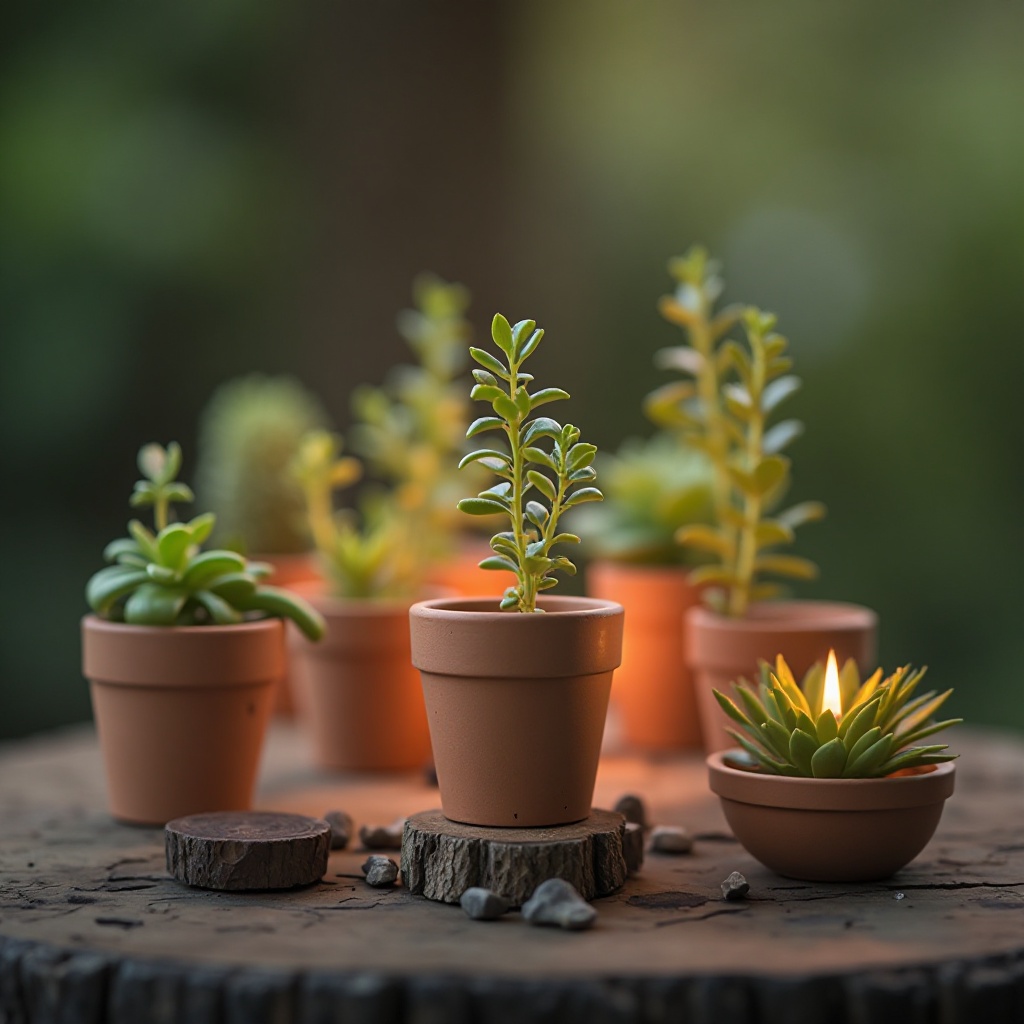
8. Ombre Succulent Planters
Gradient-glazed pinch pots ranging from deep saturated colors at the base to lighter tones or white at the rim, sized specifically for succulent propagation and small cacti. Shop on Amazon
Why It Works: Ombre glazing is easier to achieve than it looks and creates sophisticated visual impact. The gradient draws the eye upward toward the plants, enhancing their sculptural qualities. These planters photograph beautifully and work equally well displayed individually or as a graduated collection.
How to Style It:
- Dip the pot base-first into your darkest glaze, then progressively shorter dips into lighter shades
- Allow 30 seconds of dripping time between each glaze layer for clean color transitions
- Size pots to 2-4 inches for individual succulent propagations or small clusters
- Create drainage holes sized proportionally—¼ inch diameter for pots under 3 inches
Where to Use It: Window sills, floating shelves, desktop arrangements, bathroom ledges
Pro Tip: Apply wax resist at the transition points between glaze colors for sharper, more defined bands rather than soft gradients—alternate between soft and sharp transitions across a collection for visual interest.
9. Organic Edge Serving Bowls
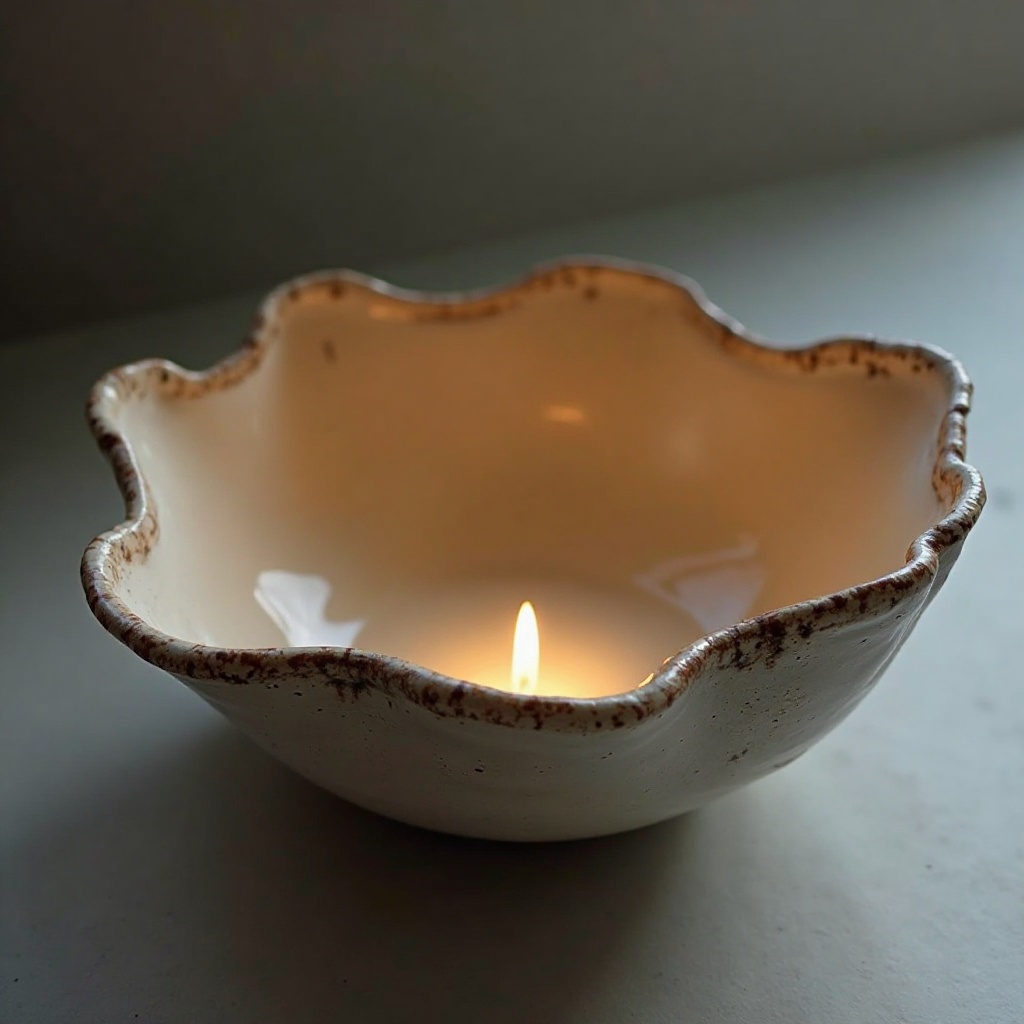
Medium to large pinch pots (6-10 inches diameter) with deliberately irregular, rippled rims that mimic natural forms like flower petals, leaves, or ocean waves. Shop on Amazon
Why It Works: The organic edges transform functional serving ware into statement pieces worthy of display between uses. Hand-forming these larger pieces creates surprisingly strong, substantial bowls while the irregular rim disguises any beginner imperfections. They bridge rustic and refined, working in both casual and elegant table settings.
How to Style It:
- Work with smooth, well-wedged clay in larger quantities (1-2 pounds per bowl)
- Pinch the rim deliberately thinner than the walls, then gently manipulate into waves or ruffles
- Use a damp sponge to smooth the interior to food-safe standards while leaving exterior texture
- Apply food-safe glazes fully to interior and top third of exterior for practical serving use
Where to Use It: Dining tables for salads or sides, kitchen counters for fruit, coffee tables for decorative displays
Pro Tip: Support larger pinch pots from underneath with your non-dominant hand while working to prevent sagging—or work over a foam pad cut to a smaller diameter than your desired pot size for structural support.
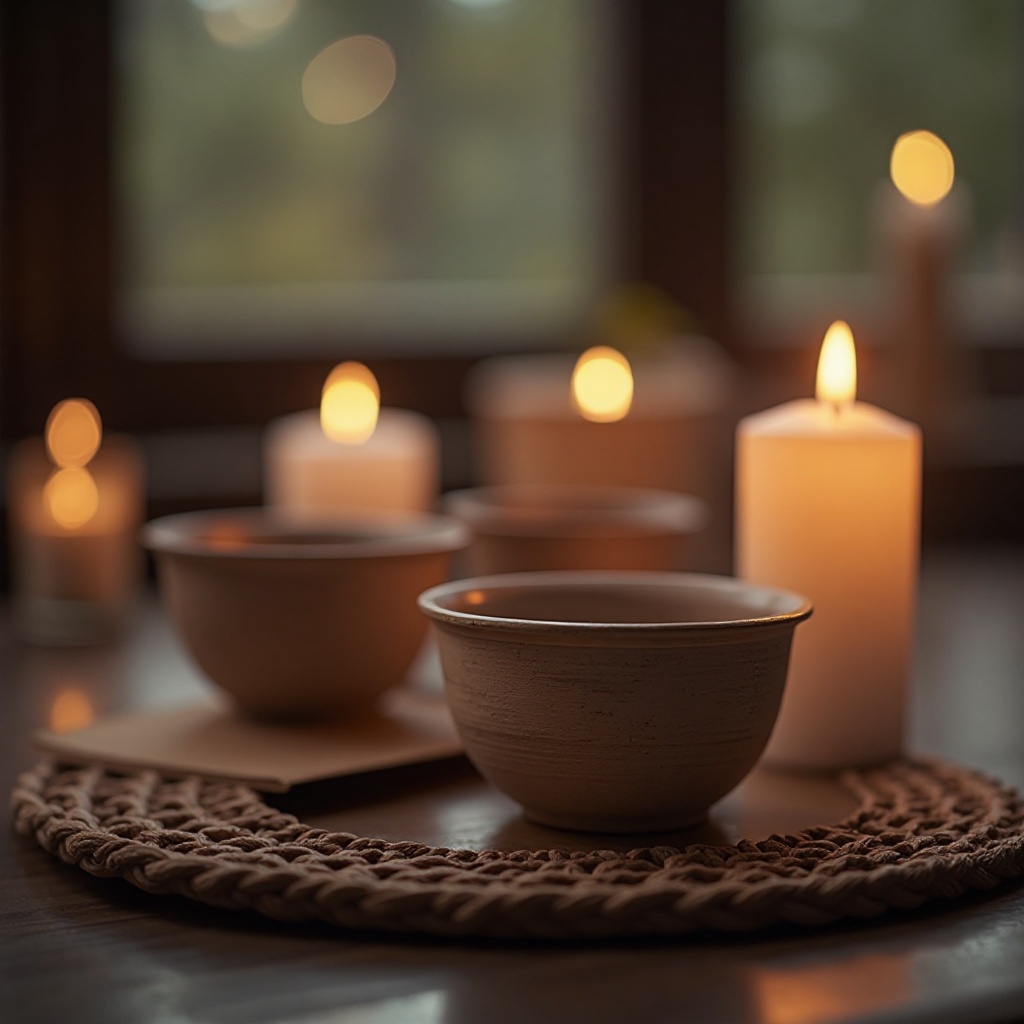
10. Minimalist Sake Cups
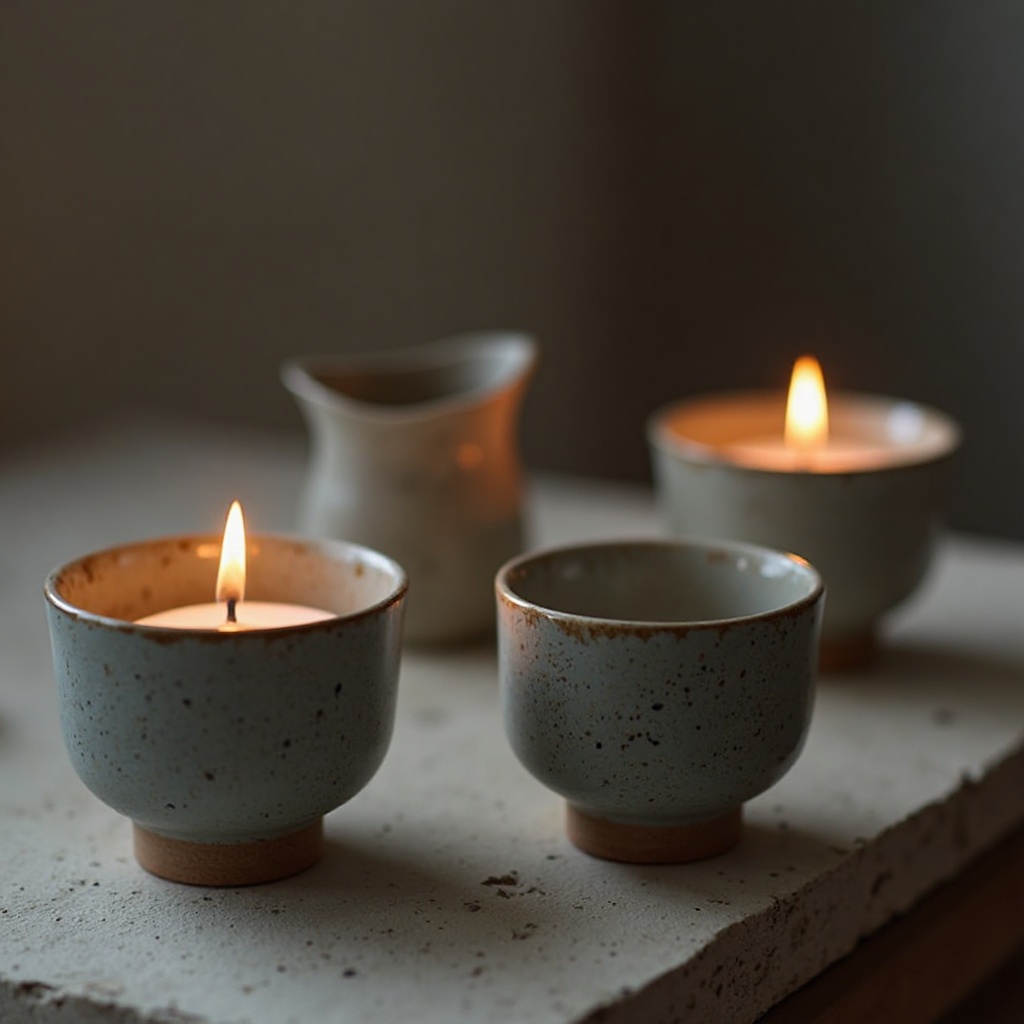
Small cylindrical pinch pots approximately 2 inches tall and wide, with gently rounded bottoms and smooth rims, finished in traditional Japanese-inspired glazes like shino, tenmoku, or celadon. Shop on Amazon
Why It Works: The intimate scale and simple form put your pinch technique on full display while creating genuinely functional vessels. The thick walls retain warmth for hot sake or provide pleasant heft for cold beverages. These cups feel special in hand—the slight irregularities make each sip a tactile experience that connects you to the maker.
How It Works:
- Maintain even wall thickness of approximately ⅜ inch for proper heat retention
- Form rims carefully—they touch lips directly, so smooth thoroughly with a damp sponge
- Create slightly wider bases than rims (reverse taper) for stability and comfortable handling
- Size opening to approximately 1.75-2 inches for traditional two-finger grip
Where to Use It: Dining tables, home bars, tea ceremony spaces, kitchen open shelving
Pro Tip: Make a test cup first and actually use it for a week—note where your lips meet the rim, where fingers naturally grip, and adjust subsequent cups based on real-world ergonomics. Comfort beats aesthetics for vessels you’ll use daily.
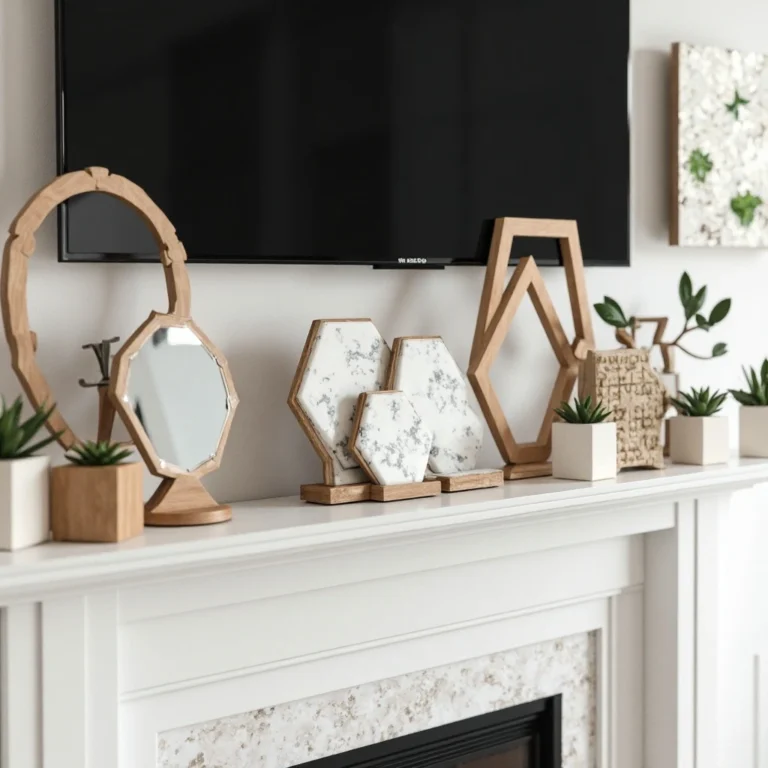
11. Geometric Faceted Bowls
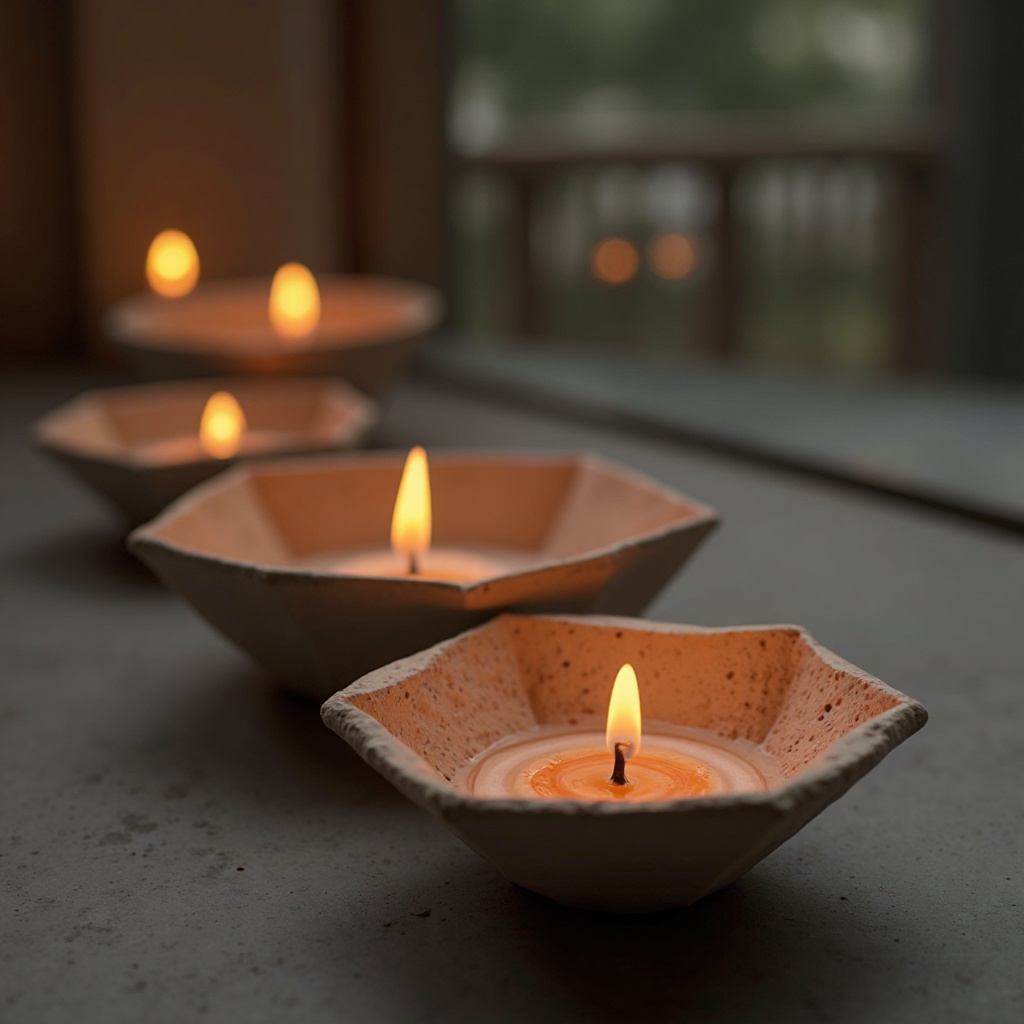
Pinch pots gently pressed into geometric forms—pentagonal, hexagonal, or triangular—while clay is still malleable, creating angular facets that catch light like gemstones. Shop on Amazon
Why It Works: The geometric approach creates visual sophistication while remaining technically accessible. Faceting disguises fingerprint marks and surface irregularities within the intentional geometry. These pieces bridge handmade warmth with contemporary design sensibility, appealing to modern minimalist aesthetics while retaining craft authenticity.
How to Style It:
- Pinch pots to near-completion, then use flat tools or your palms to create 5-8 flat facets
- Work systematically around the pot, creating facets of roughly equal width for visual harmony
- Allow the natural meeting points between facets to create subtle ridges rather than forcing sharp edges
- Choose glazes that pool differently in angles versus flat planes—celadons and glossy colors emphasize geometry
Where to Use It: Modern dining tables, minimalist bedroom decor, contemporary office spaces, gallery walls with shelf displays
Pro Tip: Chill leather-hard pots in the refrigerator for 10 minutes before faceting—slightly firmer clay holds geometric shapes better and resists fingerprints during manipulation.
12. Footed Offering Bowls
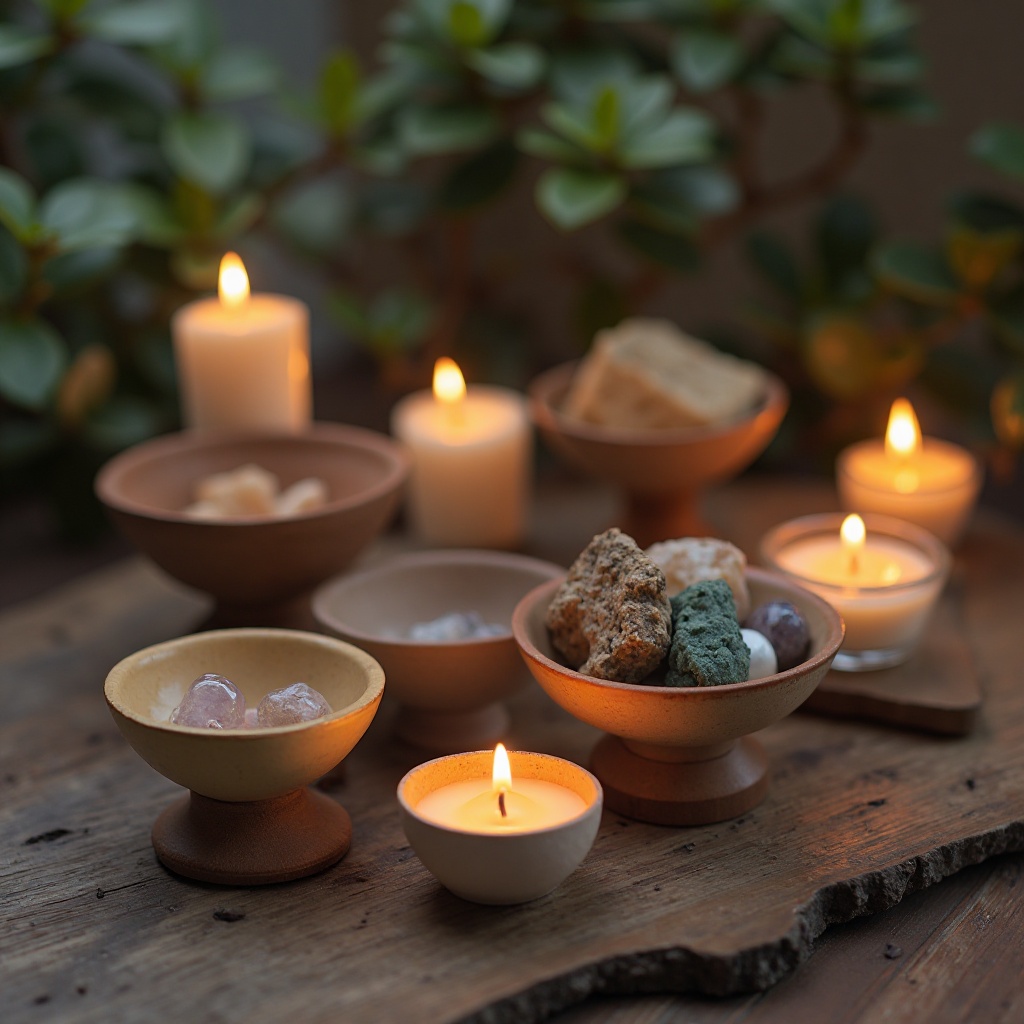
Pinch pots elevated on small handformed feet or a pedestal base, creating ceremonial-style vessels perfect for displaying crystals, jewelry, or small treasures. Shop on Amazon
Why It Works: The elevated form creates importance and intention—whatever rests inside becomes a focal point rather than clutter. Feet add visual weight and stability while making even small bowls feel substantial. These pieces honor the ritual of display, transforming everyday objects into curated collections.
How to Style It:
- Form three to four small feet (marble-sized balls, flattened) or one central pedestal from extra clay
- Score and slip attachment points thoroughly, adding small coil reinforcements inside joints
- Proportion feet to ¼ to ⅓ the height of the main bowl for visual balance
- Create feet in contrasting or complementary glaze colors for added interest
Where to Use It: Bedside tables for rings and watches, bathroom counters for jewelry, meditation altars, entryway consoles
Pro Tip: Attach feet to inverted (upside-down) bowls while working—gravity helps joints compress properly, and you can easily check that the pot sits level before joints dry.
13. Herb Markers with Stakes
Tiny pinch pots formed around wooden stakes or bamboo skewers, with one flat surface for writing or impressing herb names, creating adorable functional garden markers. Shop on Amazon
Why It Works: These solve the “what did I plant here?” problem with handmade charm. The pinch pot tops are large enough to read easily while small enough to not overwhelm plants. Making sets teaches consistency while allowing personality—each marker can have slight variations while remaining cohesive.
How to Style It:
- Form marble-sized pinch pots, then carefully insert stakes while clay is still pliable
- Flatten one side by pressing against a smooth surface for the writing/stamping area
- Use stamps, carved letters, or underglaze pencils to label each herb before firing
- Keep forms simple—this project is about quantity and consistency for full garden sets
Where to Use It: Herb gardens, vegetable plots, indoor kitchen herb planters, potted plant collections
Pro Tip: Insert stakes at a slight angle (75-80 degrees rather than 90) so markers tilt toward viewers rather than pointing straight up—this makes labels much easier to read without bending down.
14. Double-Walled Insulated Cups
Two pinch pots—one slightly smaller nested inside a larger one—creating an air gap for insulation, perfect for hot beverages or cold drinks that won’t create condensation. Shop on Amazon
Why It Works: This advanced technique creates genuinely functional insulated vessels while teaching precision and planning. The air gap provides real thermal benefits, keeping hot drinks hot and cold drinks from sweating. Successfully executing double-walled construction is satisfying and produces heirloom-quality pieces.
How to Style It:
- Form inner cup first with walls approximately ⅜ inch thick, measuring carefully
- Create outer cup approximately ½ inch larger in diameter with ¼ inch walls
- Trim both rims to exact same height, then join with scored and slipped rim connection
- Leave a tiny air hole at the base (pinhole size) to prevent pressure buildup during firing
Where to Use It: Morning coffee rituals, tea ceremonies, desk workstations, outdoor entertaining
Pro Tip: This is genuinely advanced—practice with solid-walled cups first until your wall thickness is consistently even. Uneven walls cause warping during drying, which is catastrophic for double-walled pieces that must fit together precisely.
15. Textured Napkin Rings
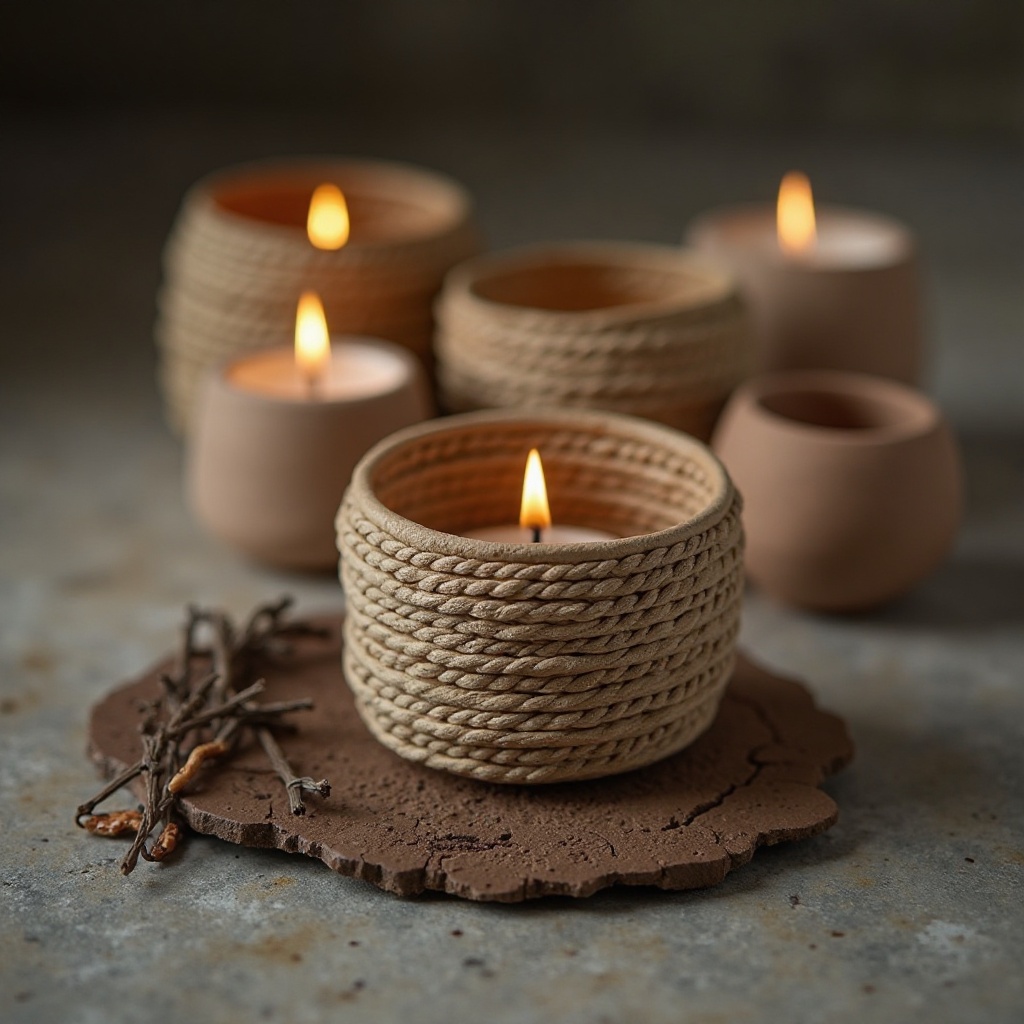
Small cylindrical pinch pots approximately 2 inches in diameter and 1.5 inches tall, with heavily textured exteriors—rope impressions, stamped patterns, or carved designs—left hollow in the center. Shop on Amazon
Why It Works: Napkin rings are the perfect small-scale project for experimenting with texture and surface design. Their simple form requires minimal clay and focuses attention entirely on decorative technique. Sets of 4-8 instantly elevate casual dining into intentional table settings, and they’re impressive handmade gifts.
How to Style It:
- Form around a cylindrical object (PVC pipe, dowel) wrapped in newspaper to achieve uniform inner diameter
- Apply textures before removing from the form, rotating to create pattern continuity
- Vary textures across a set while maintaining cohesive glaze colors for unified-yet-interesting collections
- Size inner diameter to 1.5-1.75 inches for most standard napkins (cloth or paper)
Where to Use It: Dining room table settings, holiday dinners, wedding receptions, everyday breakfast tables
Pro Tip: Sand the inner diameter smooth after bisque firing—even if you want rustic texture outside, rough interiors snag fabric napkins. A few minutes with fine sandpaper makes these infinitely more functional.
16. Sponge Holders with Drainage
Small pinch pots with multiple holes pierced through the bottom and lower sides, sized perfectly for kitchen sponges to drain and dry between uses. Shop on Amazon
Why It Works: This solves the soggy-sponge problem beautifully while adding handmade charm to an overlooked kitchen necessity. Elevated drainage prevents mildew and extends sponge life. The functional craft object makes tedious kitchen cleanup feel slightly more special.
How to Style It:
- Form pots 3-4 inches wide and 2-3 inches tall for standard sponge sizes
- Pierce 8-12 drainage holes (⅜ inch diameter) through bottom and sides before drying
- Use waterproof glazes inside and out—semi-glossy finishes resist soap buildup better than matte
- Create a slight foot or three small feet to elevate the piece above sink surfaces for airflow
Where to Use It: Kitchen sinks, laundry rooms, bathroom counters, mudroom utility sinks
Pro Tip: Make sets of two—one for regular dish sponges, one smaller version for scrub brushes or delicate cleaning cloths. Matching sets create cohesive sink-side organization.
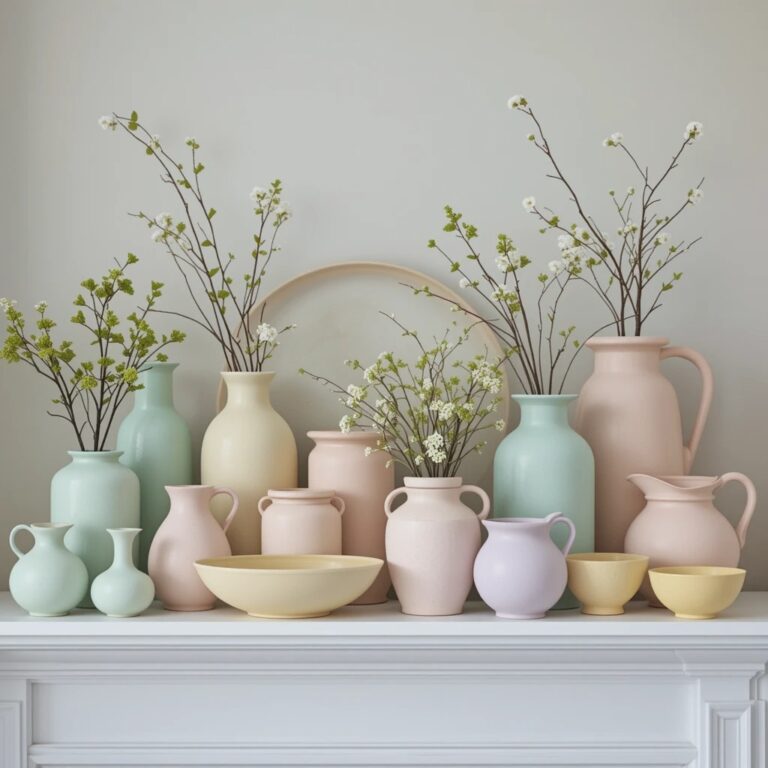
17. Asymmetric Bud Vases
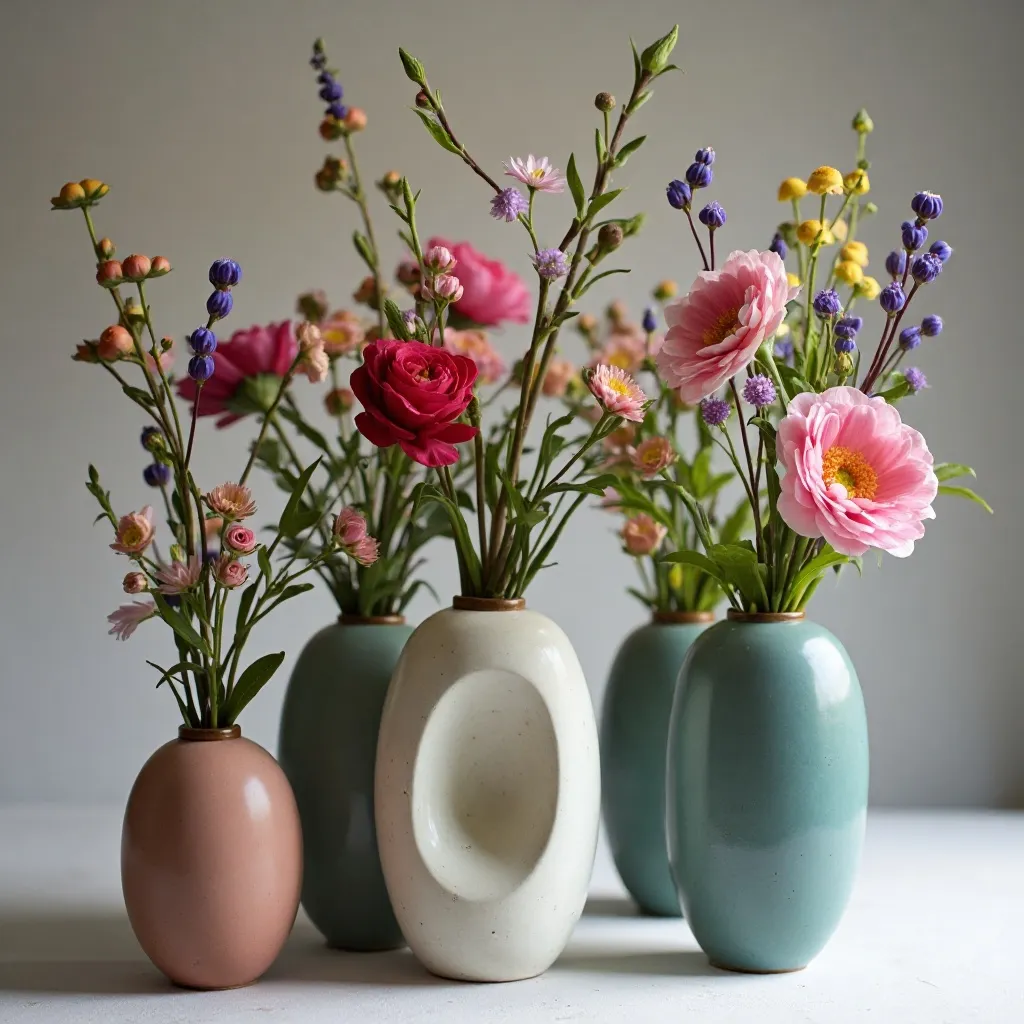
Narrow-necked pinch pots with deliberately irregular forms—tilted, elongated, or organically curved—sized for single stem displays or small foraged branches. Shop on Amazon
Why It Works: Bud vases showcase individual stems as art, and the handmade imperfection complements natural botanical beauty. The narrow opening supports stems without additional hardware. These pieces look intentional displayed empty, making them year-round decor rather than occasional-use vases.
How to Style It:
- Pinch the neck narrow (½ to 1 inch opening) after forming the main body
- Deliberately tilt or curve the form while clay is still malleable for organic character
- Vary heights across a collection (4-7 inches) for dynamic grouped displays
- Use single-color glazes in your room’s accent palette—they’ll coordinate with any flower color
Where to Use It: Window sills, dining tables, bathroom counters, bedside tables
Pro Tip: Weight the bottom by leaving it slightly thicker than the walls (double thickness)—narrow-necked vases are top-heavy once filled with water and stems. A weighted base prevents tipping.
18. Pinch Pot Wind Chimes
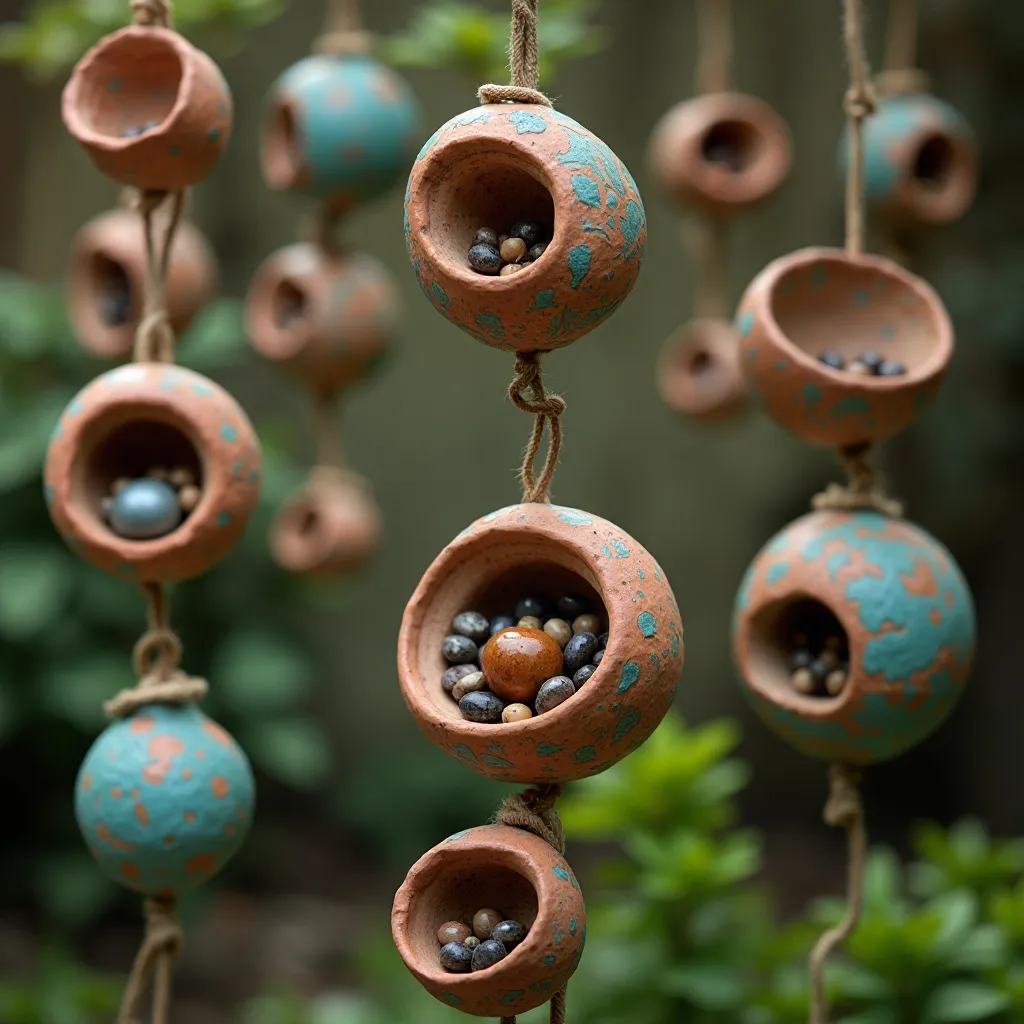
Multiple small pinch pots of varying sizes suspended on cord or wire, with small pebbles, beads, or ceramic pieces inside that create gentle sounds when pots move in the breeze. Shop on Amazon
Why It Works: This project transforms pinch pots into kinetic sculpture and functional garden art. The ceramic-on-ceramic sound is mellower than metal chimes—organic and peaceful. Each pot can be different, creating visual interest and varied tones, teaching that imperfection creates character.
How to Style It:
- Create 5-8 pots ranging from 1-3 inches in diameter for tonal variety
- Pierce two holes through opposite sides of each pot’s rim before firing for stringing
- Add small ceramic beads or pebbles inside each pot, experimenting with sound before glazing
- Hang from driftwood, copper pipes, or bamboo crossbars at staggered heights
Where to Use It: Covered porches, garden pergolas, balcony railings, indoor near open windows
Pro Tip: Bisque fire pots with noise-makers already inside—this ensures the sound you hear is exactly what you’ll get after glaze firing. Remove and reinsert noise-makers after bisque to apply interior glaze if desired.
19. Nesting Prep Bowls
Sets of 3-5 small pinch pots (2-4 inches) designed for mise en place—holding prepped ingredients during cooking—glazed in bright, easily distinguishable colors. Shop on Amazon
Why It Works: These diminutive bowls make cooking more organized and intentional, transforming ingredient prep into ritual. Bright glazes help you quickly identify contents during fast-paced cooking. The nested storage means they occupy minimal drawer space despite being multiples.
How to Style It:
- Keep forms simple and consistent for true nesting capability
- Use food-safe glossy glazes in a rainbow or ombre progression for visual coding
- Size the smallest to hold 2-3 tablespoons, the largest for ½ cup measurements
- Create small pour spouts by pinching one side of the rim for easy ingredient transfer
Where to Use It: Kitchen prep areas, cooking classes, food photography setups, baking stations
Pro Tip: Make these with high-fire stoneware clay and fully glazed interiors—they need to withstand frequent washing. Dishwasher-safe glazes are worth the investment if you’ll actually use these daily.
20. Sculptural Air Plant Holders
Organic, irregular pinch pot forms designed to cradle air plants without soil—think nests, shells, or abstract sculptures with natural depressions or perches. Shop on Amazon
Why It Works: Air plants don’t need drainage holes or soil, giving you total creative freedom with form. The sculptural holder becomes as important as the plant itself, creating living art installations. These pieces work as standalone sculpture when plants are soaking, making them functional decor year-round.
How to Style It:
- Create bowls, perches, or cradles with slight concavity to nestle plants securely
- Add multiple plant positions on a single sculptural piece for living collage effects
- Leave unglazed or use matte glazes—air plants’ roots prefer gripping to texture rather than slick surfaces
- Incorporate organic textures that complement plant forms—bark impressions, rock patterns, coral-inspired surfaces
Where to Use It: Hanging displays, floating shelves, bathroom ledges, office desks
Pro Tip: Make removable perches by creating small indentations rather than enclosed spaces—air plants need complete air circulation and weekly soaking, so they must be easily removable for care.
21. Handwarmer Mugs with Thumb Rests
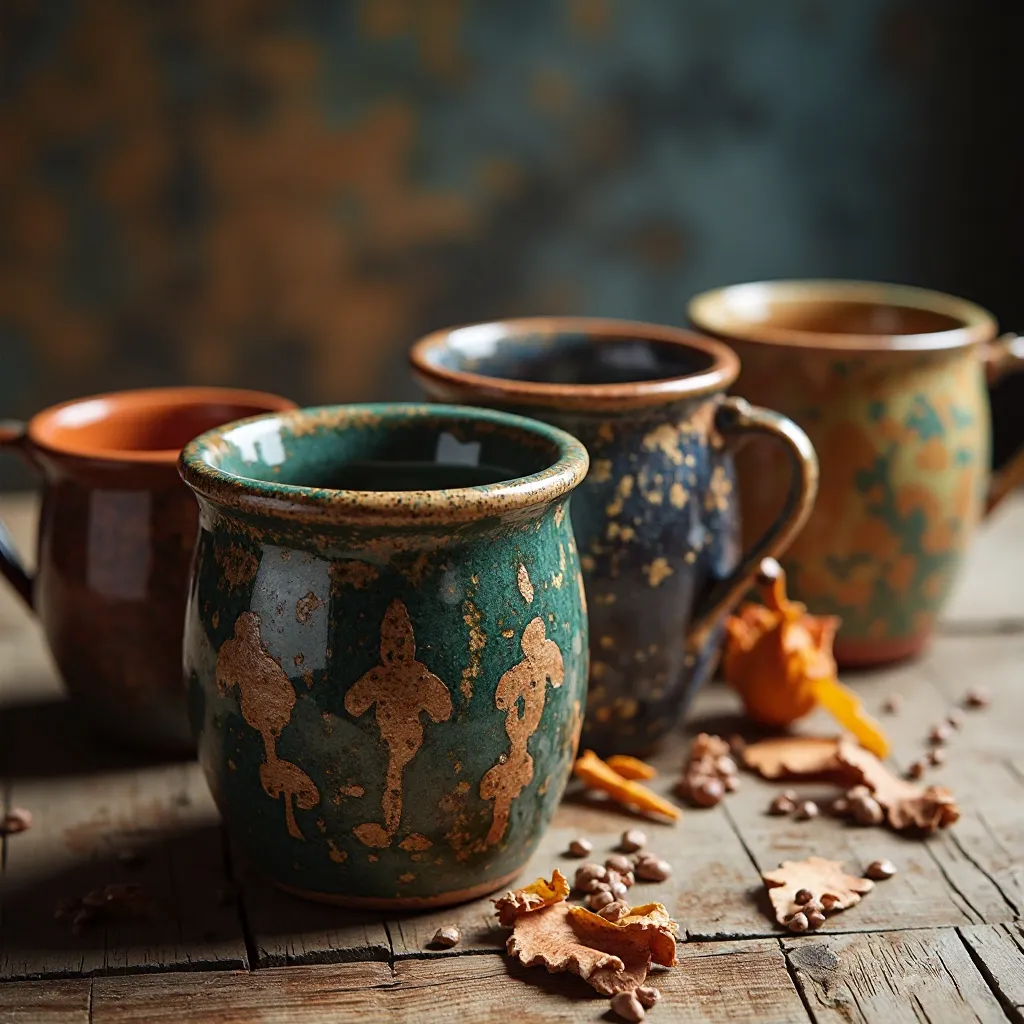
Cylindrical pinch pot mugs with deliberately thick walls (½ inch) for heat retention and comfort, featuring carved thumb indentations on the side for ergonomic grip. Shop on Amazon
Why It Works: The thick walls and thumb rest create mugs that feel designed for your specific hand—genuinely more comfortable than commercial options. Handwarmth becomes part of the experience, perfect for cold mornings or contemplative tea moments. The thumb rest prevents rotation and provides unconscious reassurance during use.
How to Style It:
- Form walls consistently thick throughout—use calipers or finger-width checks while working
- Carve thumb depression on one side when leather-hard, smoothing thoroughly with damp sponge
- Size capacity to 10-12 oz (typical coffee mug) with opening approximately 3-3.5 inches diameter
- Test grip comfort while clay is workable—everyone’s hands differ, so customize to yours
Where to Use It: Morning coffee rituals, tea meditation practices, bedside night-time reading, outdoor morning moments
Pro Tip: Add a subtle foot ring to the base—this keeps the hot bottom from directly contacting surfaces and provides a finger grip point for washing. Form it by pressing a concave circle into the base before the clay firms.
22. Trinket Towers (Stacked Design)
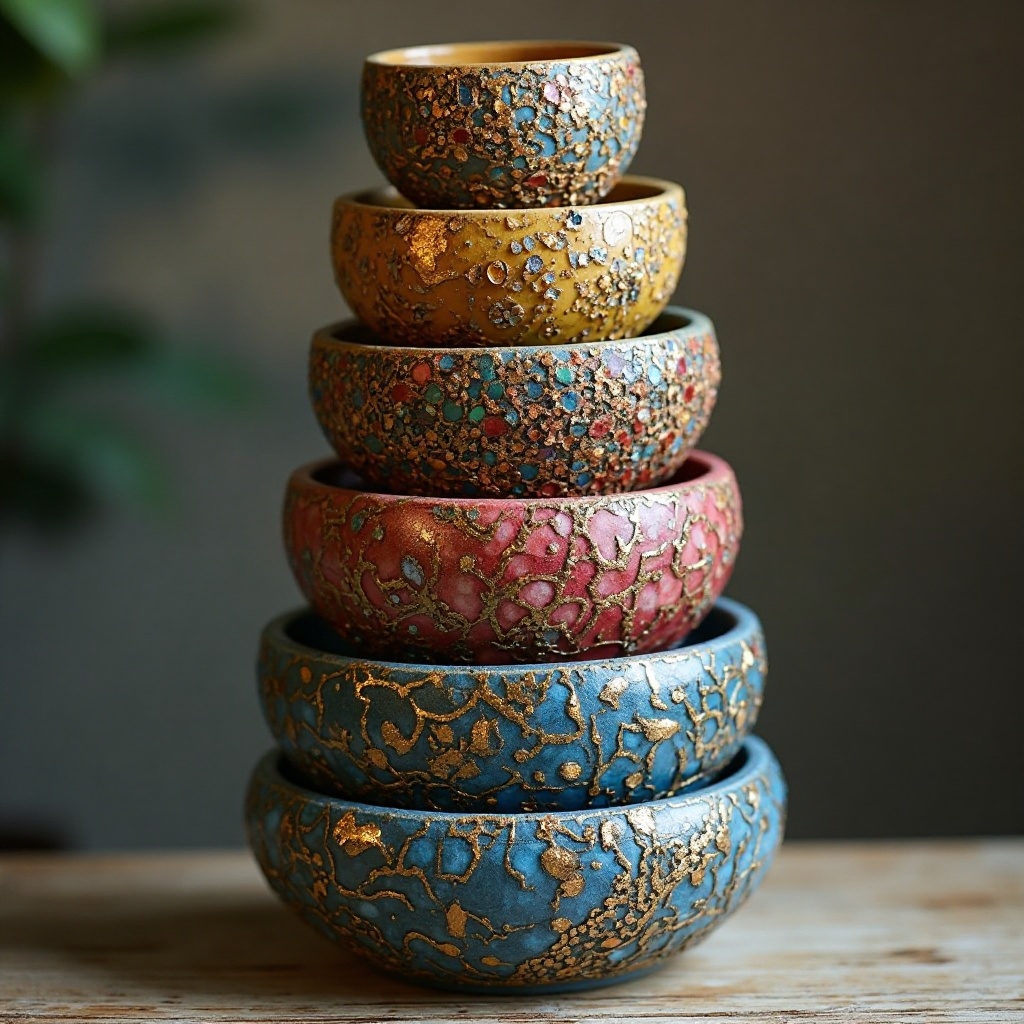
Multiple pinch pots of decreasing sizes designed to stack vertically, creating tiered storage for jewelry, office supplies, or collected treasures, each level accessible independently. Shop on Amazon
Why It Works: Vertical storage maximizes limited surface area while creating sculptural presence. The stacked design is modular—use all levels or just some depending on current needs. Each tier acts as a reveal, making small object storage feel like uncovering treasures rather than sorting through clutter.
How to Style It:
- Create 3-5 graduated sizes with consistent wall thickness for stable stacking
- Size each tier’s base to sit securely within the rim of the piece below
- Use alternating or complementary glaze colors to emphasize each distinct level
- Form the largest base with extra weight and width for stability under full tower weight
Where to Use It: Dressers for jewelry, desks for office supplies, craft rooms for small materials, children’s rooms for tiny treasures
Pro Tip: Fire all pieces nested together (with paper separators) to ensure they shrink identically and stack perfectly. Clay shrinks 10-15% during firing—pieces fired separately may not fit despite careful initial sizing.
23. Textured Soap Dishes with Drainage Ridges
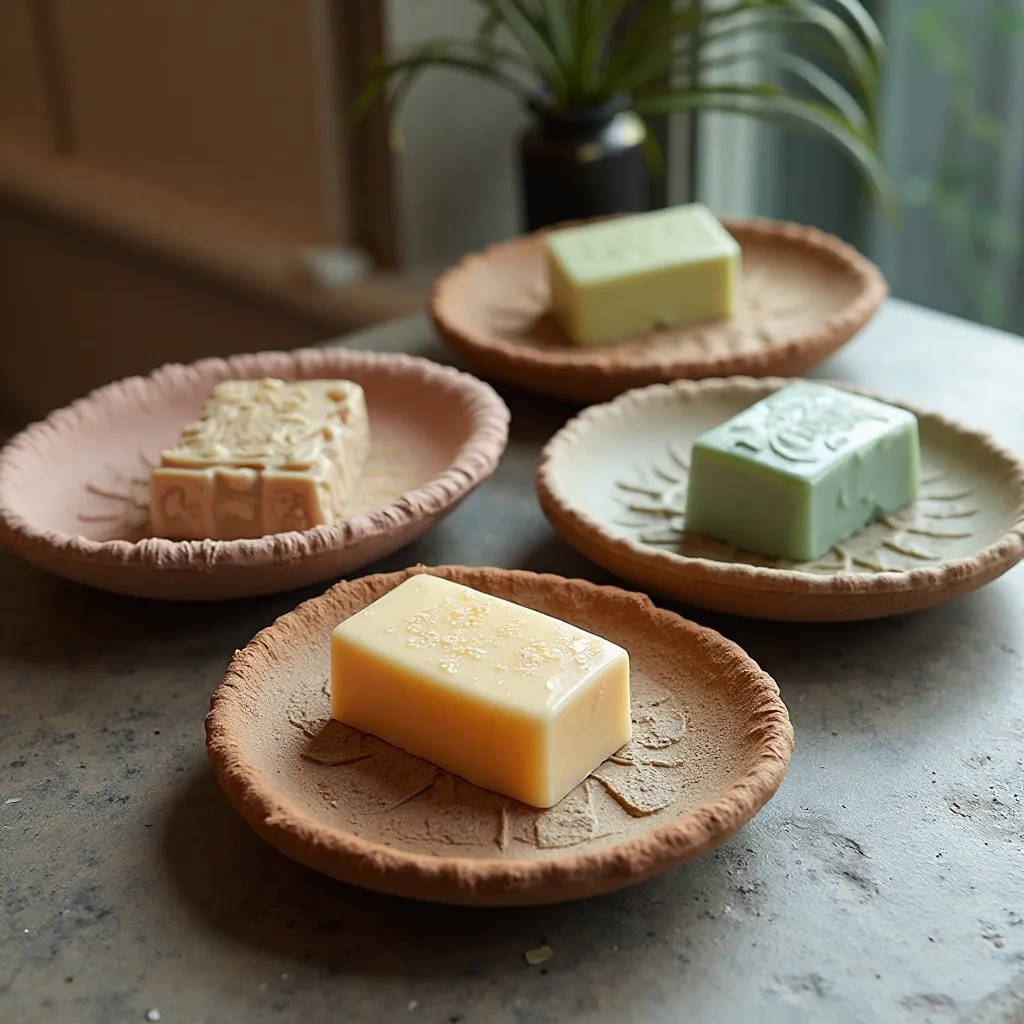
Oval or rectangular pinch pot platforms with impressed patterns on the surface and carved channels for water drainage, keeping bar soap dry between uses. Shop on Amazon
Why It Works: Handmade soap dishes elevate humble bathroom necessities into intentional design objects. The texture and drainage are functional—preventing soap from sitting in water—while adding visual interest. These pieces bridge utilitarian need with artistic expression, making necessary objects beautiful.
How to Style It:
- Form shallow, wide dishes (4-5 inches long, ½ inch deep) with gently raised edges
- Press parallel ridges or channel patterns running lengthwise before clay fully sets
- Angle channels toward one end or corner to direct water flow deliberately
- Use fully waterproof glazes—soap residue and constant moisture demand durability
Where to Use It: Bathroom sinks, kitchen sinks, guest bathrooms, shower ledges
Pro Tip: Create a matching small dish for placing wet soap while showering—the two-piece set shows thoughtful design consideration and gives guests options for different soap storage needs.
24. Meditation Bell Holders
Small pinch pots specifically sized to cradle meditation or singing bowls, with wide, stable bases and soft interior curves lined with felt or cork after firing. Shop on Amazon
Why It Works: Proper holders elevate meditation tools both literally and spiritually, creating designated sacred space. The stable base prevents bowls from rolling or tipping during use. Handmaking the holder personalizes your practice space with intention and craft.
How to Style It:
- Measure your singing bowl’s diameter and form the holder slightly larger for nestling without rattling
- Create thick, heavy walls and base for stability during bowl striking or singing
- Leave interior unglazed or use matte glazes for better grip with added cushioning materials
- Form subtle feet or a foot ring to further stabilize and prevent surface scratching
Where to Use It: Meditation corners, yoga spaces, bedside tables, therapy offices
Pro Tip: After firing, line the interior with adhesive-backed felt or thin cork—this protects both the bowl and holder from chipping while dampening any rattling sounds during transport or storage.
25. Hanging Planters with Leather Cords
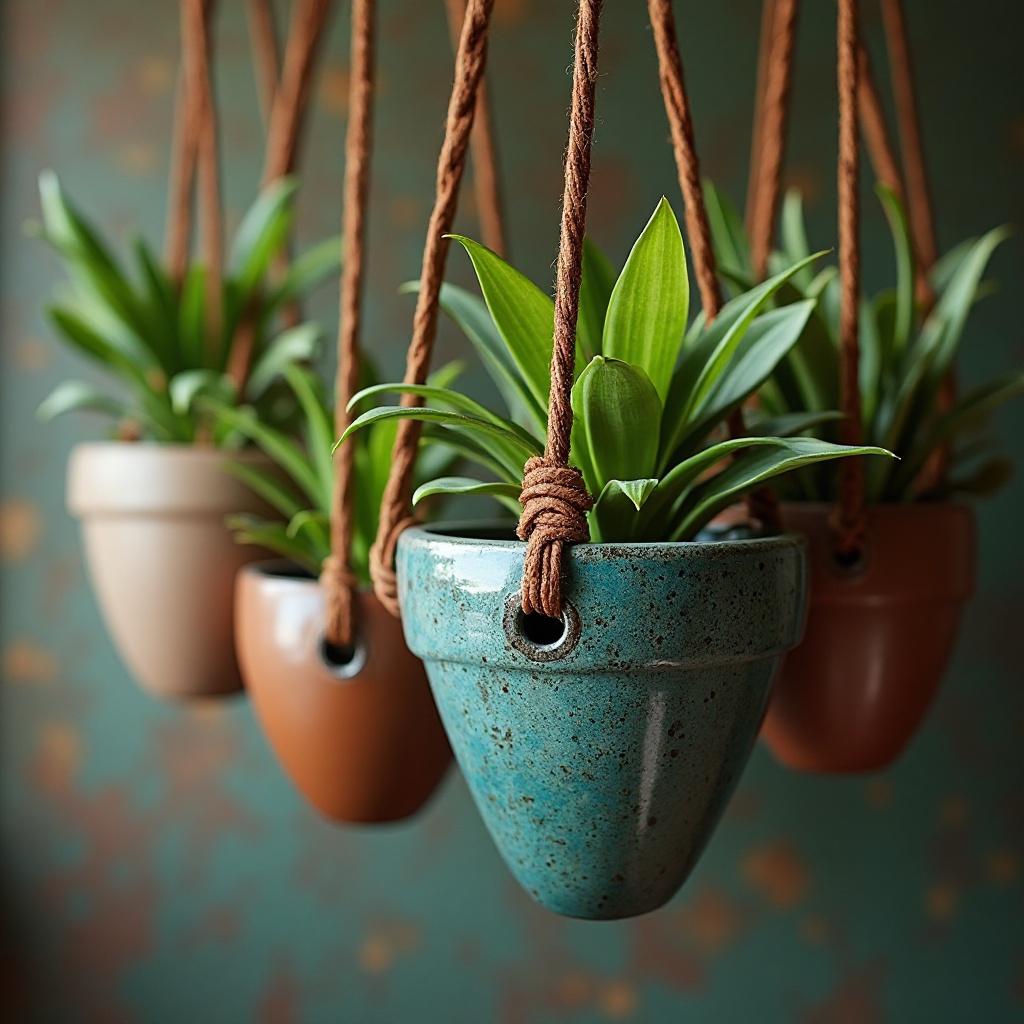
Pinch pots with three evenly-spaced holes pierced through the rim, designed for suspending with leather cord, macramé, or wire hangers. Shop on Amazon
Why It Works: Hanging planters maximize growing space while creating dynamic vertical interest. The three-point suspension distributes weight evenly and allows leveling adjustment. Handmade hanging planters feel more organic than plastic alternatives, complementing living plants with living craft.
How to Style It:
- Form pots with slightly thicker rims (double thickness) around hole placement for structural integrity
- Pierce three holes evenly spaced (120 degrees apart) while clay is leather-hard
- Size holes to ⅛ inch diameter—large enough for cord but small enough for structural strength
- Create integrated drainage by leaving the pot’s bottom slightly permeable or adding a small center hole
Where to Use It: Sunny windows, covered porches, kitchen herb gardens, bathroom corners with natural light
Pro Tip: Test hang empty pots with your cord before planting—this lets you adjust cord lengths for perfect leveling. Use removable plastic liners inside to prevent water damage to cords and make plant swapping easier.
26. Toothbrush Holders with Multiple Slots
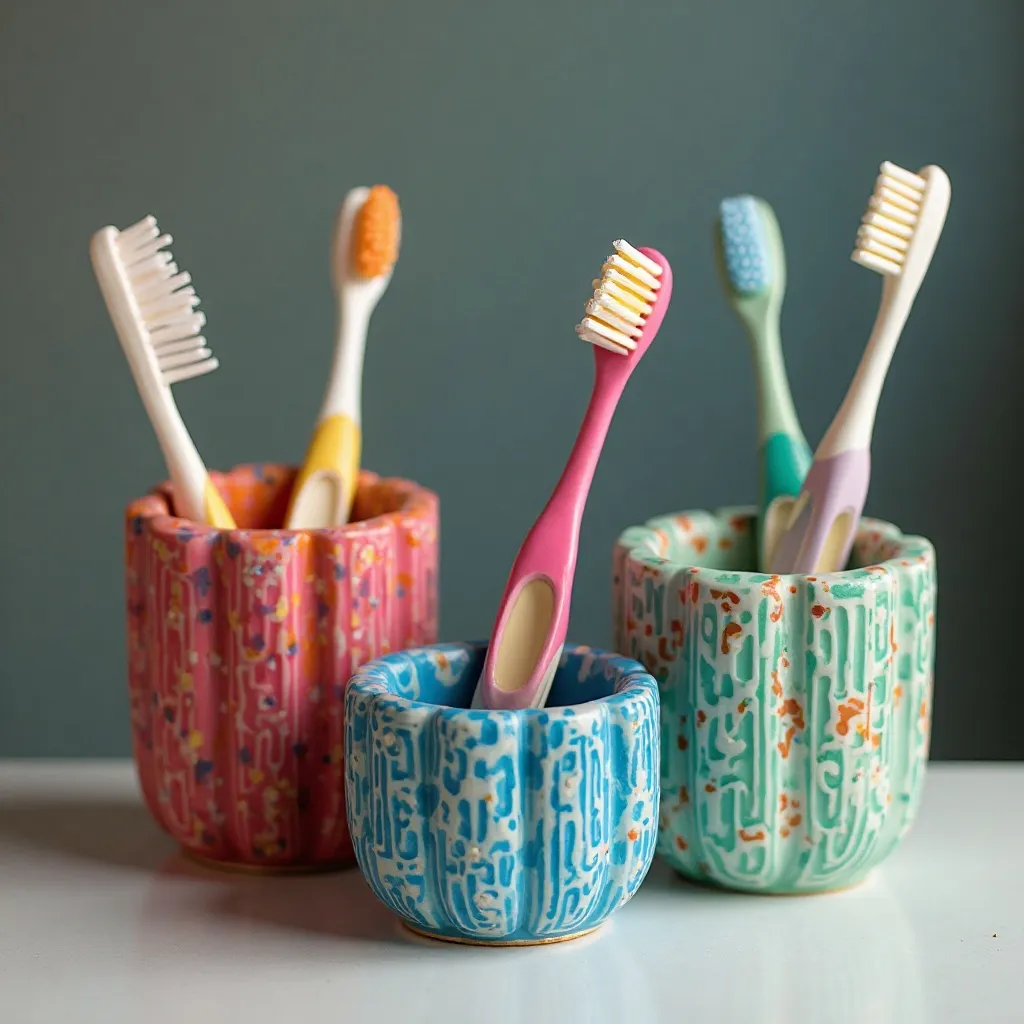
Cylindrical pinch pots with 2-4 vertical divots pressed into the rim, creating individual slots to hold toothbrushes upright and separated for hygienic storage. Shop on Amazon
Why It Works: Separated storage prevents toothbrush head contact—more hygienic than communal cups. The upright position allows proper air drying. Handmade holders transform boring bathroom necessities into personalized functional art, making daily routines feel more intentional.
How to Style It:
- Form cylinders 3-4 inches tall with 3-inch diameter for stability
- Press evenly-spaced indentations into the rim using a dowel slightly smaller than toothbrush handle width
- Create a solid bottom or add small drainage holes if rinsing the holder regularly
- Use waterproof glossy glazes inside for easy cleaning—bathrooms are humid environments
Where to Use It: Bathroom counters, children’s bathrooms, guest bathrooms, RV/camper bathrooms
Pro Tip: Personalize family sets by assigning each divot a different colored glaze accent or carving initials near each slot—this eliminates toothbrush confusion in shared bathrooms.
27. Condiment Serving Trio
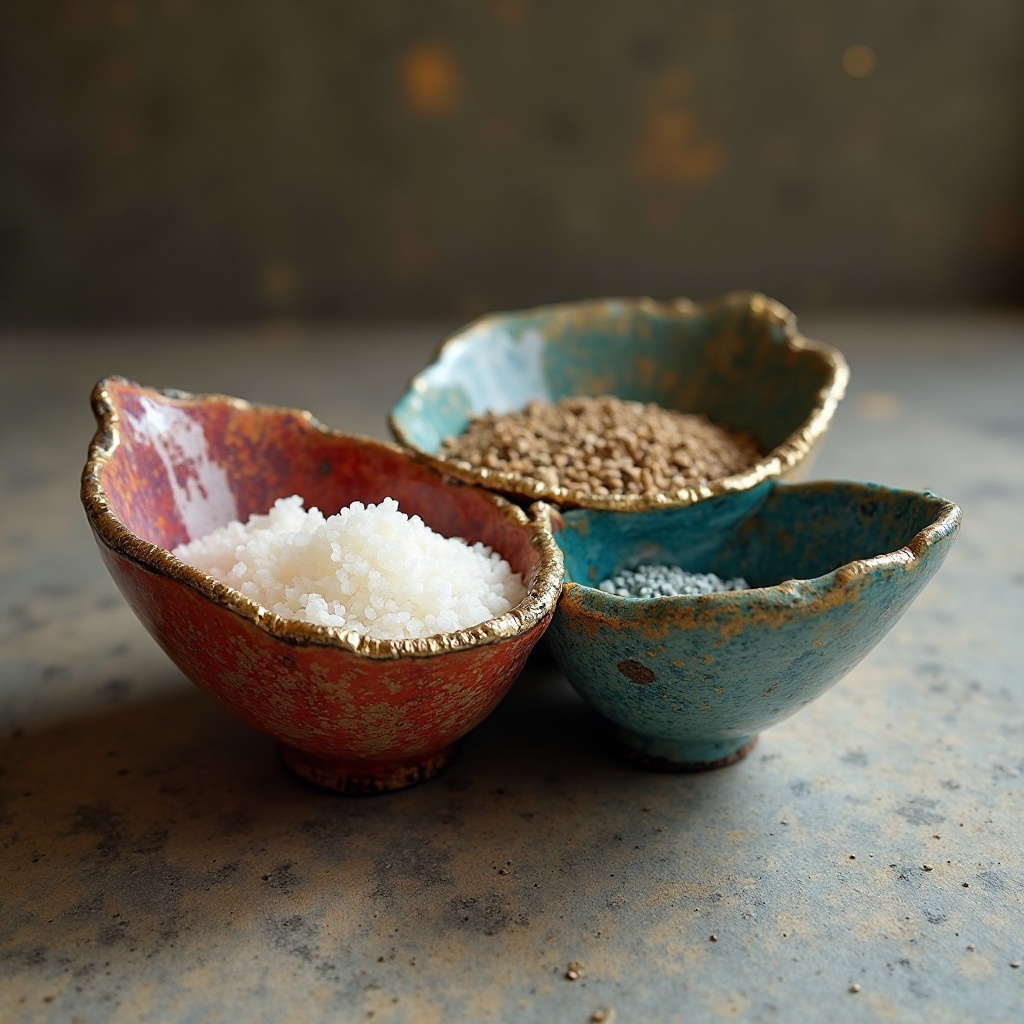
Three connected or coordinated pinch pots designed to hold salt, pepper, and a third condiment, either formed as separate pieces sized to cluster or attached into a permanent triptych. Shop on Amazon
Why It Works: Clustered condiment holders create cohesive table settings while keeping essentials organized and accessible. The trio format feels complete and intentional rather than random. Handmade serving ware makes even casual meals feel more curated and special.
How to Style It:
- Size each pot to 2-3 inches wide and 1.5-2 inches deep for generous pinches
- Create matching forms with distinguishing features—different colored glazes or stamped labels
- For connected versions, join three pots in a row or triangle while clay is still workable
- Include small coordinating spoons by forming tiny paddles from leftover clay
Where to Use It: Dining tables, kitchen islands, outdoor dining setups, breakfast nooks
Pro Tip: Make the salt vessel slightly larger than pepper—you’ll use more of it. Add a third pot sized for specialty salts, spice blends, or sugar depending on your household’s eating patterns.
Common Mistakes to Avoid
1. Working with Clay That’s Too Wet
Overly wet clay collapses under its own weight, especially in larger pinch pots, leading to frustrating structural failures. Your fingerprints will be too pronounced, and walls will be inconsistent and sloppy. To avoid this, allow clay to firm slightly if it’s too soft—wrap and wait 30 minutes.
Learn to recognize “leather-hard” stage where clay holds shape but remains workable. Keep a spray bottle nearby to add moisture only where needed rather than working with uniformly wet clay.
2. Uneven Wall Thickness
Inconsistent walls cause cracking during drying and firing as thick sections shrink at different rates than thin ones. Thin spots are structurally weak and may break during use. Develop a systematic approach: rotate the pot continuously as you pinch, working from bottom to top in consistent rounds rather than randomly.
Use calipers or your fingers as measuring guides, checking thickness frequently. Remember that beginners tend to make bases too thick and rims too thin—consciously work against this tendency.
3. Rushing the Drying Process
Forcing clay to dry quickly with heaters or direct sunlight causes cracking, warping, and permanent structural damage. Fast, uneven drying creates internal stress that manifests as cracks days later or catastrophic failures during firing. Slow, even drying is non-negotiable: cover pieces loosely with plastic for the first 24 hours, then expose gradually. Dry all pieces in the same room temperature environment away from drafts, vents, and windows. Patience during drying prevents heartbreak later.
4. Neglecting to Score and Slip Attachments
Feet, handles, decorative elements, and any added pieces will separate during drying or firing without proper bonding technique. “Score and slip” isn’t optional—it’s essential chemistry. Roughen both surfaces to be joined with a fork or knife, apply a paste of clay and water (slip), then press together firmly and add a small reinforcing coil inside the joint. Let attached pieces dry slowly to allow full bonding.
5. Applying Glaze Too Thickly
Thick glaze runs during firing, pools at the bottom, sticks pieces to kiln shelves, and creates uneven, unattractive finishes with possible crawling or cracking. Most glazes require only 2-3 thin, even coats rather than one thick application. Dip and pour techniques should involve seconds of contact, not minutes. Always wipe glaze from the bottom inch of pieces, and test new glazes on sample tiles first to understand their flow characteristics at your firing temperature.
6. Ignoring Ergonomics and Functionality
Creating beautiful objects that are uncomfortable to hold or impractical to use means they’ll sit unused on shelves. Test rim smoothness against your lips, check handle positions with actual gripping, verify that serving ware holds realistic portions. Make pieces for your actual life—your hand size, your beverage preferences, your storage space. Beauty and function aren’t opposing forces; the most satisfying work achieves both. Create test pieces specifically to evaluate comfort and usability before making final versions.
Frequently Asked Questions
What type of clay is best for pinch pots as a beginner?
Earthenware or mid-range stoneware clays are ideal for beginners, particularly those with grog (pre-fired clay particles) that add texture and forgiveness. Look for clays labeled “sculpture” or “handbuilding” rather than “throwing” clays, as they’re formulated to hold shape without wheel-work. Avoid porcelain initially—it’s beautiful but less forgiving of imperfections and requires more experience to control. Start with standard cone 04-06 earthenware from brands like Laguna or Amaco; it’s affordable, widely available, air-dries relatively quickly, and fires at lower temperatures accessible in most community studios.
How do I prevent my pinch pots from cracking during drying?
Slow, even drying is the single most important factor in preventing cracks. Cover finished pieces loosely with plastic bags for the first 24-48 hours, allowing moisture to escape gradually. Place pots on wooden boards or plaster bats that absorb moisture evenly rather than non-porous surfaces. Dry all pieces in the same room, away from windows, heaters, air conditioning vents, and direct sunlight—consistent temperature matters more than warm temperature. For pieces with attachments or varying thicknesses, cover thicker sections with slightly damp paper towels under the plastic to slow their drying and keep pace with thinner areas. Patience prevents heartbreak.
Can I make functional food-safe pinch pots for eating and drinking?
Yes, absolutely, but glaze selection is critical for safety. Use only glazes explicitly labeled “food-safe” or “dinnerware-safe,” and apply them to all surfaces that contact food or beverages. Fire to the manufacturer’s recommended temperature—under-fired glazes may leach chemicals. Avoid using decorative glazes containing heavy metals (often in bright reds, oranges, and yellows) on interiors or rims. After firing, examine pieces carefully—any cracks, chips, or crazing (fine surface cracks) can harbor bacteria and should disqualify pieces from food use. For hot beverages, thicker walls (⅜-½ inch) provide comfortable heat insulation and durability.
How thick should pinch pot walls be?
Most functional pinch pots work best with walls between ¼ and ⅜ inch thick—thin enough to be lightweight and elegant, thick enough for structural integrity and comfortable handling. Smaller decorative pieces (under 3 inches) can go slightly thinner (3/16 inch), while larger functional bowls and mugs benefit from ⅜ to ½ inch walls for stability and heat retention. Check thickness by pinching the wall between your thumb and forefinger while working—you should feel consistent resistance around the entire piece. Beginners often create thick bases and thin rims; consciously work to maintain consistency from bottom to top.
Do I need a kiln to make pinch pots, or can they air-dry?
Unfired clay remains permanently fragile and water-soluble—it’s essentially dried mud that will dissolve if wet. For decorative pieces that will never contact moisture, you can use air-dry clays, but they’re fundamentally different from ceramic clay and remain delicate. For functional ceramics, kiln firing is essential—it transforms clay chemically into permanent ceramic through sintering. If you don’t own a kiln, search for community studios, makerspaces, art centers, or pottery schools that offer kiln rental or firing services. Many studios allow you to use their kilns for a per-piece fee, making ceramics accessible without thousands of dollars in equipment investment.
What’s the best way to add color and decoration to pinch pots?
Timing determines your best options: (1) When clay is soft, press in textures, carve designs, or apply contrasting colored slips (liquid clay). (2) At leather-hard stage, carving is cleanest with minimal mess. (3) After bisque firing, underglazes allow detailed painting before final glaze coating. (4) After glaze firing, some artists add gold leaf, luster, or acrylic accents, though these aren’t food-safe. For beginners, combination approaches work beautifully—texture while soft, then glaze after bisque firing. Don’t feel obligated to decorate every piece; sometimes the simple beauty of form and a single glaze color creates the most sophisticated result.
Final Thoughts: Your Journey Begins with Clay in Hand
The beauty of pinch pots lies not in achieving perfection but in embracing the unique character your hands bring to each piece. Every thumbprint, subtle asymmetry, and organic curve tells the story of your making—these aren’t flaws but signatures of handcraft in a world of mass production. Start with just one project from this collection, work with clay you have or can easily acquire, and allow yourself the freedom to experiment without judgment.
These humble vessels connect you to thousands of years of ceramic tradition while creating functional beauty for your modern life. Whether you’re crafting a simple tea light holder or an ambitious double-walled cup, you’re participating in the deeply human act of shaping earth into objects that serve, delight, and endure. The pots you create will hold more than plants or jewelry—they’ll contain the meditation of making, the satisfaction of completion, and the quiet pride of using something formed by your own hands.
Trust your instincts, embrace imperfection as character, and remember that even experienced ceramicists began with wobbly first attempts. The clay is forgiving, the process is meditative, and the results—however they turn out—are authentically yours. Let each pot teach you something about pressure, patience, and the transformative power of sustained attention.
Your Next Step: Gather a small ball of clay (purchase, harvest, or borrow), choose the simplest project that speaks to you, and spend just 20 minutes with your hands in the material. Don’t aim for perfection—aim for presence. Feel the clay respond to your touch and notice how quickly it begins to transform.
Remember: The most treasured ceramic pieces aren’t the most technically perfect—they’re the ones made with intention, used with joy, and held with the knowledge that your hands brought them into being. Your pinch pots will be loved not despite their handmade imperfections, but because of them.