20+ Wood Countertops Kitchen Ideas You’ll Want to Copy
Wood Countertops Kitchen Ideas bring an unmatched combination of warmth, character, and functionality to any kitchen, creating a living surface that actually improves with age. Whether you’re drawn to the rustic charm of butcher block, the refined elegance of walnut, or the durability of teak, wood countertops offer endless possibilities for personalization and style.
This comprehensive guide will walk you through over 20 stunning wood countertop ideas that can elevate your kitchen from ordinary to extraordinary, plus expert tips on styling, maintenance, and avoiding common pitfalls.
Some product links in this article are affiliate links. I may receive a small commission if you make a purchase, at no additional cost to you.
1. Classic Butcher Block Island
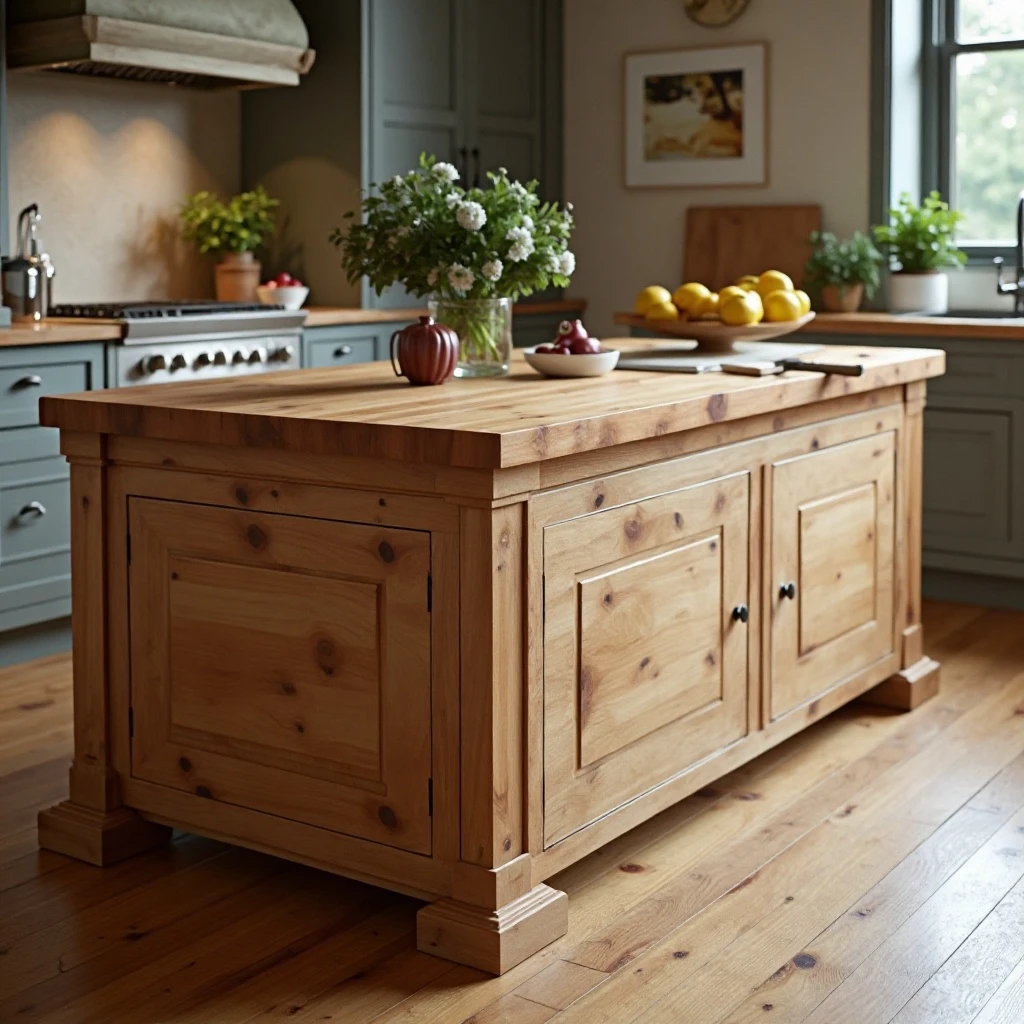
A substantial butcher block island with thick maple planks serves as both a functional workspace and a stunning focal point, featuring edge-grain construction that showcases the wood’s natural striping.
The warm honey tones create an inviting prep area that contrasts beautifully with surrounding cabinetry, while the generous thickness (typically 1.5 to 3 inches) provides both durability and visual weight. Shop on Amazon
Why It Works: Butcher block islands create the perfect blend of functionality and warmth, offering a dedicated surface for food prep that’s knife-friendly and naturally antimicrobial. The light tones of maple brighten the space while adding organic texture that softens the hard edges of modern appliances and cabinetry. As a bonus, minor scratches and marks can be sanded out, making this a practical choice for busy kitchens.
How to Style It:
- Choose edge-grain construction (2.5-3 inches thick) for maximum durability and a traditional look, or end-grain for superior knife-friendliness
- Pair with darker perimeter countertops in quartz or soapstone to create distinct zones and prevent the space from feeling too monotone
- Install an overhang of 12-15 inches on one side to accommodate bar seating and create a casual dining area
- Seal with food-safe mineral oil monthly for the first year, then quarterly, to maintain the wood’s luster and protect against moisture
Where to Use It: Kitchen islands, breakfast bars, prep stations in gourmet kitchens, baking zones
Pro Tip: Request “select grade” maple for consistent color and minimal knots, or embrace “rustic grade” for more character and visual interest—just ensure your fabricator matches the grain pattern for a cohesive look across seams.
2. Waterfall Edge Walnut Counter
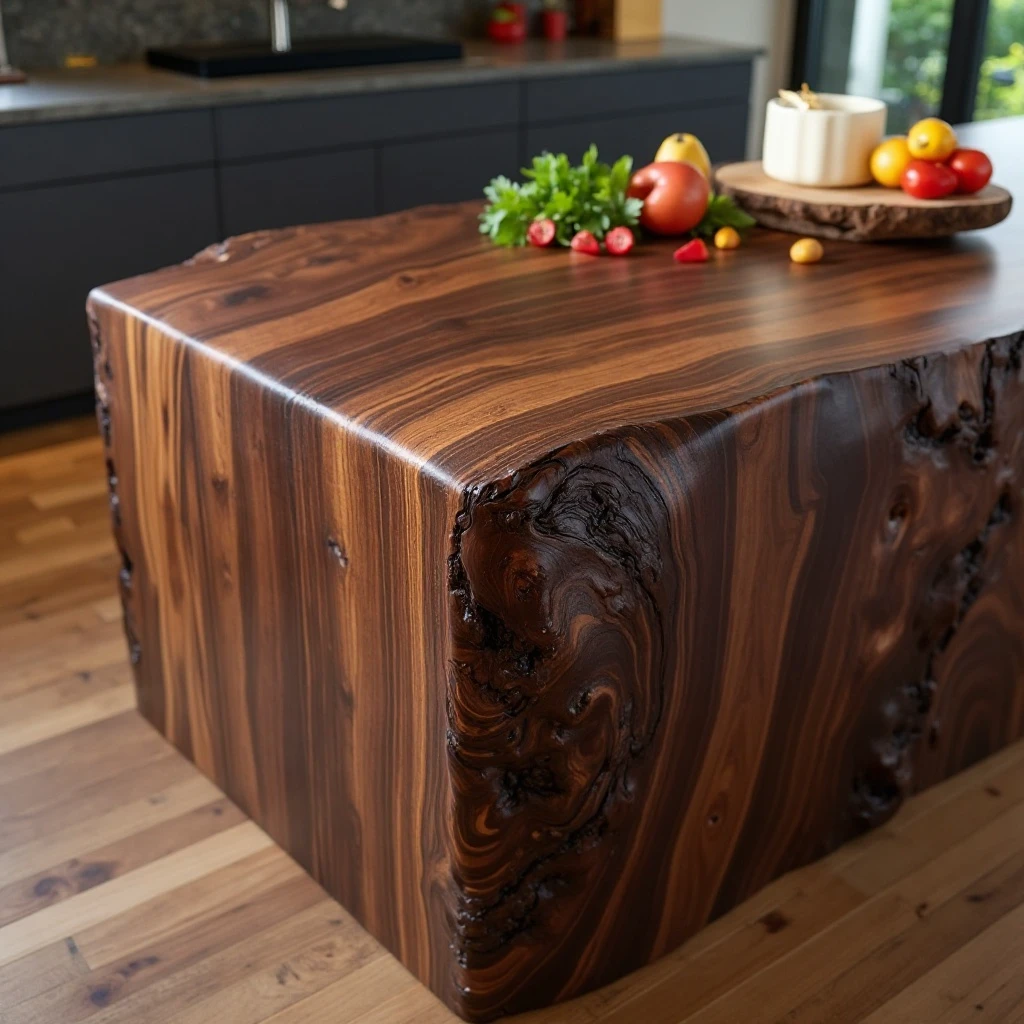
A dramatic walnut countertop extends vertically down the side of an island in a continuous waterfall edge, showcasing the wood’s rich chocolate-brown tones and dramatic grain patterns.
The seamless transition from horizontal to vertical plane creates a sculptural element that commands attention while maintaining clean, contemporary lines. Shop on Amazon
Why It Works: Walnut’s sophisticated dark tones and luxurious grain patterns instantly elevate any kitchen, creating a jewelry-like focal point that rivals the visual impact of natural stone. The waterfall edge design adds architectural drama while protecting the cabinet edges from wear and damage. This combination works particularly well in modern and transitional kitchens where you want to introduce organic warmth without sacrificing contemporary aesthetics.
How to Style It:
- Ensure book-matched grain alignment across the waterfall edge for a seamless, high-end appearance
- Pair with matte black or brushed brass hardware to complement the wood’s deep tones without competing visually
- Install integrated LED strip lighting under the counter overhang to highlight the wood grain and create ambient glow
- Use a matte or satin finish rather than high-gloss to maintain the wood’s natural character and hide minor imperfections
Where to Use It: Modern kitchen islands, peninsula ends, bar areas, statement pieces in open-concept spaces
Pro Tip: Specify book-matched or slip-matched walnut slabs when ordering to ensure the grain pattern flows naturally across the waterfall edge—this detail separates amateur installations from professional-grade work.
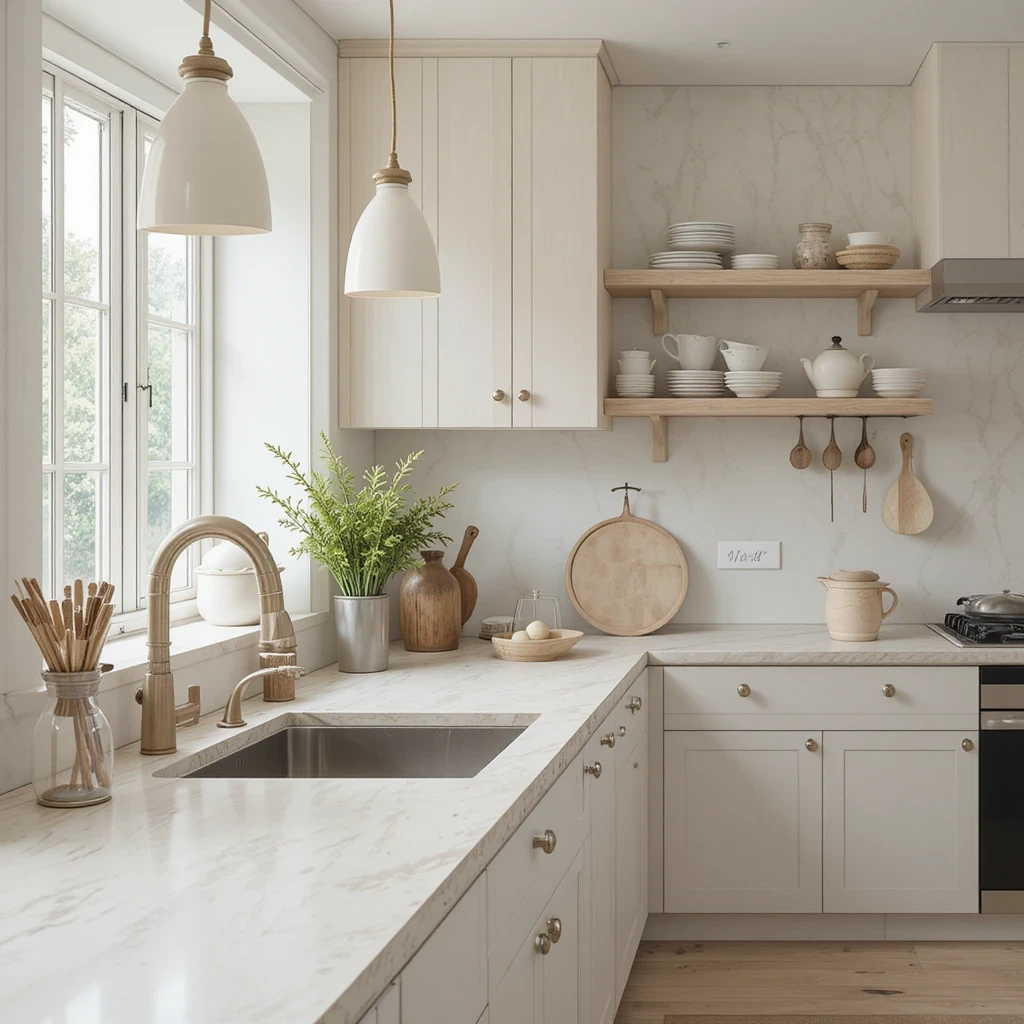
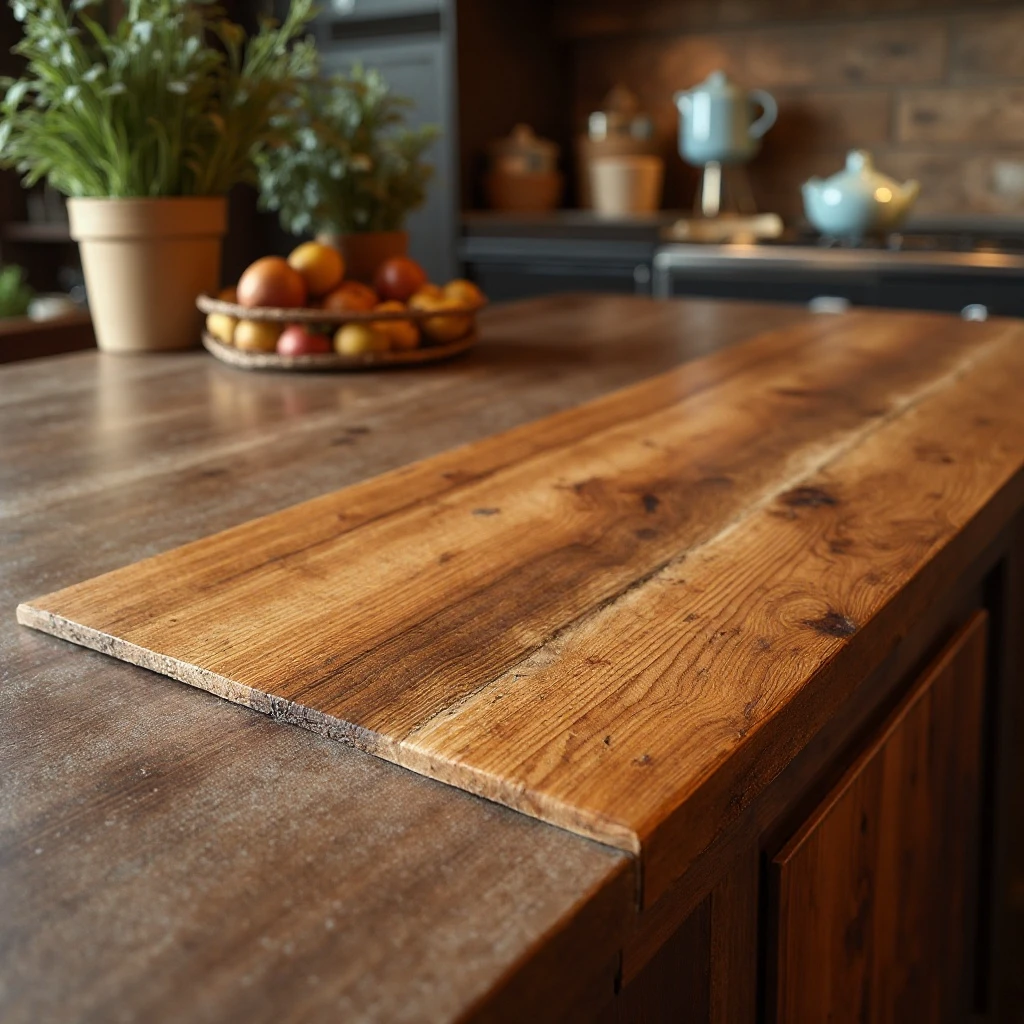
3. Mixed Material Perimeter with Wood Accent
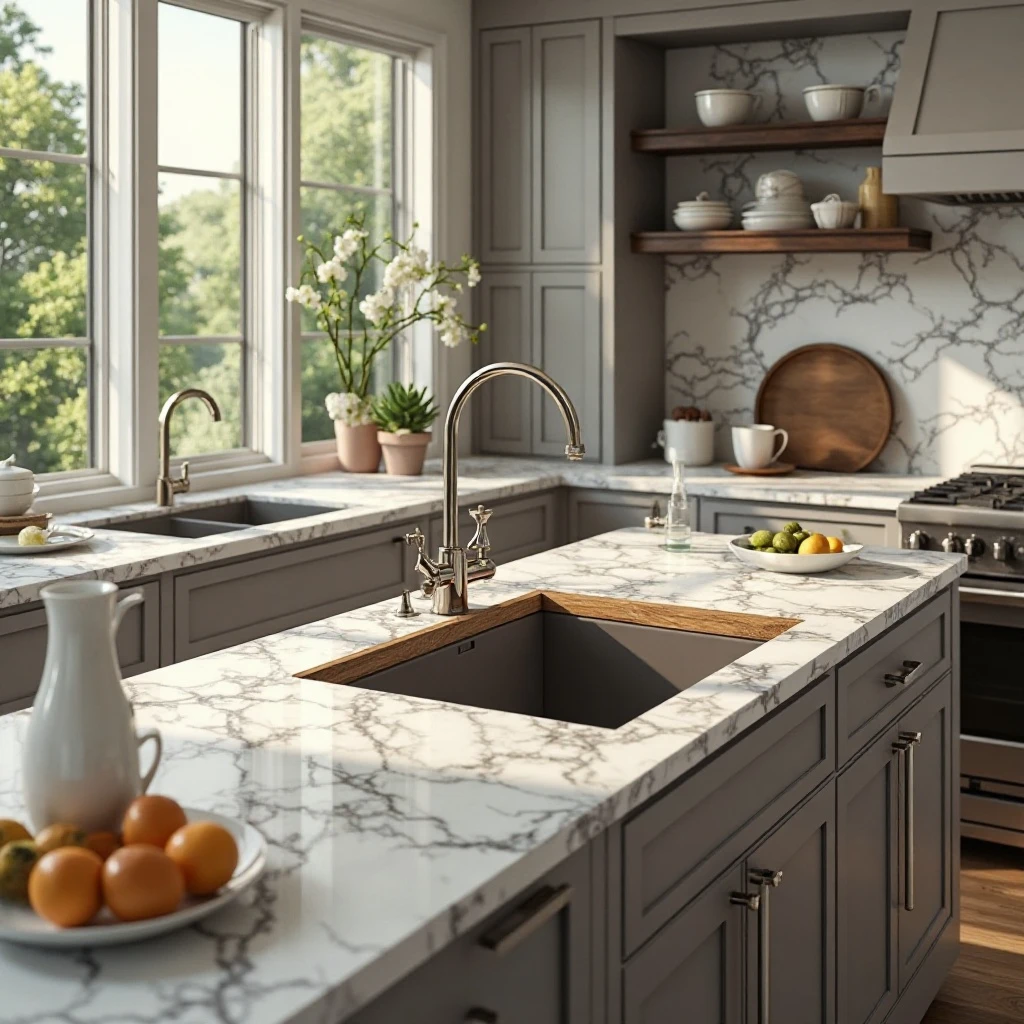
A kitchen featuring quartz or marble perimeter countertops with a strategically placed wood section near the cooktop or sink creates visual interest and functional zoning.
The wood insert, typically 24-36 inches wide, provides a dedicated landing zone that’s warm to the touch and gentler on dishes and glassware than stone. Shop on Amazon
Why It Works: This approach gives you the best of both worlds—the durability and water resistance of engineered or natural stone where you need it most, with the warmth and functionality of wood in high-use areas. The contrasting materials create natural visual breaks that define different work zones, making your kitchen feel more intentional and thoughtfully designed. It’s also more budget-friendly than doing all wood countertops.
How to Style It:
- Install the wood section as a 24-36 inch landing zone directly adjacent to the cooktop for hot pots and pans
- Ensure the wood is finished flush with surrounding stone (not raised) to prevent tripping hazards with pots and cutting boards
- Choose wood tones that either complement (warm walnut with warm-toned quartz) or contrast (light maple with dark granite) your primary countertop material
- Use professional-grade waterproof wood sealer on any sections near sinks or high-moisture areas
Where to Use It: Perimeter counters near cooktops, prep sinks, dedicated baking stations, landing zones beside refrigerators
Pro Tip: Position wood sections at least 6 inches away from sink edges to minimize water exposure, and always install a subtle marine-grade sealant on any wood within 2 feet of water sources.
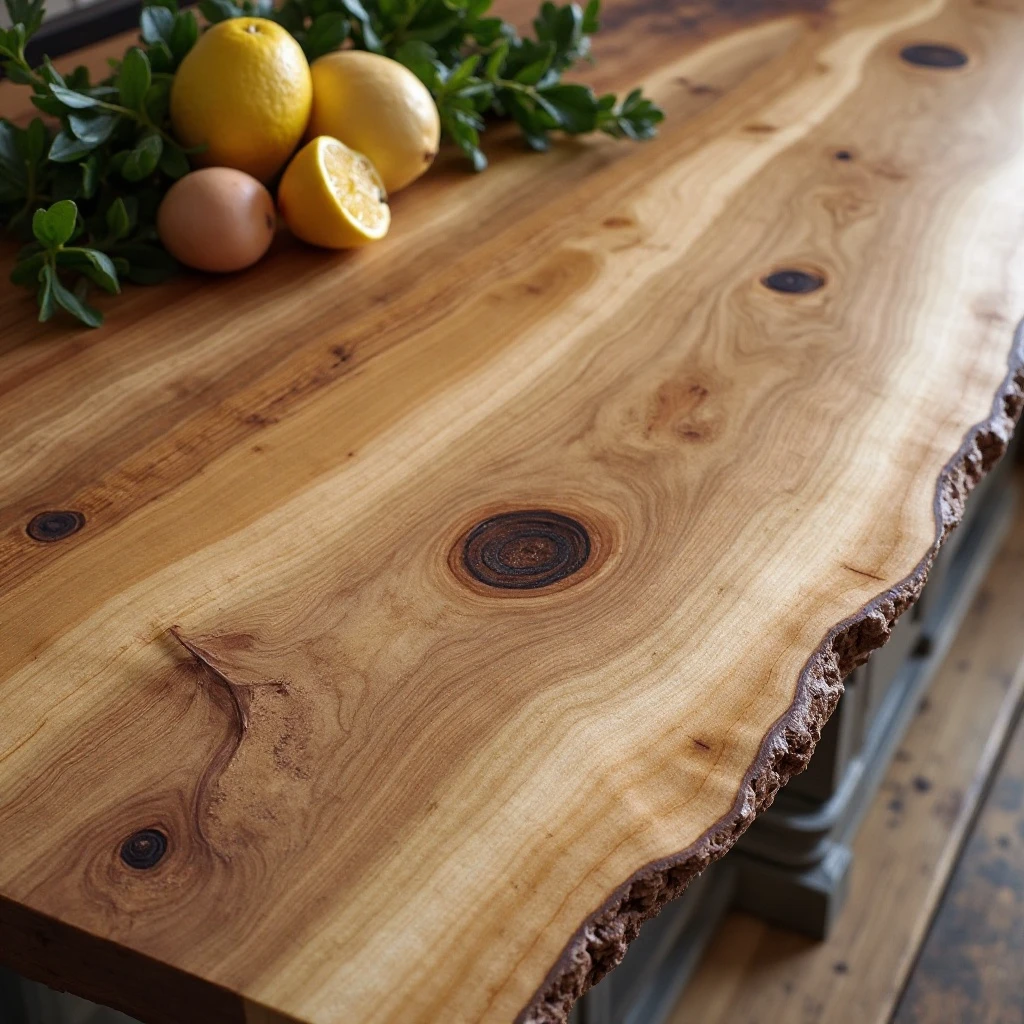
4. Live Edge Walnut or Oak Bar Top
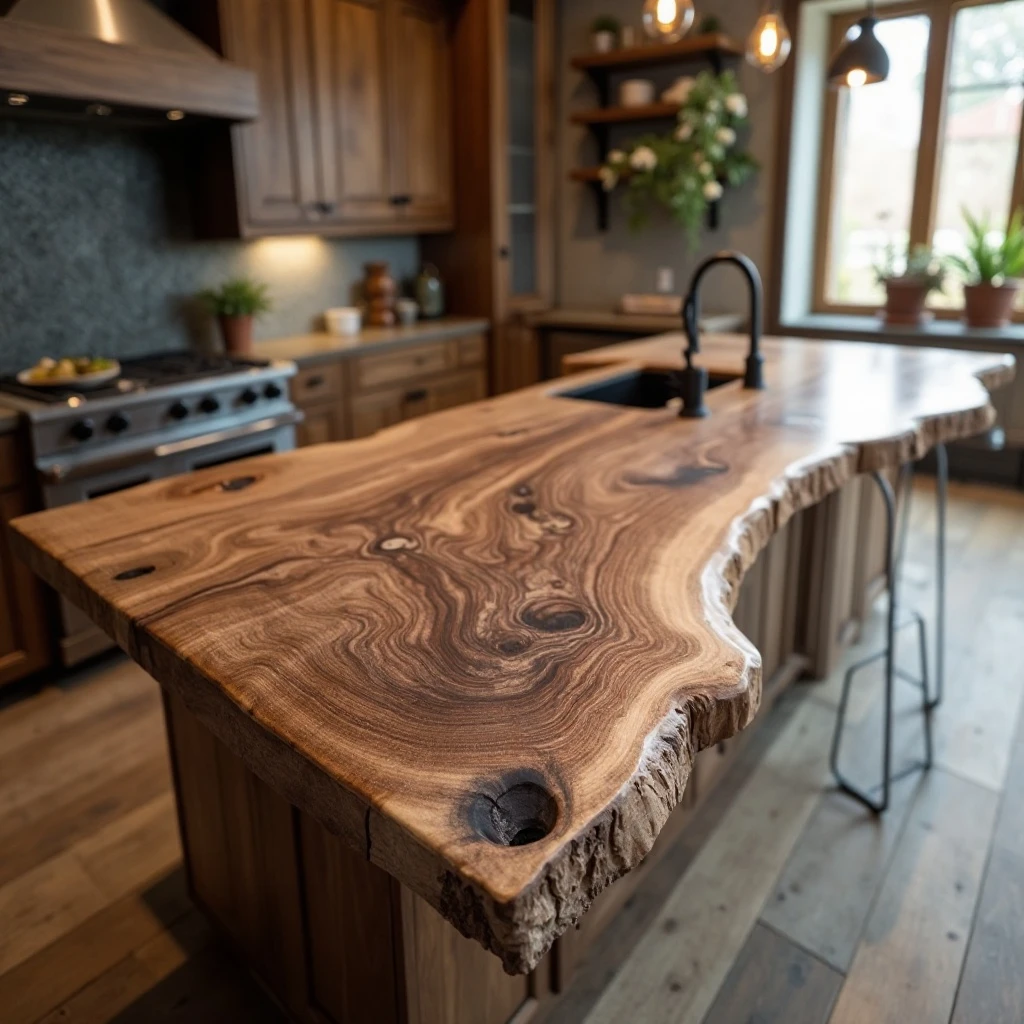
A stunning live edge slab with natural bark edge (or smoothed natural edge) serves as a bar top or peninsula counter, celebrating the tree’s organic shape with visible knots, mineral streaks, and irregular edges.
The undulating natural edge contrasts beautifully with the geometric lines of cabinetry, creating an artisanal focal point that’s impossible to replicate. Shop on Amazon
Why It Works: Live edge countertops transform your kitchen into a conversation piece, bringing the organic beauty of nature indoors while ensuring no two installations are ever identical. The natural edge creates a tactile, sculptural quality that softens ultra-modern spaces and adds authenticity to rustic or farmhouse designs. Each imperfection—burls, knots, and color variations—tells the story of the tree’s growth and adds character that only improves with age.
How to Style It:
- Stabilize any natural voids or cracks with clear epoxy resin to prevent debris collection while maintaining the organic aesthetic
- Mount on industrial black metal brackets or minimalist floating supports to let the wood take center stage
- Orient the slab so the most dramatic grain patterns and natural edge face the main viewing area
- Apply multiple coats of penetrating oil finish to bring out depth in the grain while maintaining a natural, touchable surface
Where to Use It: Breakfast bars, peninsula counters, coffee stations, pass-through counters
Pro Tip: Choose slabs that have been kiln-dried to 6-8% moisture content and properly sealed on all sides (including the underside) to prevent warping—air-dried slabs may look rustic but will likely crack or warp within the first year.
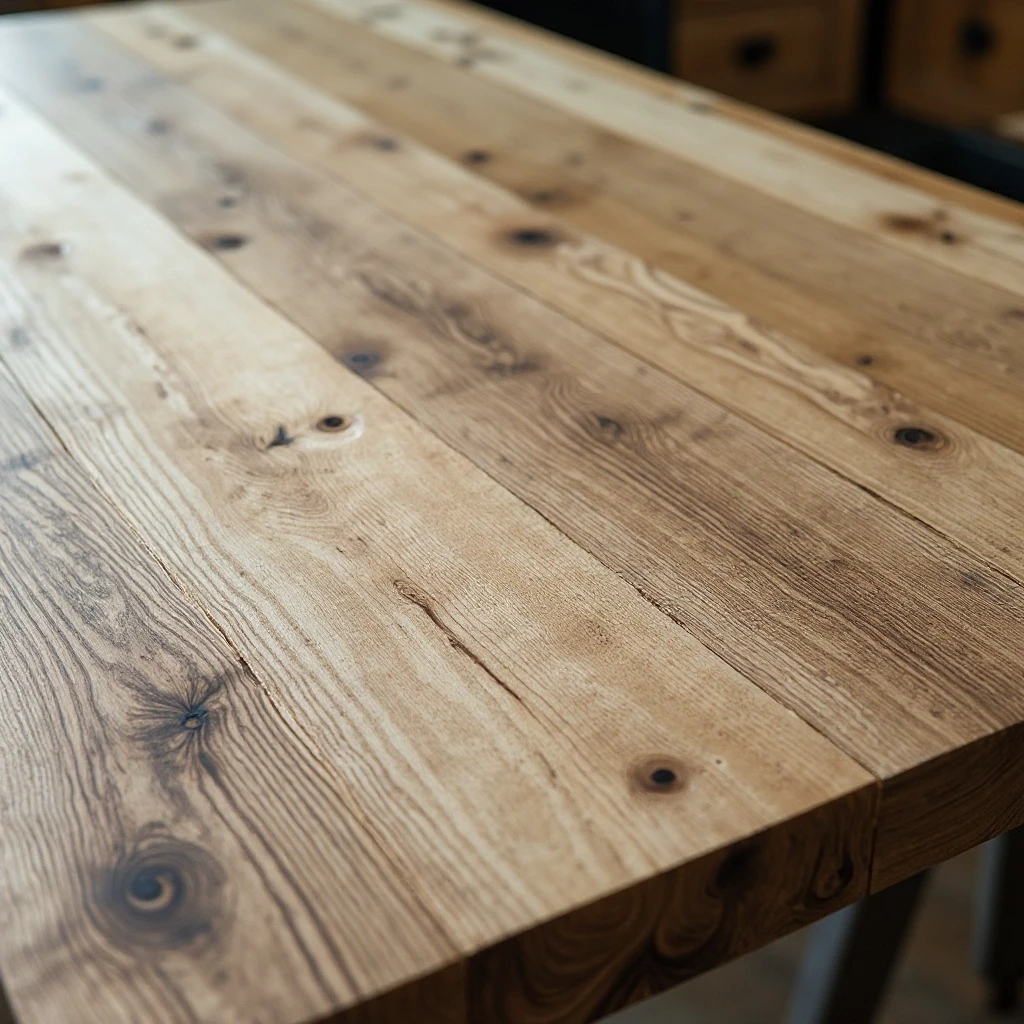
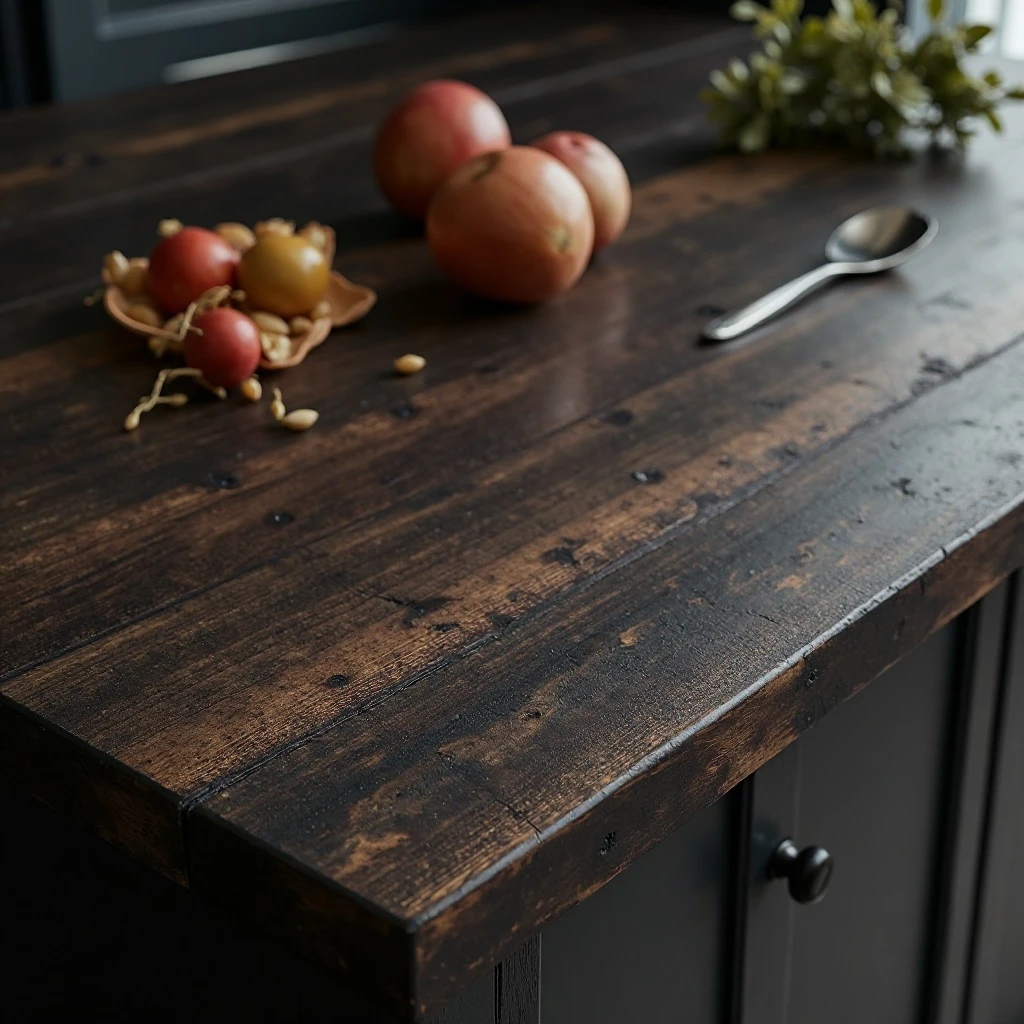
5. Reclaimed Wood Patchwork Counter
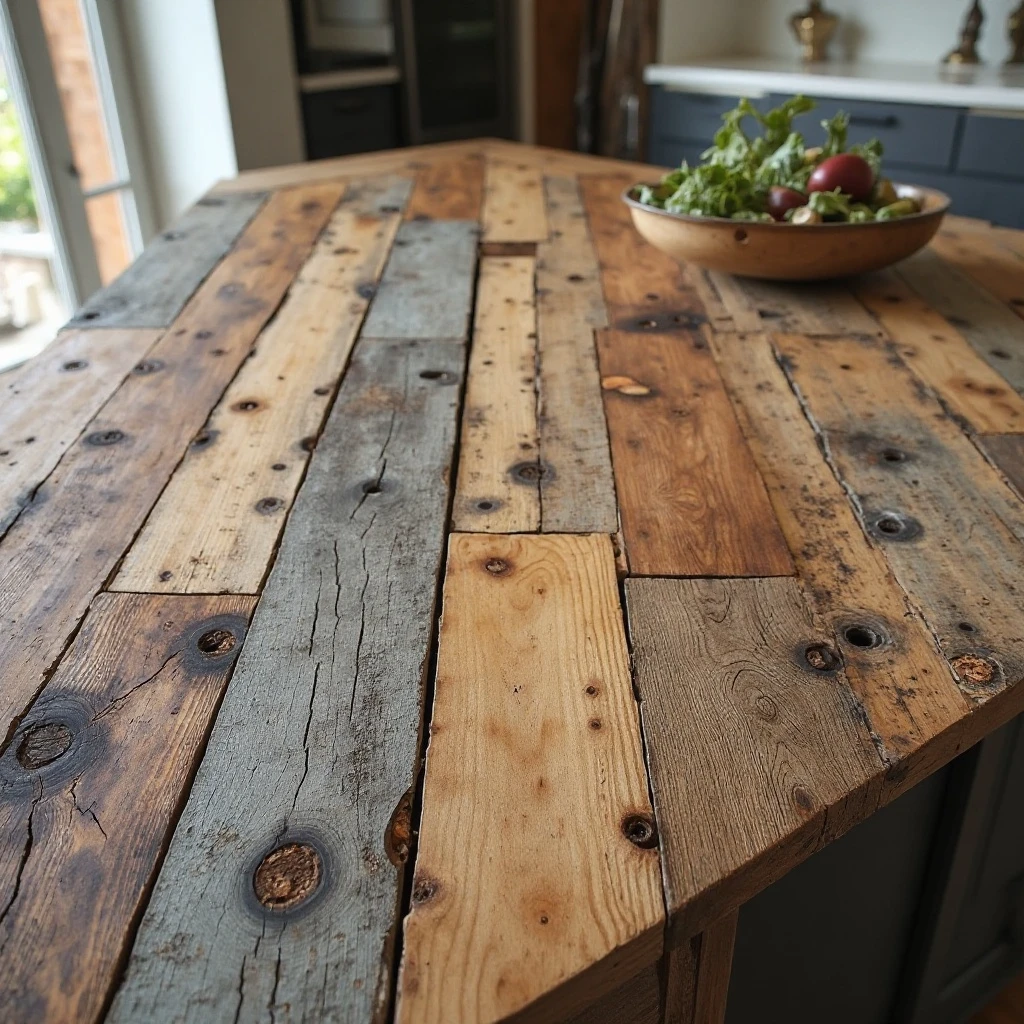
A countertop crafted from reclaimed wood planks in varying widths creates a patchwork effect with subtle color variations ranging from weathered gray to warm honey.
Each plank tells a story with nail holes, saw marks, and patina that add depth and history to your kitchen, creating an eco-friendly surface with unmatched character. Shop on Amazon
Why It Works: Reclaimed wood offers instant patina and character that new wood takes decades to develop, while also being an environmentally conscious choice that repurposes materials. The varied tones and textures create visual interest that prevents the space from feeling flat or one-dimensional. This style works particularly well in farmhouse, industrial, and eclectic kitchens where imperfection and authenticity are celebrated as design features.
How to Style It:
- Source wood from a reputable reclaimed lumber supplier who has properly cleaned, de-nailed, and dried the material
- Mix plank widths (4-8 inches) randomly rather than in a pattern to create organic, unplanned visual flow
- Apply a clear, food-safe hardwax oil that doesn’t obscure the wood’s patina but provides necessary protection
- Pair with vintage-inspired or industrial hardware in oil-rubbed bronze or weathered brass to complement the aged aesthetic
Where to Use It: Farmhouse kitchen islands, coffee bar stations, rustic cabin kitchens, eclectic urban lofts
Pro Tip: Always have reclaimed wood professionally milled and planed to consistent thickness (most installers recommend 1.5 inches minimum) and sealed on all six sides before installation to prevent pest issues and ensure structural stability.
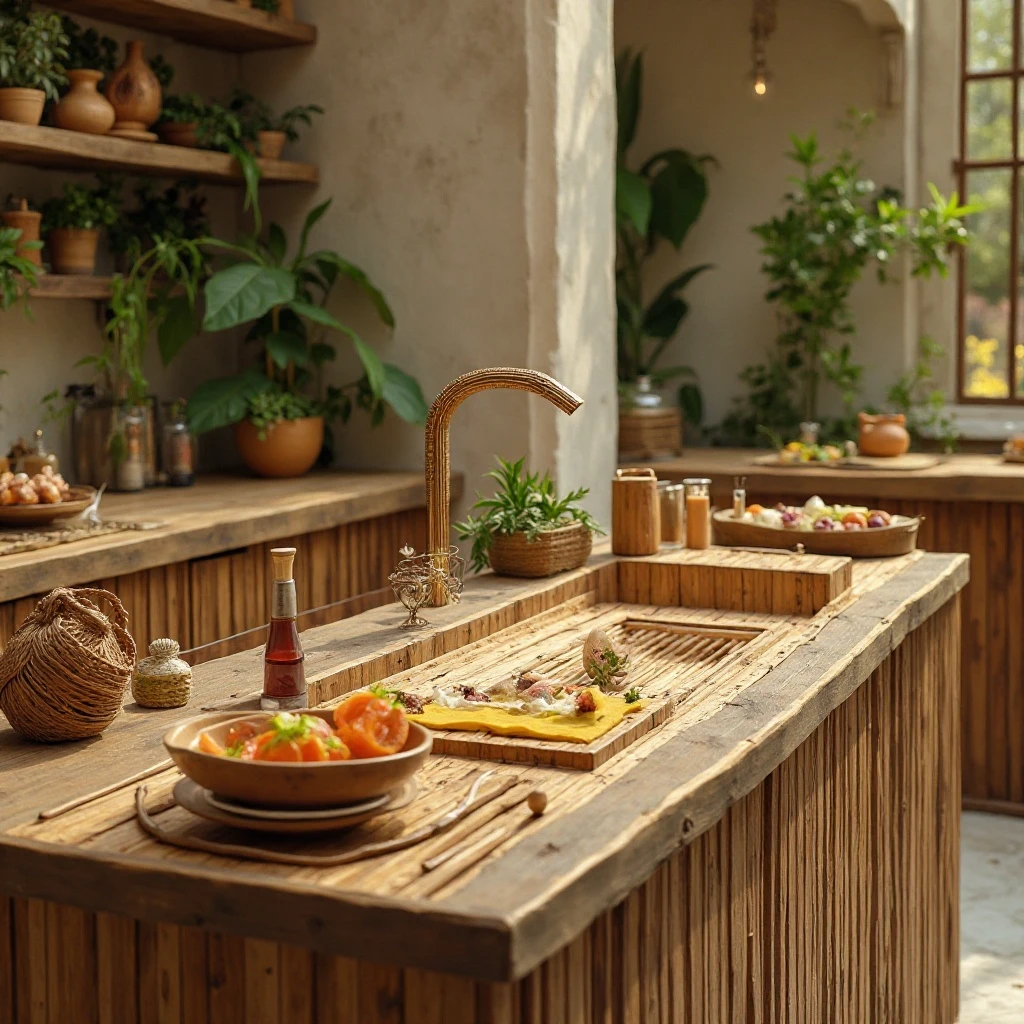
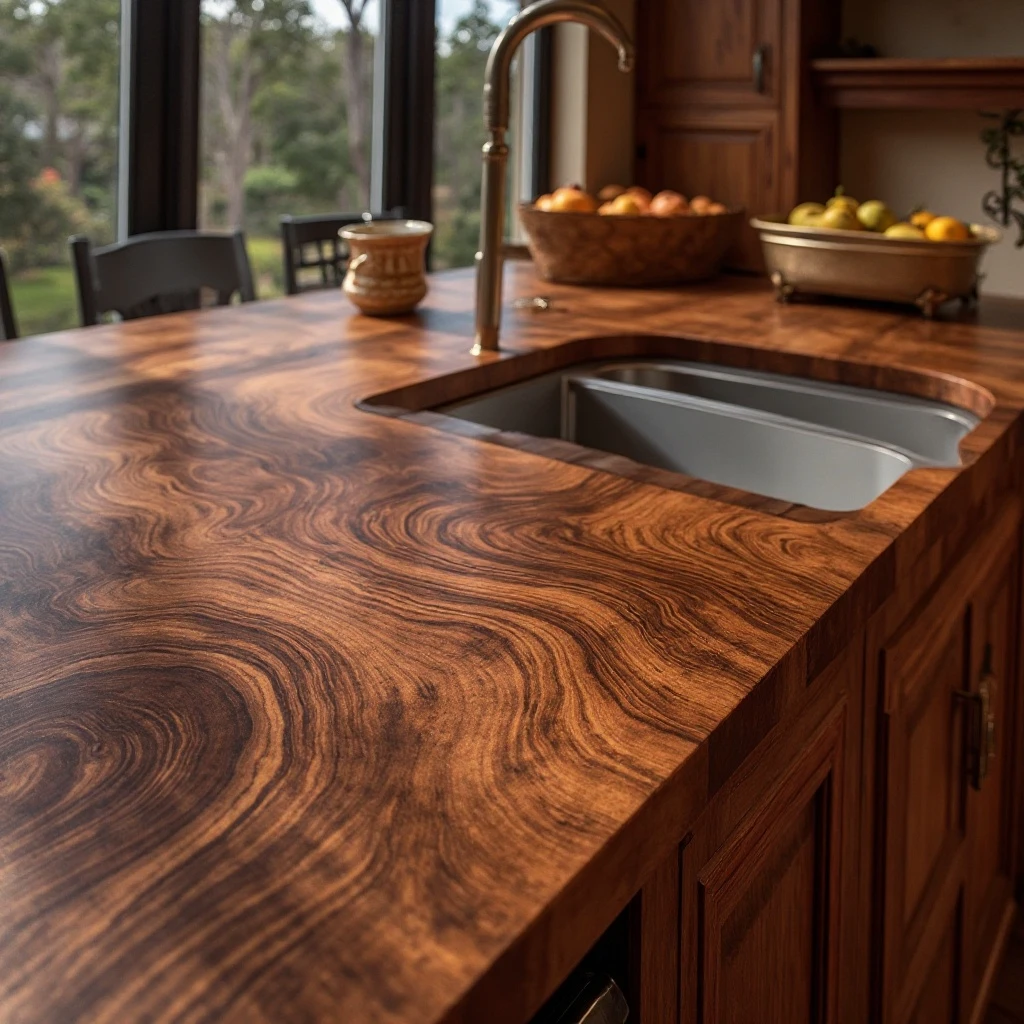
6. Teak Marine-Grade Counter Near Sink
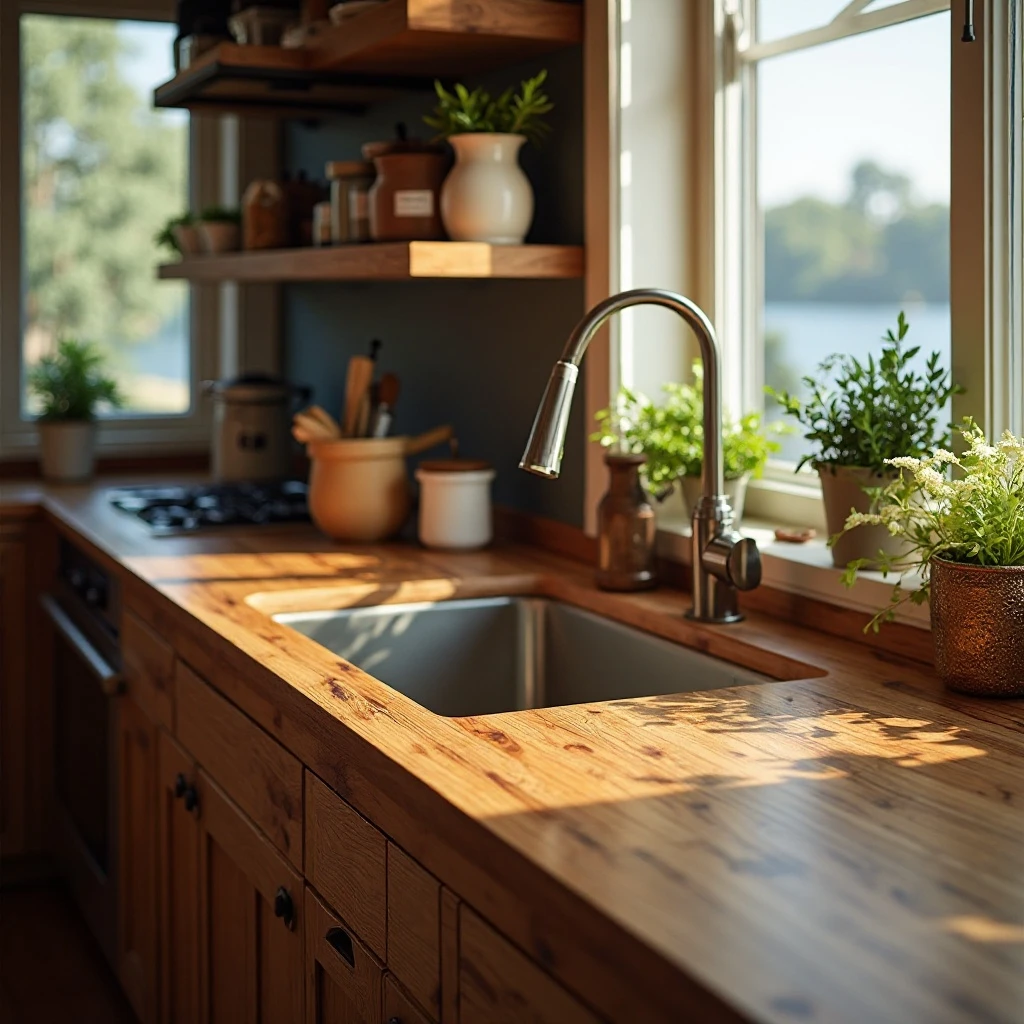
A teak countertop section surrounding the sink brings the warmth of wood to the highest-moisture area of the kitchen, leveraging teak’s natural oils and water resistance.
The golden-brown tones and tight grain pattern create a luxury yacht aesthetic that’s both practical and beautiful, aging to a silvery patina if left unsealed or maintaining rich color with regular oiling. Shop on Amazon
Why It Works: Teak is naturally water-resistant thanks to its high oil content and tight grain structure, making it the only wood that can truly handle sink-adjacent installation without extensive sealing. The wood’s natural oils make it antimicrobial and resistant to mold, while its dimensional stability means it won’t warp or swell like softer woods. This is the perfect solution for anyone who loves wood countertops but worries about water damage.
How to Style It:
- Install a subtle undermount sink to maximize the wood surface area and create clean, modern lines
- Apply teak oil every 3-4 months to maintain the golden color, or leave unsealed for a natural silver-gray weathered patina
- Ensure at least a 1/8-inch gap between sink rim and wood to allow for slight expansion and prevent moisture trapping
- Use marine-grade stainless steel mounting hardware that won’t rust or corrode in the high-moisture environment
Where to Use It: Sink surrounds, wet bar counters, outdoor kitchen sections, areas with high humidity exposure
Pro Tip: Purchase FSC-certified plantation teak rather than old-growth to ensure sustainability, and specify “First European Quality” (FEQ) grade for consistent color and tight grain—the premium cost is worth it for longevity.
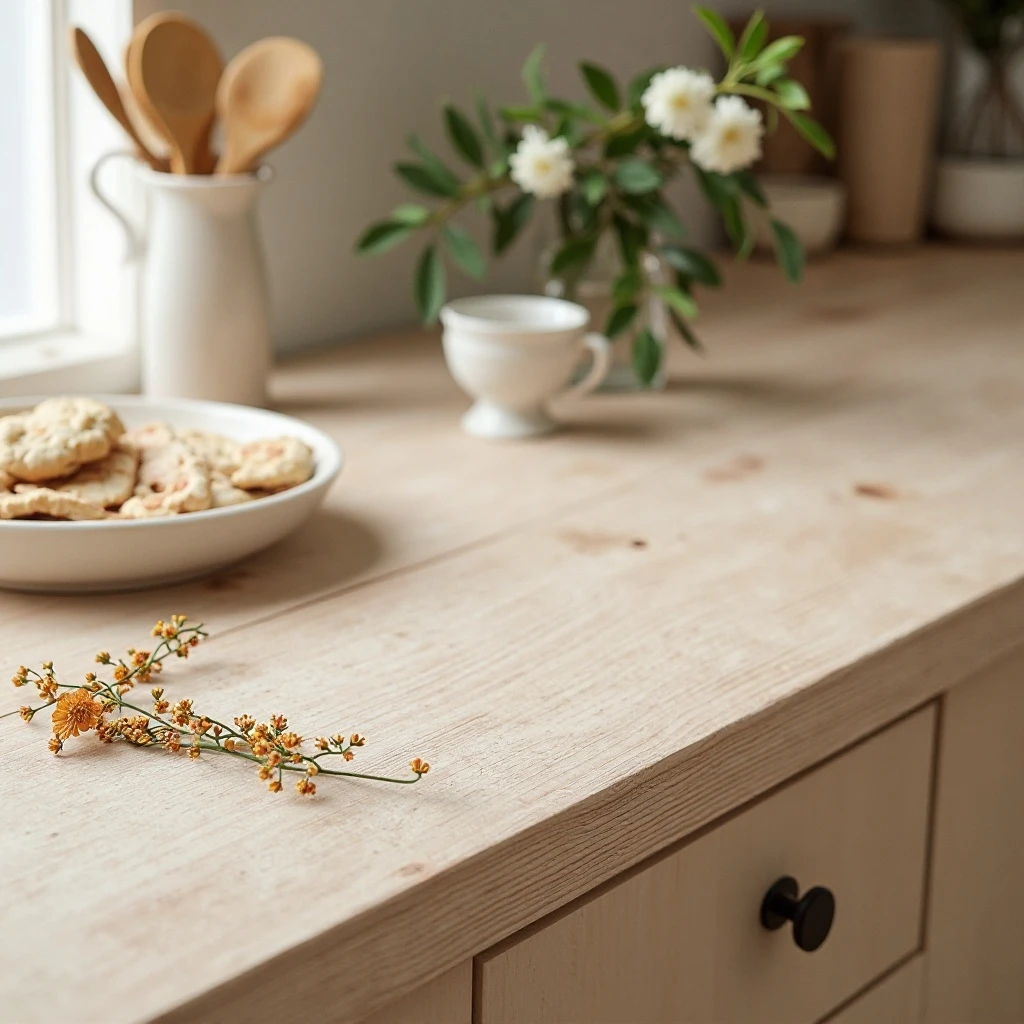
7. Lighter Maple for Scandinavian Minimalism
A pale maple countertop with subtle grain creates a serene, light-filled Scandinavian aesthetic that makes small kitchens feel more spacious. The almost-white surface with gentle grain variations provides warmth without visual weight, creating the perfect canvas for colorful dishes and accessories. Shop on Amazon
Why It Works: Light maple brightens spaces naturally, reflecting light and creating an airy feel that’s essential to Scandinavian design philosophy. The subtle grain provides just enough visual interest to prevent the space from feeling sterile while maintaining the clean, uncluttered aesthetic. Maple is also one of the hardest domestic hardwoods, offering durability that belies its delicate appearance.
How to Style It:
- Choose clear or select grade maple with minimal color variation for the cleanest, most uniform look
- Pair with white or light gray cabinetry to create a serene, monochromatic palette with subtle tonal variations
- Install simple cup pulls or recessed handles in brushed nickel to maintain the minimalist aesthetic
- Apply a water-based polyurethane finish rather than oil to preserve the light color and prevent yellowing over time
Where to Use It: Small kitchen islands, Scandinavian-style kitchens, compact urban apartments, all-white kitchen designs
Pro Tip: Maple naturally darkens to a warmer amber tone over time—if you want to maintain the pale, almost-white appearance, use a water-based finish and keep the surface away from direct sunlight, or embrace the natural aging process for a lived-in Scandinavian look.
8. Thick-Cut Cherry Counter with Rounded Edges
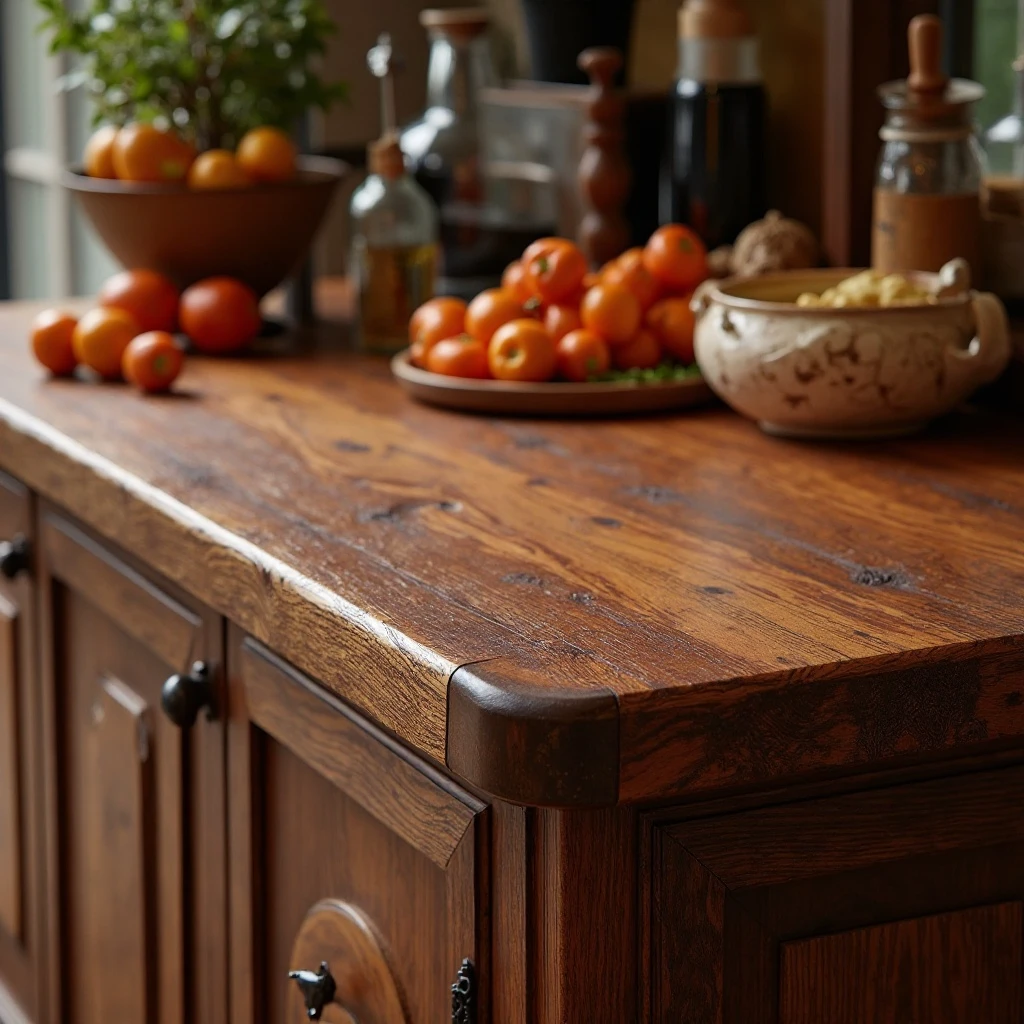
A luxurious cherry wood countertop with 3-inch thickness and gently radiused edges creates a substantial, furniture-quality presence. The wood’s characteristic reddish-brown tones with subtle grain patterns add richness and depth, while the rounded edges provide safety and a handcrafted feel. Shop on Amazon
Why It Works: Cherry’s warm reddish tones bring immediate richness and sophistication, creating a traditional or transitional aesthetic that feels both timeless and high-end. The wood darkens beautifully over time through natural oxidation, developing a deeper, more lustrous patina that can’t be replicated with stains. The substantial thickness and rounded edges add to the heirloom quality, making the counter feel like a piece of fine furniture.
How to Style It:
- Specify a 1/4-inch radius on top edges for comfort and a 1/8-inch chamfer on bottom edges to prevent chipping
- Allow the wood to darken naturally by exposing it to indirect natural light—rearrange items periodically to ensure even color development
- Pair with traditional brass or copper hardware that will develop its own patina alongside the wood
- Apply Danish oil or tung oil finish to enhance the depth of color while maintaining a natural, hand-rubbed appearance
Where to Use It: Traditional kitchen islands, formal dining areas, heirloom-quality renovations, transitional kitchens
Pro Tip: Cherry will darken significantly in the first 6-12 months of exposure to light—if you love the lighter peachy tone, keep it covered or plan your design around the inevitable deepening to rich auburn tones.
9. Bamboo Eco-Friendly Counter
A strand-woven bamboo countertop in caramel or natural tones provides an eco-friendly alternative that’s harder than most hardwoods. The linear grain pattern creates subtle visual texture, while the sustainable sourcing appeals to environmentally conscious homeowners who want the warmth of wood without the environmental impact. Shop on Amazon
Why It Works: Bamboo is technically a grass that regenerates in 3-5 years versus the 30-50 years required for hardwood trees, making it one of the most sustainable countertop choices available. Strand-woven bamboo (compressed bamboo fibers) is actually harder than maple or oak, offering exceptional durability. The contemporary linear grain pattern works beautifully in modern and transitional spaces where you want warmth without heavy traditional aesthetics.
How to Style It:
- Choose strand-woven (not traditional horizontal or vertical) bamboo for maximum hardness and moisture resistance
- Select darker caramelized tones for warmer aesthetics or natural blonde for contemporary spaces
- Seal with the same food-safe finishes recommended for hardwood—bamboo accepts oils and polyurethane equally well
- Pair with stainless steel or white quartz elements to emphasize the modern, eco-conscious design direction
Where to Use It: Eco-friendly kitchen renovations, modern minimalist spaces, LEED-certified homes, Asian-inspired designs
Pro Tip: Always specify “strand-woven” bamboo (not horizontal or vertical grain) for countertops—it’s 2-3 times harder and more moisture-resistant than traditional bamboo construction, making it comparable to or harder than most hardwoods.
10. White Oak with Wire-Brushed Texture
A white oak countertop with wire-brushed finish highlights the wood’s dramatic open grain, creating tactile texture and visual depth. The finishing technique removes softer wood fibers, leaving the harder grain lines raised in a three-dimensional pattern that’s both modern and organic. Shop on Amazon
Why It Works: Wire-brushing creates instant character and aged appearance while actually improving the wood’s durability by exposing the hardest grain fibers. The pronounced texture hides minor scratches and wear far better than smooth finishes, making it ideal for high-use areas. White oak’s neutral tones and prominent grain work in both traditional and contemporary settings, offering versatility that few other species match.
How to Style It:
- Request medium wire-brushing (not aggressive) to create texture without compromising structural integrity or ease of cleaning
- Apply a matte or satin finish to emphasize the texture—high-gloss finishes diminish the tactile quality
- Pair with modern flat-panel cabinetry to create interesting contrast between smooth and textured surfaces
- Use the grain direction strategically—run it lengthwise on long islands to emphasize the linear flow
Where to Use It: Rustic modern kitchens, transitional spaces, high-traffic family kitchens, farmhouse-industrial hybrids
Pro Tip: White oak’s open grain requires proper sealing—specify a pore-filling topcoat or multiple coats of penetrating finish to prevent food particles and liquids from collecting in the grain texture, especially on horizontal surfaces.
11. Dark Stained Ash Counter
Ash wood darkly stained to espresso or ebony tones creates dramatic contrast while showcasing the species’ bold, pronounced grain pattern. The dark finish provides sophistication and formality while the grain texture prevents the surface from appearing flat or one-dimensional. Shop on Amazon
Why It Works: Dark stained wood offers the drama of dark colors with the warmth and grain variation that painted or laminate surfaces can’t match. Ash’s prominent grain pattern remains visible even under dark stains, preventing the flat, lifeless appearance common with stained woods. This creates a sophisticated aesthetic that bridges traditional and contemporary styles while hiding minor wear and scratches better than light finishes.
How to Style It:
- Apply pre-stain wood conditioner to ash’s porous grain structure to ensure even color absorption and prevent blotchiness
- Layer stain gradually in multiple light coats rather than one heavy application for depth and dimension
- Pair with light-colored or white cabinetry to prevent the space from feeling cave-like or oppressive
- Add under-cabinet lighting to prevent dark counters from creating shadows in work areas
Where to Use It: Contemporary kitchens, masculine bachelor pad designs, high-contrast modern spaces, bar areas
Pro Tip: Ash accepts stain beautifully but its open grain requires aggressive pore filling before topcoating—skip this step and your “smooth” counter will feel perpetually slightly rough, especially near high-use areas.
12. Hickory with Natural Color Variation
A hickory countertop celebrating the wood’s extreme natural color variation creates a dynamic surface ranging from pale cream sapwood to rich brown heartwood. The dramatic contrast within a single slab creates visual movement and one-of-a-kind character that’s perfect for rustic and eclectic designs. Shop on Amazon
Why It Works: Hickory’s wild color variation creates instant visual interest and ensures no two countertops ever look identical—perfect for homeowners who want unique, unrepeatable design elements. The wood is exceptionally hard (harder than maple or oak), making it ideal for high-use areas despite its rustic appearance. The natural color drama means you get visual interest without needing to introduce multiple materials or colors.
How to Style It:
- Embrace the color variation rather than fighting it—request “natural grade” or “rustic grade” for maximum character
- Balance the busy counter with simpler, solid-color cabinetry in white, cream, or soft gray
- Use clear finishes that enhance rather than obscure the natural color differences
- Arrange seams to maintain interesting color flow rather than trying to match tones across joints
Where to Use It: Cabin kitchens, rustic lodges, farmhouse designs, eclectic spaces that celebrate imperfection
Pro Tip: Hickory’s hardness makes it difficult to work with—expect higher fabrication costs and ensure your installer has specific experience with this species, as standard woodworking tools dull quickly and improper technique can cause tearout in the figured grain.
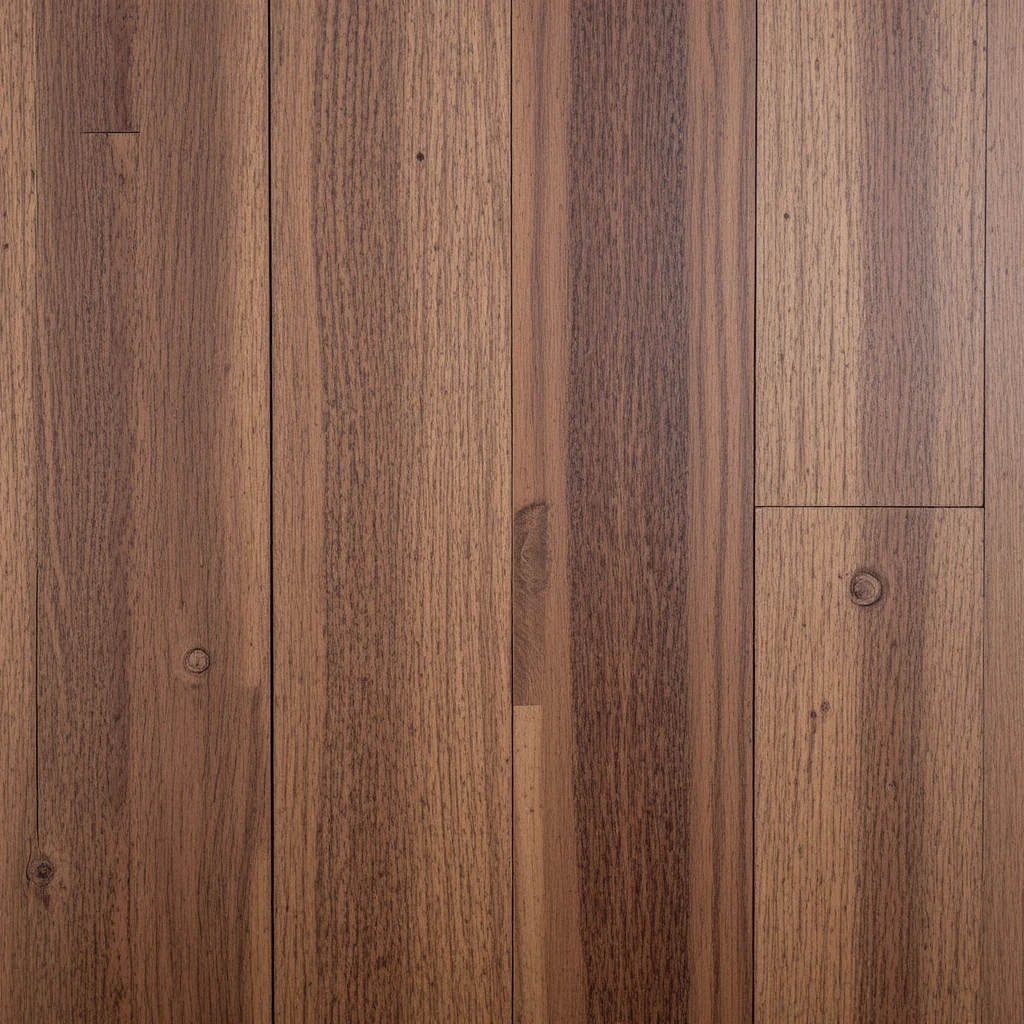
13. Narrow Plank Walnut Farmhouse Style
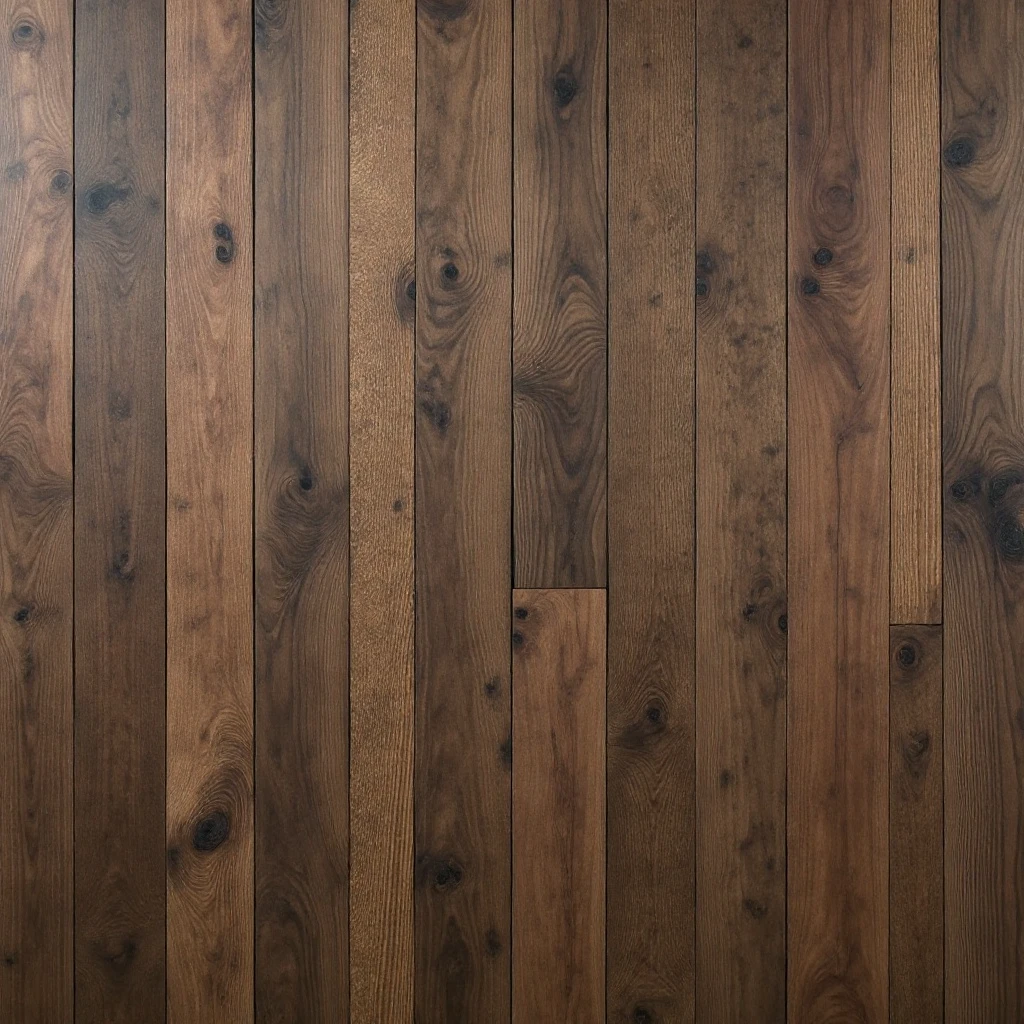
Multiple narrow walnut planks (3-4 inches wide) arranged side-by-side create a traditional farmhouse aesthetic with clean lines and subtle variation. The narrow width emphasizes the linear quality while the dark walnut tones add sophistication to the rustic style. Shop on Amazon
Why It Works: Narrow planks create rhythm and movement across the counter surface, making long islands feel more dynamic and intentional. This construction method is also more stable than wide planks, reducing the risk of cupping or warping. The farmhouse style with luxury walnut material creates an elevated take on rustic design—sophisticated country rather than shabby chic.
How to Style It:
- Mix plank widths slightly (3, 3.5, and 4 inches) for organic variation rather than machine-precision uniformity
- Install perpendicular to the island’s length to create visual width in narrow spaces
- Edge-join planks with waterproof adhesive and reinforce with biscuits or dominoes every 6-8 inches
- Finish with matte oil-based polyurethane to enhance walnut’s depth without creating glossy shine
Where to Use It: Farmhouse kitchen islands, country-style homes, rustic-elegant designs, long narrow islands
Pro Tip: Alternate plank directions (rotating each plank 180 degrees) during installation to counteract natural cupping tendencies—this old-world technique creates more stable surfaces that won’t develop ridges at the seams over time.
14. Iroko African Teak Alternative
An iroko wood countertop provides the look and performance of teak at a fraction of the cost, with golden-brown tones and natural oils that resist moisture. The interlocked grain creates subtle figure while the medium texture balances durability with workability. Shop on Amazon
Why It Works: Iroko contains natural oils similar to teak, providing inherent water and insect resistance without chemical treatments—making it ideal for kitchens. The wood machines and finishes beautifully while costing 40-60% less than genuine teak. Its moderate color (lighter than walnut, darker than oak) makes it versatile enough for both traditional and contemporary designs.
How to Style It:
- Source from certified sustainable suppliers—iroko is not endangered but ethical sourcing ensures proper forest management
- Apply tung oil or Danish oil to enhance the golden tones and protect the surface naturally
- Expect initial color variations that will mellow and blend after 6-12 months of light exposure
- Pre-drill all fastener holes—iroko’s density and interlocked grain can split if hardware is forced
Where to Use It: Indoor-outdoor kitchen transitions, high-humidity climates, budget-conscious projects wanting premium looks
Pro Tip: Iroko contains mineral deposits that will dull blades and bits quickly—warn your fabricator and expect slightly higher labor costs due to increased tool wear, but the savings versus teak still make it economical.
15. Pecan with Rich Reddish Undertones
A pecan wood countertop showcases warm reddish-brown heartwood with lighter sapwood streaks, creating subtle color variation. The fine, uniform grain provides visual interest without overwhelming patterns, while the wood’s moderate hardness offers good durability for typical kitchen use. Shop on Amazon
Why It Works: Pecan offers a middle ground between the drama of hickory and the uniformity of cherry—color variation exists but remains controlled and elegant. The warm reddish undertones create a cozy, inviting atmosphere that works beautifully in traditional and transitional kitchens. As a bonus, pecan is regionally abundant in southern states, often making it more affordable and sustainable than imported or specialty woods.
How to Style It:
- Select “common grade” for more color variation or “select grade” for uniform appearance—both are beautiful in different ways
- Pair with cream or sage green cabinetry to complement the warm tones without creating monotony
- Apply oil-based finishes to deepen the reddish hues or water-based to maintain lighter, natural tones
- Incorporate copper or aged brass hardware that will develop patina complementing the wood’s warm undertones
Where to Use It: Southern-style kitchens, traditional homes, transitional spaces, warm-toned color schemes
Pro Tip: Pecan steams and bends beautifully due to its even density—consider having your fabricator create a gentle curved edge or waterfall detail that would be prohibitively expensive in denser species like maple or hickory.
16. Zebrawood Exotic Statement Piece
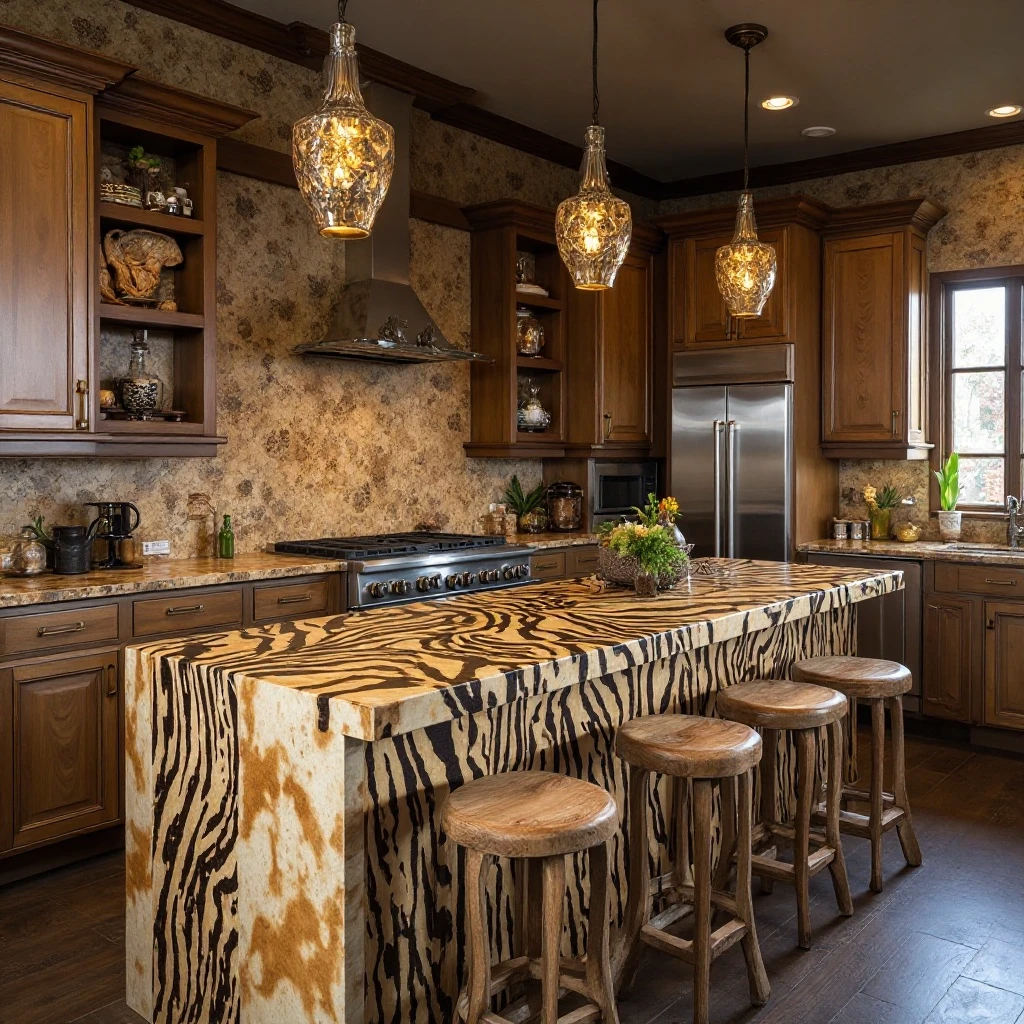
A dramatic zebrawood section (typically 24-48 inches) serves as a statement insert or bar top, featuring bold dark brown stripes against pale golden-blonde background. The high-contrast striping creates instant visual drama that dominates any space it inhabits. Shop on Amazon
Why It Works: Sometimes you want a countertop that’s unquestionably the room’s focal point—zebrawood delivers that in spades. The dramatic striping is unlike any other wood species and creates a jewelry-like quality when used strategically. Small doses prevent visual overwhelm while still making a bold design statement. This works particularly well in contemporary or eclectic spaces that celebrate bold material choices.
How to Style It:
- Use sparingly—a 30-40 inch section as a bar top or peninsula end is dramatic; an entire kitchen becomes overwhelming
- Book-match the grain across seams to create mirror-image patterns that amplify the visual impact
- Keep surrounding materials simple and solid-colored to let the zebrawood perform as the solo performer
- Apply multiple coats of high-quality finish—the dramatic grain will show every flaw or finish defect
Where to Use It: Bar tops, small peninsula sections, statement inserts in larger islands, eclectic powder rooms
Pro Tip: Zebrawood’s wild grain and varied density make it prone to tearout during machining—only work with fabricators experienced in exotic species, and expect to pay premium prices for both material and labor.
17. Shou Sugi Ban Charred Japanese Technique
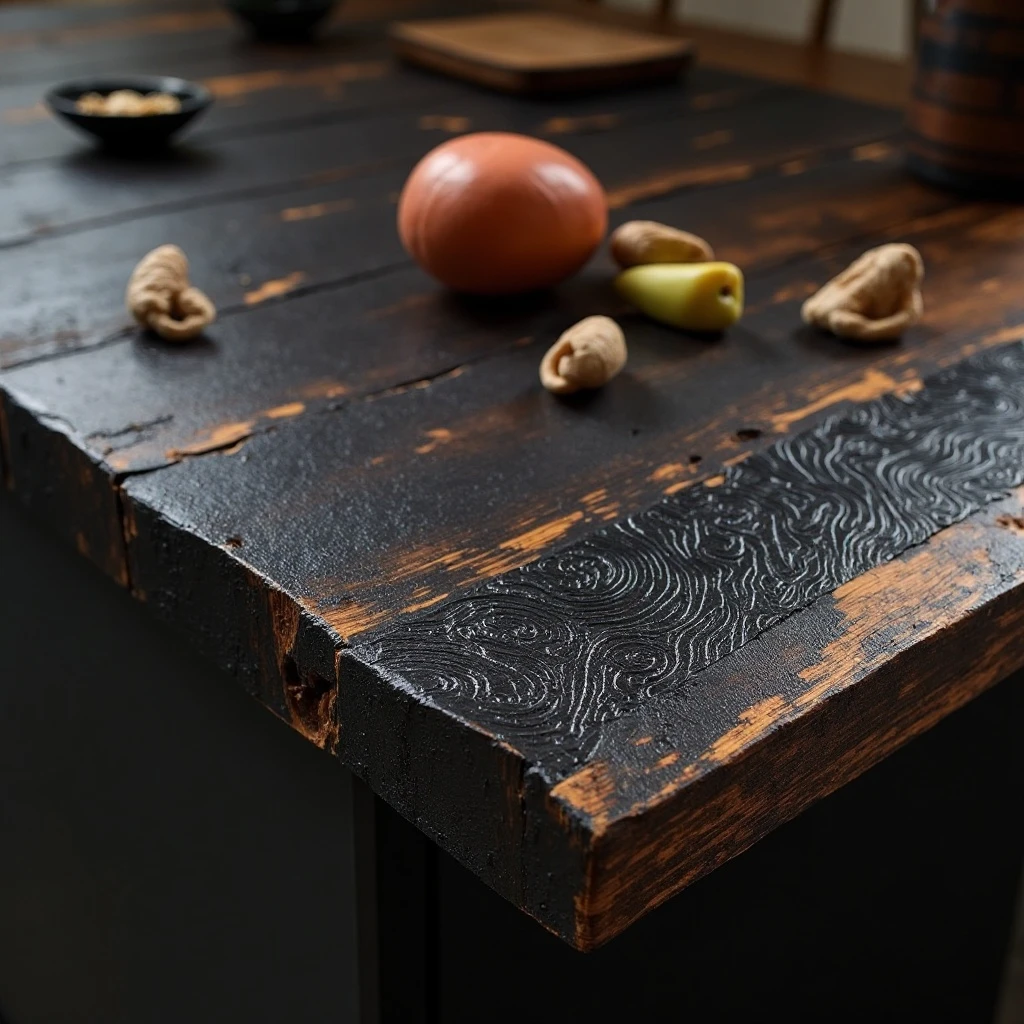
A countertop featuring the ancient Japanese shou sugi ban technique shows deeply charred wood with blackened surface texture and occasional preserved wood grain showing through. The carbonized surface creates dramatic black coloring with dimensional texture and a unique conversation-starting finish. Shop on Amazon
Why It Works: The charring process creates a surface that’s naturally fire-resistant, insect-resistant, and incredibly durable—the carbonized layer protects the wood beneath. The dramatic black aesthetic brings bold contemporary style while the visible texture maintains organic warmth. This technique transforms common species like cedar or cypress into extraordinary statement pieces while actually improving their longevity.
How to Style It:
- Use softer woods (cedar, cypress, pine) that char evenly rather than hardwoods that resist the flame
- Seal the charred surface with multiple coats of food-safe hardwax oil to prevent carbon transfer and create usable surface
- Pair with ultra-modern white or concrete-look cabinetry to emphasize the dramatic contrast
- Plan for higher maintenance—the textured surface requires more careful cleaning than smooth wood
Where to Use It: Contemporary kitchens, Japanese-inspired designs, bar areas, artistic statement pieces
Pro Tip: Shou sugi ban counters should be sealed and resealed aggressively—the charred surface is fragile when unsealed and will transfer black carbon to everything it touches. Apply at least 4-6 coats of penetrating sealer before first use.
18. Mixed Width Oak Planks with Epoxy Fills
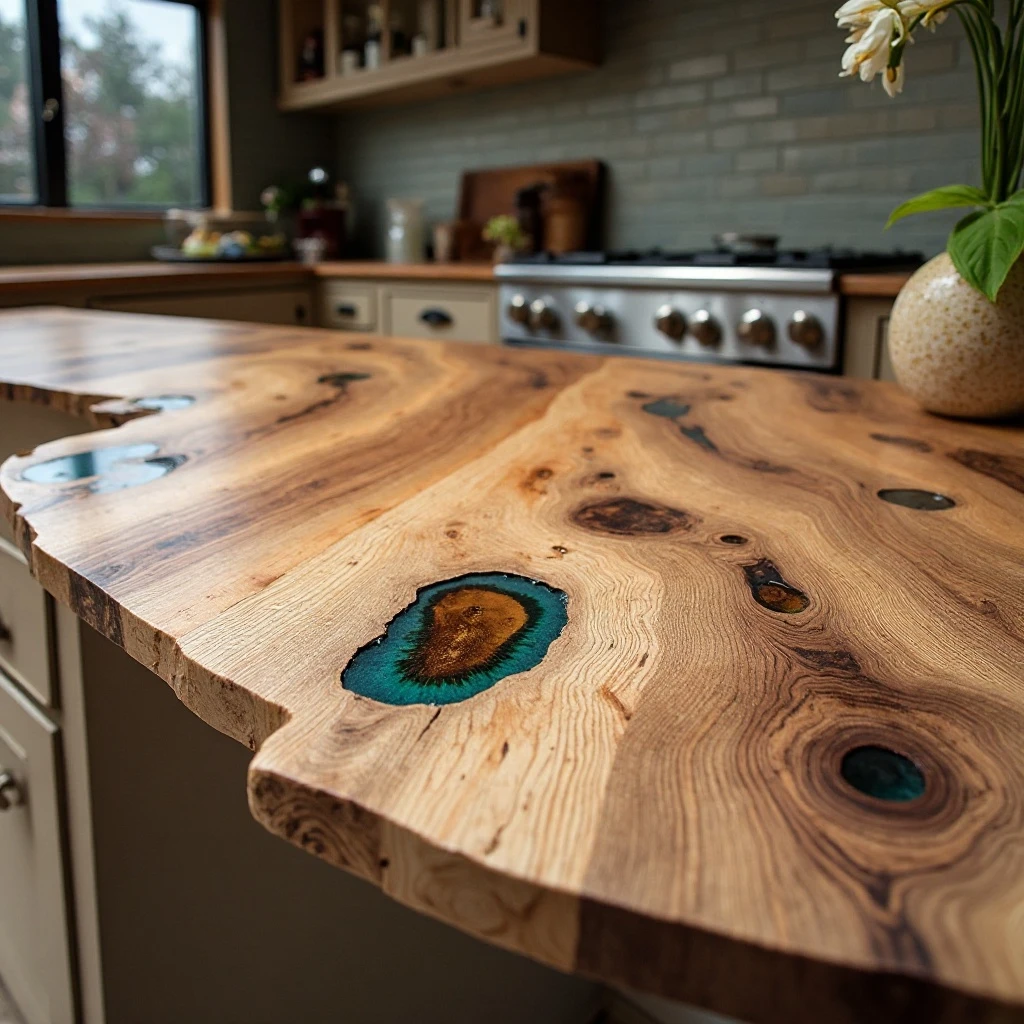
An oak countertop featuring planks in varying widths (4-8 inches) with natural knots, cracks, and voids filled with clear or tinted epoxy resin creates an artisanal aesthetic. The epoxy fills stabilize imperfections while adding contemporary artistic elements that catch and reflect light. Shop on Amazon
Why It Works: This approach celebrates rather than hides wood’s natural character—knots and imperfections become design features rather than defects. The epoxy fills add structural stability while creating opportunities for creative expression (colored epoxy, embedded objects, glow-in-the-dark effects). The mixed widths prevent the monotony of uniform planking while the oak’s neutral tones ensure versatility across design styles.
How to Style It:
- Choose clear epoxy to showcase the wood’s natural character, or tinted (black, blue, metallic) for contemporary artistic statement
- Work with planks that have been kiln-dried below 8% moisture content to prevent cracking after installation
- Level epoxy fills perfectly flush with wood surface—raised epoxy creates cleaning nightmares and catches utensils
- Apply finish that covers both wood and epoxy uniformly to prevent differential sheen or color
Where to Use It: Rustic modern kitchens, artistic spaces, river table-inspired designs, eclectic contemporary homes
Pro Tip: Always over-fill voids with epoxy by 1/8 inch then sand perfectly flush after curing—epoxy shrinks slightly and under-filled voids will leave dips that collect debris and look incomplete within weeks of installation.
19. Sapele African Mahogany Lookalike
A sapele countertop delivers the rich reddish-brown color and ribbon-stripe figure of genuine mahogany at more accessible pricing. The interlocked grain creates beautiful ribbon figure (alternating light and dark stripes) that shifts appearance as viewing angle changes, adding dynamic visual interest. Shop on Amazon
Why It Works: Sapele offers the prestige aesthetic of mahogany without the endangered species concerns or astronomical pricing. The ribboned figure creates sophisticated visual movement that prevents the surface from appearing flat or boring. The wood is hard and stable, making it practical for kitchen use despite its luxurious appearance. The rich color adds instant warmth and works beautifully in traditional, transitional, and even contemporary spaces.
How to Style It:
- Specify quarter-sawn or rift-sawn sapele to maximize the ribbon figure—flat-sawn won’t show the characteristic striping
- Orient planks so the ribbon figure runs perpendicular to the island’s length for maximum visual impact when approaching
- Apply satin-finish polyurethane that enhances depth without creating mirror-like gloss
- Pair with gold or brass hardware that complements the warm reddish tones
Where to Use It: Traditional kitchens, formal spaces, luxury renovations, library-inspired designs
Pro Tip: Sapele’s interlocked grain makes it challenging to hand-plane or scrape—ensure all smoothing is done with progressively finer sanding (up to 220 grit minimum) to avoid tearout that will telegraph through finish coats.
20. Beech European Hardwood
A beech countertop in pale pinkish-cream tones with tiny flecks creates a subtle, refined surface with fine, even grain. The wood’s uniform texture and modest grain pattern provide understated elegance that serves as a neutral backdrop rather than dominant feature. Shop on Amazon
Why It Works: Beech offers excellent hardness (comparable to hard maple) at moderate pricing, making it practical for high-use kitchens. The pale, warm tones brighten spaces without the stark coldness of white quartz, while the fine grain provides just enough texture to feel organic. This is the perfect choice for homeowners who want wood’s warmth but prefer subtle beauty over dramatic grain patterns.
How to Style It:
- Steam-bend beech for curved edges or details—it’s one of the best hardwoods for bending applications
- Pair with both warm and cool color schemes—beech’s neutral pinkish tone works surprisingly well with everything
- Apply water-based finishes to maintain the light color, or oil-based to deepen to warmer peachy tones
- Incorporate simple, clean-lined hardware in brushed stainless or polished chrome for Scandinavian-modern aesthetic
Where to Use It: European-style kitchens, Scandinavian minimalist designs, baking stations, craft areas
Pro Tip: Beech shows water spotting more readily than many hardwoods due to its even porosity—commit to prompt spill cleanup and regular oiling, or choose this wood for areas away from sinks and heavy moisture exposure.
21. Ash with Lime Wash Finish
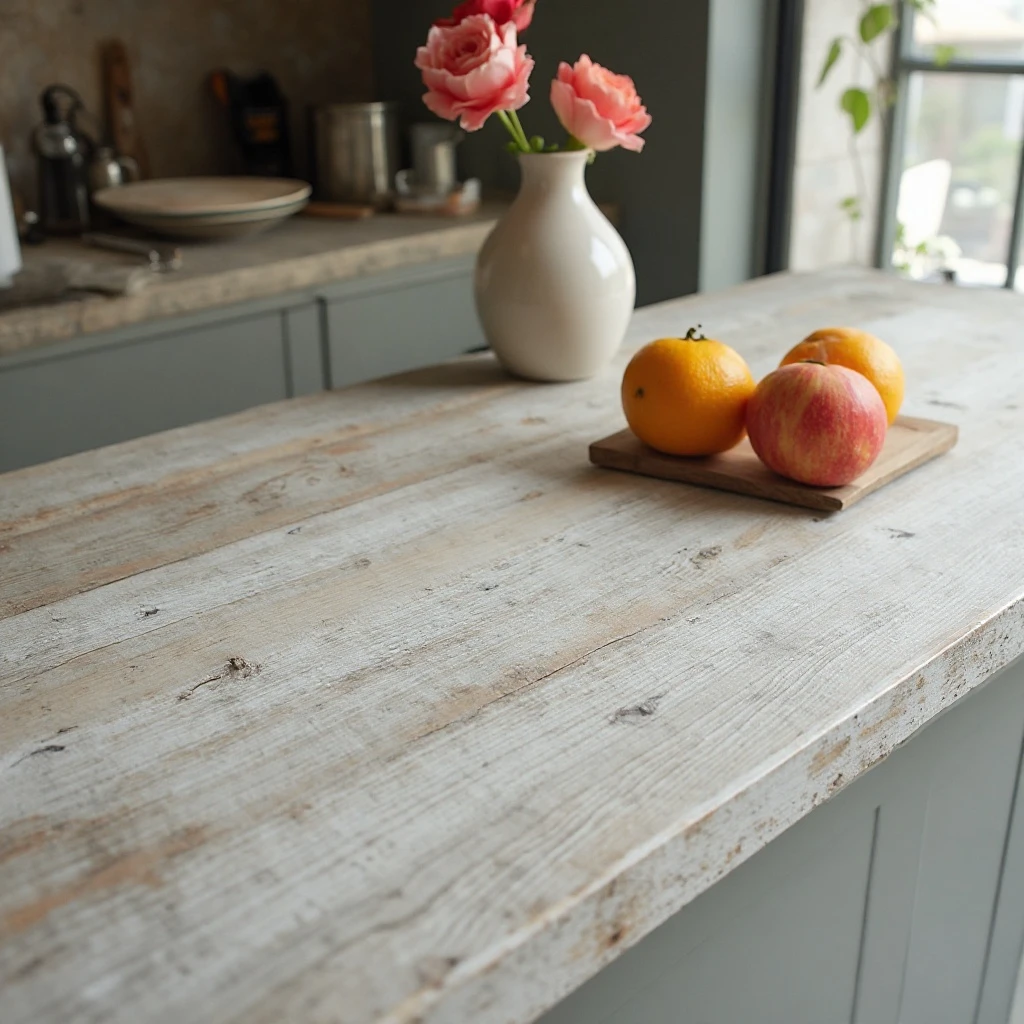
An ash countertop treated with white or gray lime wash finish creates a weathered, coastal aesthetic. The open grain remains visible through the semi-opaque finish, allowing wood texture to show while lightening the overall appearance to pale gray or white tones. Shop on Amazon
Why It Works: Lime washing provides the light, airy aesthetic of painted finishes while preserving the wood’s natural grain and texture—you get color control with organic character. The technique works particularly well with ash’s bold grain pattern, which remains prominently visible. This finish hides minor imperfections and wear beautifully while creating the relaxed, lived-in feel perfect for coastal or Scandinavian-inspired kitchens.
How to Style It:
- Apply lime wash in thin layers, wiping back excess before drying to control opacity and preserve grain visibility
- Seal with water-based matte polyurethane to protect the finish while maintaining the flat, chalky appearance
- Pair with natural fiber textures (jute, linen, rattan) and soft blues or greens for complete coastal aesthetic
- Consider leaving some areas less heavily washed to create subtle tonal variation and depth
Where to Use It: Coastal kitchens, Scandinavian designs, farmhouse-beach fusion styles, cottage renovations
Pro Tip: Test lime wash techniques on scrap ash before committing to your counter—the amount of wiping-back drastically changes the final appearance, and most homeowners prefer more grain visibility than initial application suggests.
22. Acacia with Golden Honey Tones
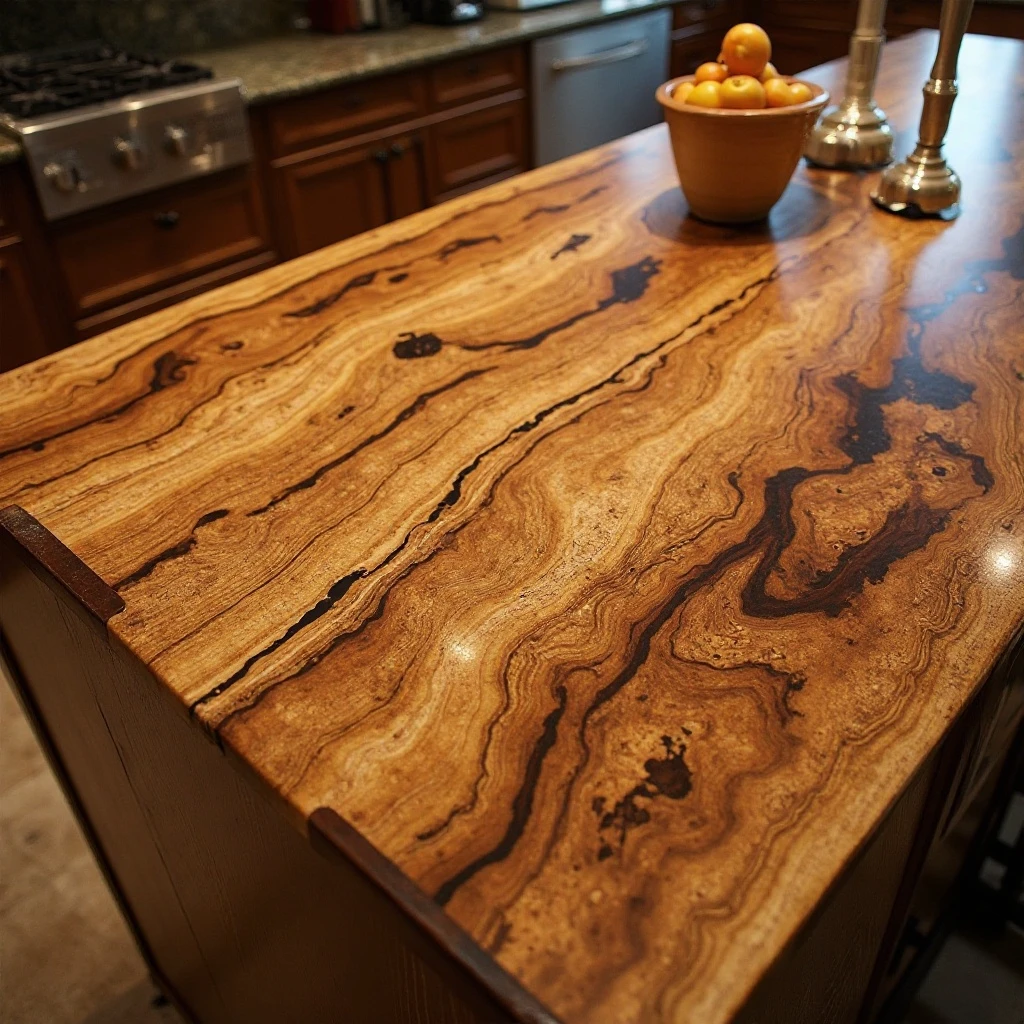
An acacia countertop showcases dramatic color variation from pale honey to dark chocolate brown, with swirling grain patterns and natural color streaks. The hardwood’s density and natural oils provide excellent durability while the dramatic coloring creates instant visual interest. Shop on Amazon
Why It Works: Acacia’s wild color variation means you get a dynamic, artistic surface that looks custom and expensive without requiring exotic species. The wood is exceptionally hard and naturally resistant to water and bacteria, making it practical despite its dramatic appearance. Each slab is completely unique, ensuring your counter is truly one-of-a-kind. The warm golden tones work beautifully in both traditional and contemporary settings.
How to Style It:
- Embrace the color variation—trying to match or control it fights the wood’s natural beauty
- Apply clear penetrating oil finishes that enhance color depth without obscuring the dramatic patterns
- Balance the busy counter with simple, solid-color cabinetry and minimal backsplash pattern
- Arrange multiple slabs so color transitions feel intentional rather than random or jarring
Where to Use It: Eclectic kitchens, tropical-inspired spaces, rustic contemporary designs, artisan-style homes
Pro Tip: Acacia moves significantly with humidity changes due to its density variations—leave slightly larger expansion gaps (1/4 inch) at walls and ensure your fabricator acclimates the wood to your home’s humidity for at least one week before fabrication and installation.
Common Mistakes to Avoid
1. Skipping Proper Sealing or Using the Wrong Finish
The single biggest mistake with wood countertops is inadequate or inappropriate sealing. Mineral oil alone isn’t sufficient for kitchen counters—it requires monthly reapplication and doesn’t prevent water penetration. Instead, use food-safe hardwax oils, polyurethane, or penetrating sealers designed specifically for countertops.
Apply finishes to all six sides (top, bottom, edges, and ends) before installation to prevent moisture absorption and warping. For areas near sinks, consider marine-grade sealants orchoose naturally water-resistant species like teak or iroko.
2. Installing Wood Too Close to Heat Sources
Placing wood countertops directly adjacent to cooktops without proper clearance causes discoloration, cracking, and potential fire hazards. Always maintain at least 9-12 inches between wood surfaces and heat sources, or install a trivet zone using tile, stone, or stainless steel.
Even heat-resistant woods like teak can discolor or dry out with prolonged heat exposure. Never install wood directly behind ranges without a proper backsplash—the combination of heat and grease splatter will ruin even the best-sealed wood within months.
3. Choosing Inappropriate Wood Species for High-Moisture Areas
Not all woods perform equally in kitchens. Softer species like pine, cedar, or poplar lack the density to withstand knife marks and daily wear, while open-grained woods like red oak trap moisture without aggressive sealing.
For sink-adjacent areas, stick with teak, iroko, bamboo, or ensure any other species receives professional-grade waterproofing. Avoid highly figured or dramatically colored exotic woods in high-traffic areas—save dramatic grain patterns for bar tops or accent sections where durability demands are lower.
4. Improper Grain Orientation and Installation
Installing wood counters without considering grain direction and wood movement leads to cracking, cupping, and failed joints. Always install edge-grain or end-grain butcher block rather than flat-sawn planks for maximum stability. Leave proper expansion gaps (1/8 to 1/4 inch) at all walls and fixed objects.
Never rigidly attach wood counters—use figure-8 fasteners or Z-clips that allow seasonal movement. Failure to accommodate wood’s natural expansion and contraction causes catastrophic splits, especially in climate-controlled homes with significant humidity swings between seasons.
5. Neglecting Regular Maintenance and Expecting Zero Patina
Wood countertops require ongoing care—they’re living surfaces that develop character over time, not static materials. Expecting wood to remain pristine and unchanging leads to disappointment and damage. Establish a maintenance routine: monthly oiling for the first year, quarterly thereafter, immediate spill cleanup, and annual deep cleaning with wood-specific cleaners.
Embrace minor scratches and color changes as part of wood’s natural aging process. Fighting natural patina development with aggressive sanding or over-finishing actually weakens the surface and removes the protective layer you’re trying to preserve.
6. Mixing Wood Species Without Professional Guidance
Combining multiple wood species in one counter seems attractive but different woods expand/contract at different rates, accept finishes differently, and age at different paces.
This creates uneven surfaces, visible ridges at seams, and color mismatches that worsen over time. If you want mixed materials, combine wood with stone, concrete, or tile—materials with different expansion properties.
When using multiple wood species, confine each to separate, independent sections rather than joining them side-by-side. Always consult experienced fabricators before mixing species, as some combinations are workable while others guarantee future problems.
Frequently Asked Questions
How do I maintain and seal wood countertops to prevent water damage?
Ensure all six sides receive at least three coats of food-safe sealer before installation. Oil-finished counters need monthly conditioning for the first year, then quarterly maintenance. Polyurethane-finished counters need annual inspections for wear spots. The key is immediate spill cleanup—never let water sit for more than a few minutes. Near sinks, use teak or marine-grade sealants and place mats under dish racks.
What’s the best wood species for kitchen countertops in terms of durability?
Hard maple and hickory lead with Janka hardness ratings around 1,450-1,820, making them highly resistant to dents and scratches. Strand-woven bamboo, teak, and iroko offer exceptional durability with natural water resistance. For high-traffic kitchens, choose edge-grain or end-grain construction in hard maple or hickory for maximum durability and self-healing properties.
Can I install wood countertops myself or do I need a professional?
DIY is possible for experienced woodworkers with proper tools, but most benefit from professional installation. Creating level seams, routing sink cutouts, and ensuring correct expansion gaps requires specialized knowledge. Consider a hybrid approach: install simple pre-finished butcher block sections yourself, but hire professionals for complex layouts, waterfall edges, or exotic species.
How much do wood countertops typically cost compared to other materials?
Butcher block maple or oak runs $40-$80 per square foot installed—comparable to mid-range quartz. Exotic species like teak or walnut range from $100-$200+ per square foot. End-grain costs 30-50% more than edge-grain. Budget $2,000-$4,000 for a typical island in domestic hardwoods or $4,000-$8,000+ for exotic species.
Do wood countertops stain easily and how do I remove stains?
Properly sealed wood resists most stains. Water-based stains wipe away easily if finish is intact. For set-in stains on oiled finishes, use baking soda paste, gently rub, then re-oil. Deep stains require sanding with 220-grit sandpaper and refinishing. Prevention is key: use cutting boards, trivets, and immediately wipe spills.
Will wood countertops warp, crack, or move over time?
Some seasonal movement is normal—proper installation with expansion gaps and support prevents problems. Use kiln-dried wood (6-8% moisture content) acclimated to your home for 1-2 weeks before installation. Seal all six sides and maintain 40-60% indoor humidity. Edge-grain and end-grain constructions are most stable. Quality fabrication and proper installation virtually eliminate warping concerns.
Final Thoughts: Your Journey to a Warmer, More Personal Kitchen
Wood countertops offer something no engineered material can match: a living surface that evolves with your family’s story, developing character and depth that only improves with time. Whether you choose the timeless appeal of butcher block maple, the sophisticated richness of walnut, or the eco-conscious sustainability of bamboo, you’re investing in a surface that can be repaired, refinished, and reimagined for decades to come rather than replaced when fashion changes.
Beyond aesthetics, wood countertops transform how your kitchen feels—they’re warmer to the touch on cold mornings, gentler on dropped dishes and glassware, and create an organic counterbalance to the hard surfaces and cold appliances that dominate modern kitchens. The subtle grain patterns, natural color variations, and tactile warmth invite interaction and gathering in ways that stone and synthetic materials simply cannot replicate.
Remember that the “perfect” wood counter isn’t about choosing the most expensive species or the most dramatic grain—it’s about finding the wood that speaks to your personal style, fits your maintenance willingness, and works within your functional requirements.
Start small if you’re hesitant, perhaps with a butcher block island, and experience wood’s benefits firsthand before committing to larger installations. Trust that minor scratches and evolving patina aren’t damage but rather the visible evidence of a well-loved, well-used kitchen.
Your Next Step: Measure your island or counter area, calculate square footage, and request quotes from three local fabricators for your top two wood species choices—having real numbers transforms dreams into actionable plans.
Remember: Wood countertops aren’t the lowest-maintenance option, but they may be the most rewarding—each time you oil your counter, sand out a scratch, or notice how the color has deepened over the years, you’re actively participating in your kitchen’s evolution rather than passively using it. That connection between space and inhabitant creates the heart of a home.