10 Stunning Backsplash Kitchen Ideas for a Stylish Upgrade
The kitchen is the heartbeat of any home — where breakfasts are rushed, dinners are laughed over, and little hands are always reaching for something. Your backsplash isn’t just a pretty backdrop; it’s a hardworking surface that protects your walls from splashes, spills, and everyday cooking chaos. Choosing the right one can completely transform the feel of your kitchen without a full renovation.
Whether you’re updating a family kitchen, planning a new build, or just craving a fresh look, the Backsplash Kitchen Ideas is one of the highest-impact, most budget-friendly upgrades you can make. From sleek subway tiles to warm natural stone, there’s a perfect style for every family, every taste, and every budget.
1. Classic White Subway Tile
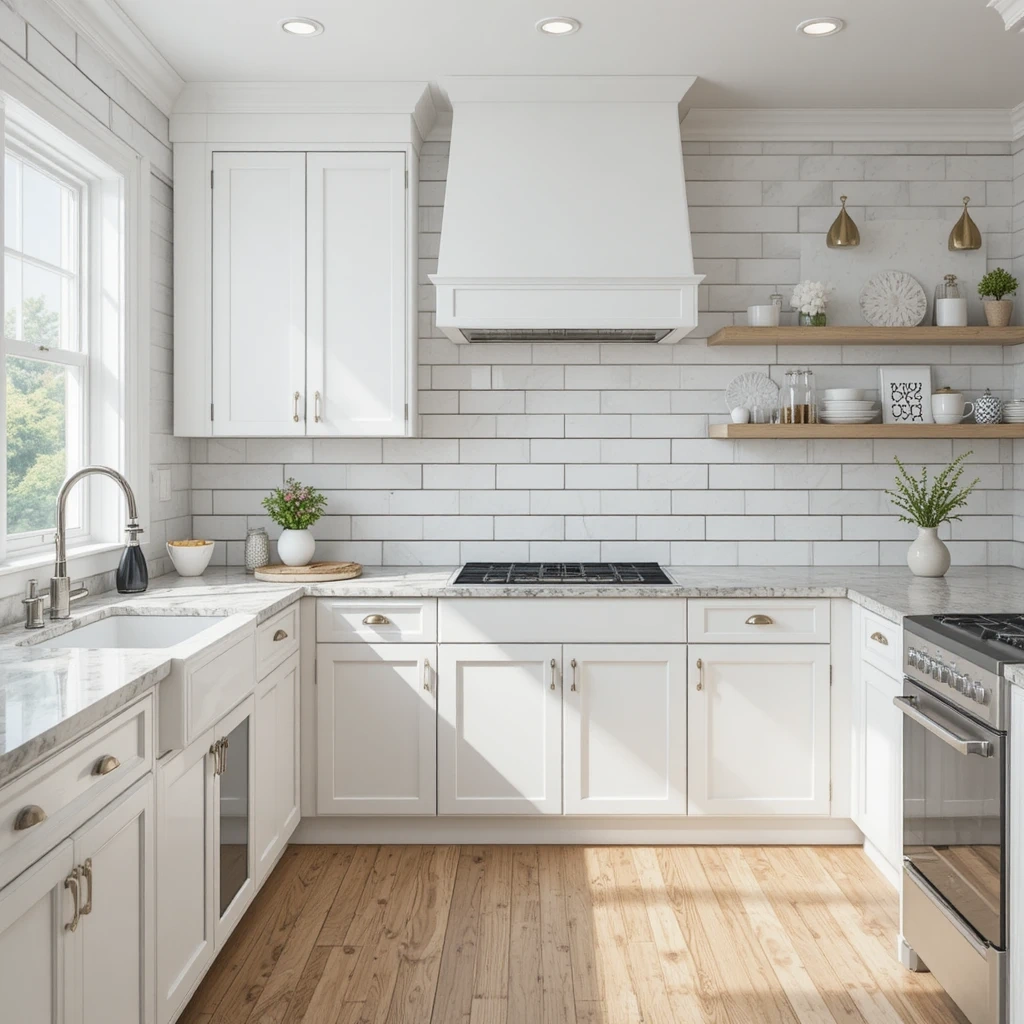
The timeless choice that never goes out of style.
White subway tile has been a kitchen staple since the early 1900s, and for very good reason. Its clean lines, bright finish, and remarkable versatility make it work beautifully in farmhouse kitchens, modern apartments, and everything in between. It reflects light beautifully and makes even small kitchens feel more open and airy. Shop on Amazon
How to Style It
- Lay tiles in a classic horizontal brick pattern for a traditional look
- Try a vertical stack pattern for a more contemporary, elongated feel
- Mix with dark grout (charcoal or slate) for high contrast and a bold statement
- Pair with open wooden shelves and matte black hardware for a modern farmhouse vibe
- Use warm white tiles (not bright white) alongside cream or beige cabinetry to keep things cohesive
Where to Use It
Works beautifully from countertop to cabinet in a full backsplash run, or as a narrow accent strip just behind the stove. Excellent choice for the entire kitchen perimeter.
✅ Pro Tip
Choose a sanded grout in a medium gray tone — it hides stains far better than white grout and dramatically reduces scrubbing time. Perfect for busy family kitchens!
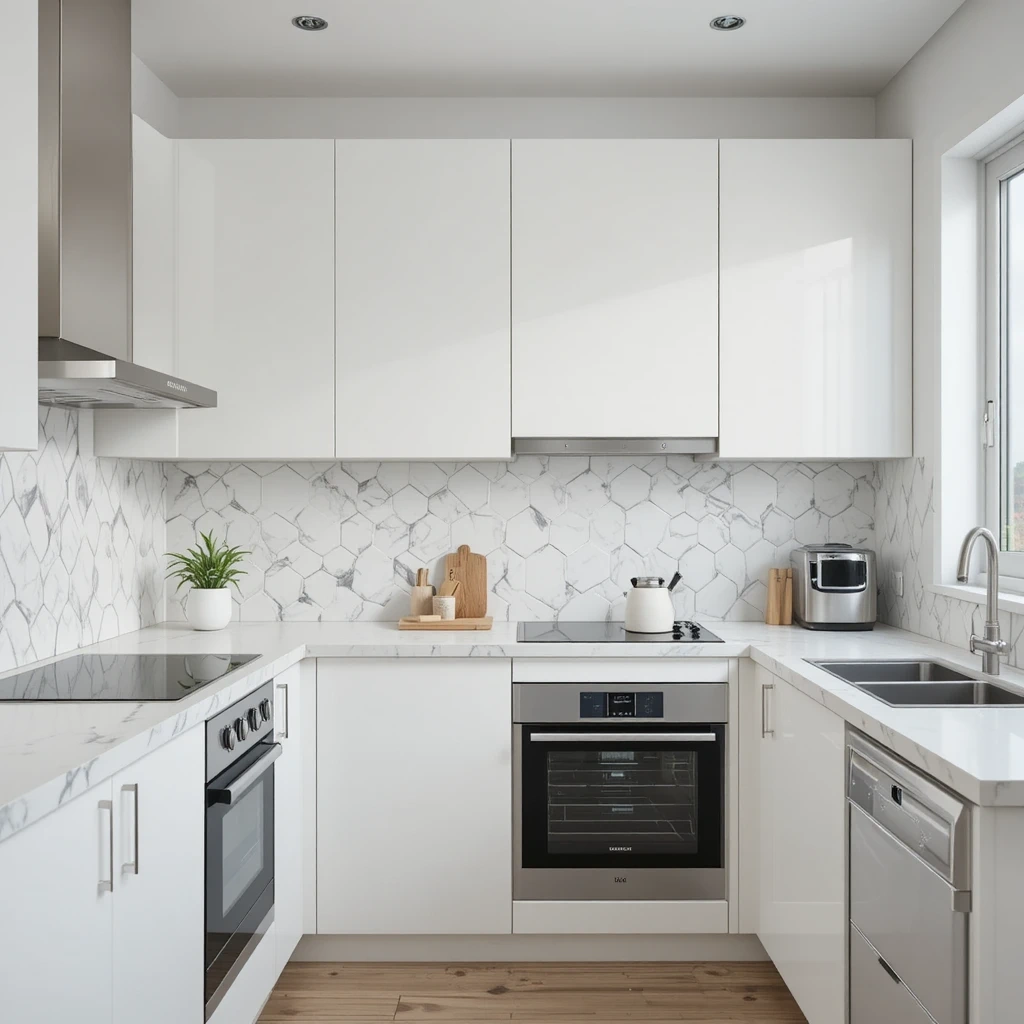
2. Arabesque Tile
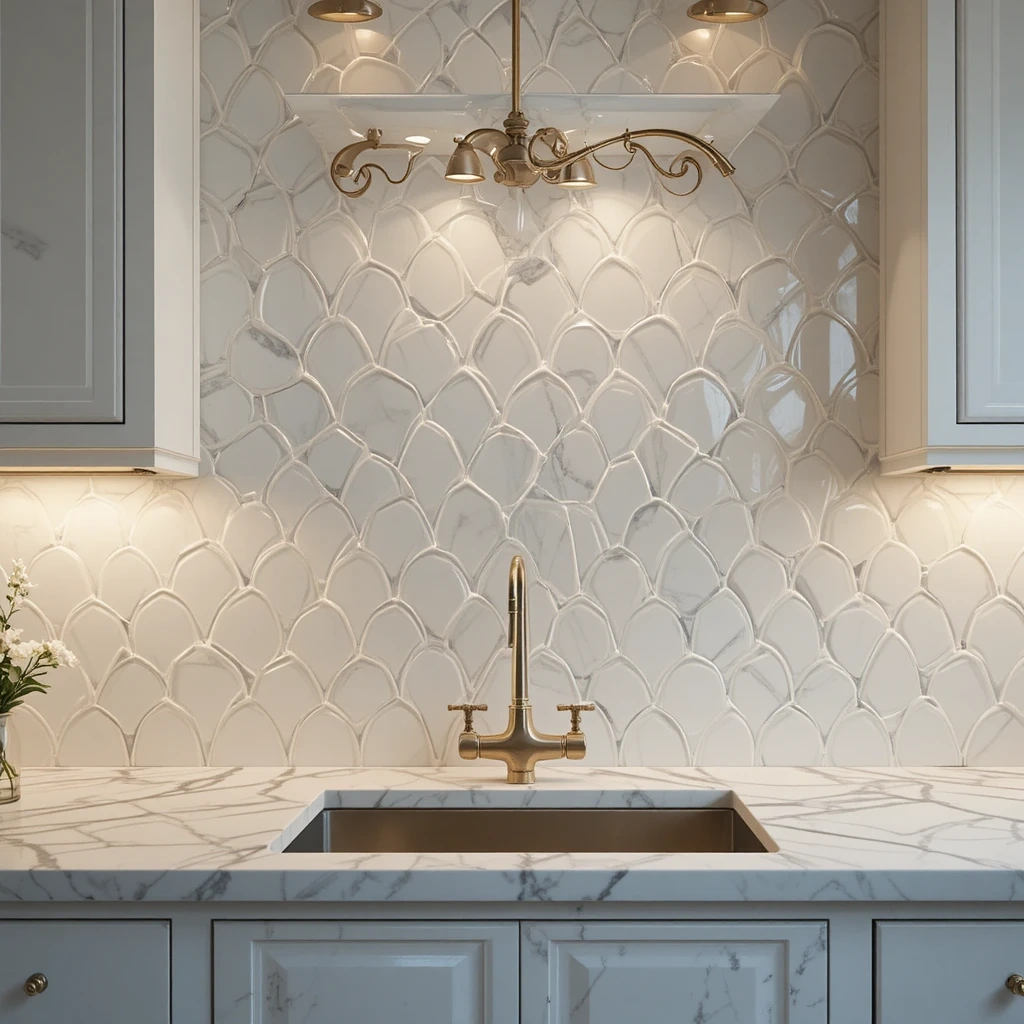
Elegant curves that bring a touch of artisan charm.
Arabesque tiles — named for their graceful, pointed oval silhouette — bring an instantly sophisticated feel to any kitchen. They reference Moorish and Mediterranean design traditions and are experiencing a major design renaissance in modern homes. Despite their intricate look, they’re incredibly easy to live with and clean. Shop on Amazon
How to Style It
- Use crisp white arabesque tiles for a classic, elegant look that suits most kitchens
- Try a glossy pale blue or sage green arabesque for a soft, playful pop of color
- Keep the rest of the kitchen neutral — these tiles are the star and don’t need competition
- Pair with unlacquered brass faucets and hardware for a warm, artisan feel
- Contrast against deep navy or forest green cabinets for a dramatic, editorial look
Where to Use It
Best displayed as a full backsplash between countertop and upper cabinets where the shape can really be appreciated. Also stunning as a focal point behind the stove hood.
Pro Tip
Ask your tile supplier for rectified tiles — these are precision-cut for tighter grout lines, which makes the pattern flow more seamlessly and look more expensive.
3. Herringbone Pattern
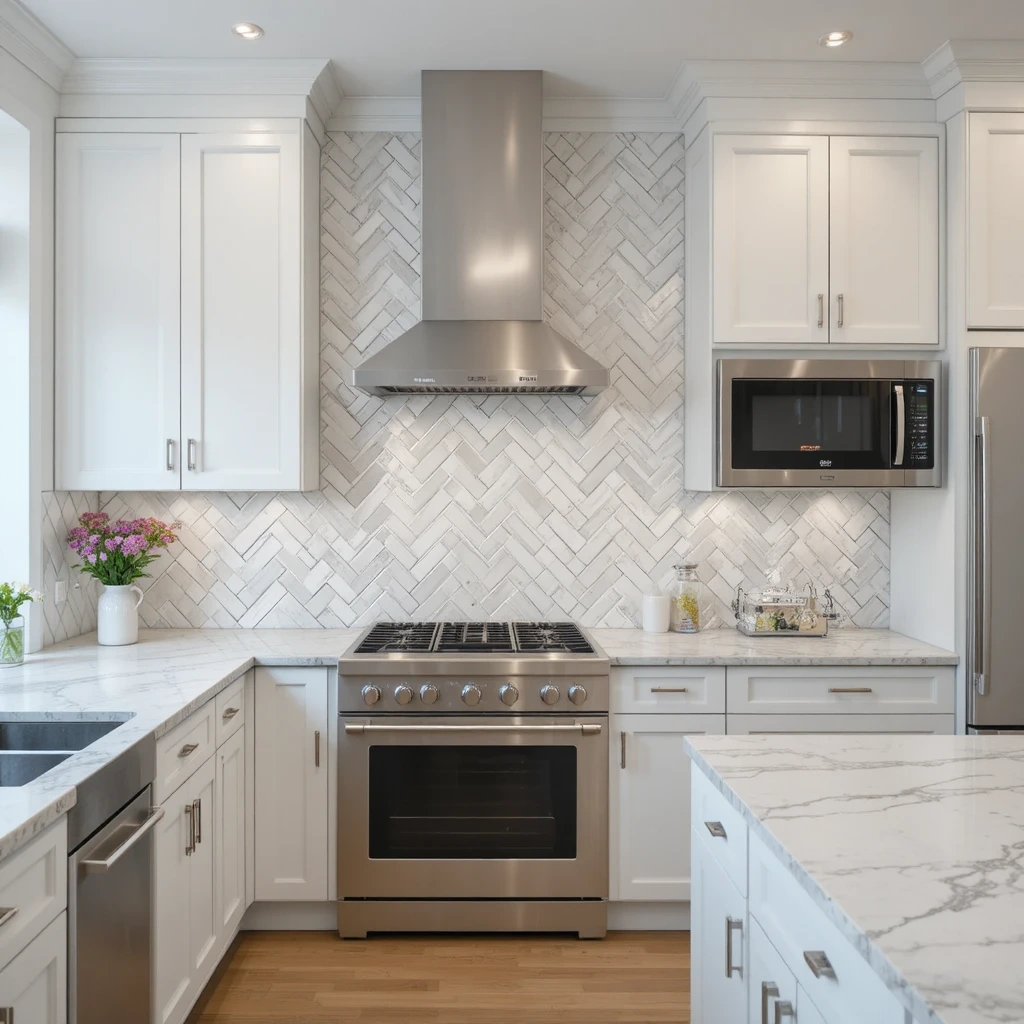
Dynamic geometry that adds movement and sophistication.
The herringbone pattern transforms even the simplest rectangular tile into something visually exciting. By laying tiles at 45-degree angles in a V-shaped zigzag, you create a sense of energy and intentional design that elevates the entire room. It’s a favorite among interior designers for its ability to add texture and visual depth without any extra cost. Shop on Amazon
How to Style It
- Use white or light gray elongated tiles for an elegant, restrained effect
- Try it in a warm terracotta or handmade-look tile for a rustic Italian kitchen feel
- Mix small herringbone mosaic tiles for a behind-the-stove statement panel
- Combine with a horizontal subway tile border to frame the pattern and keep it tidy
- Use darker grout to make the pattern pop dramatically against light-colored tiles
Where to Use It
Exceptionally popular as a stove niche feature wall. Also works beautifully as a full backsplash or as a wainscoting-style lower section paired with plain tiles above.
Pro Tip
Hire a tile setter with herringbone experience — the angled cuts require more skill and planning than straight patterns. Getting the center point perfectly aligned before tiling begins is essential.
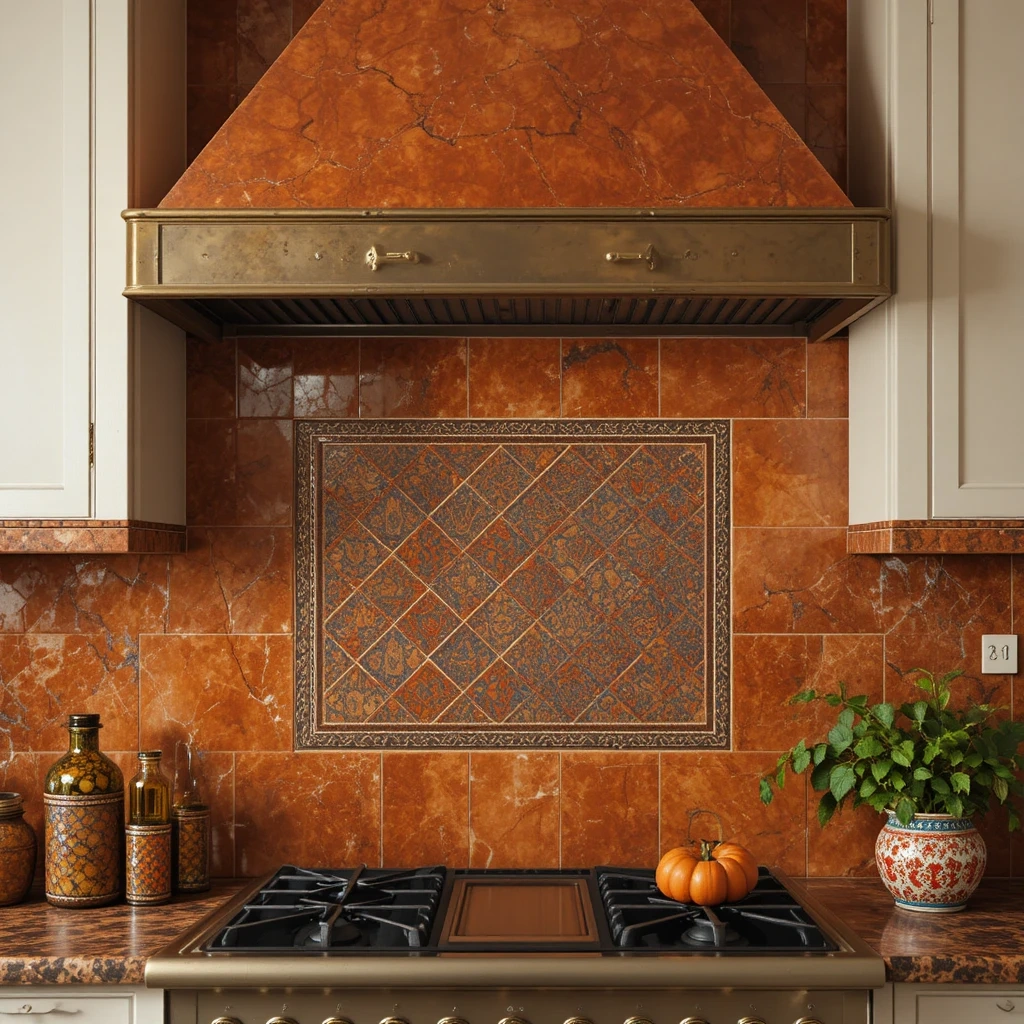
4. Natural Stone (Marble, Travertine & Slate)
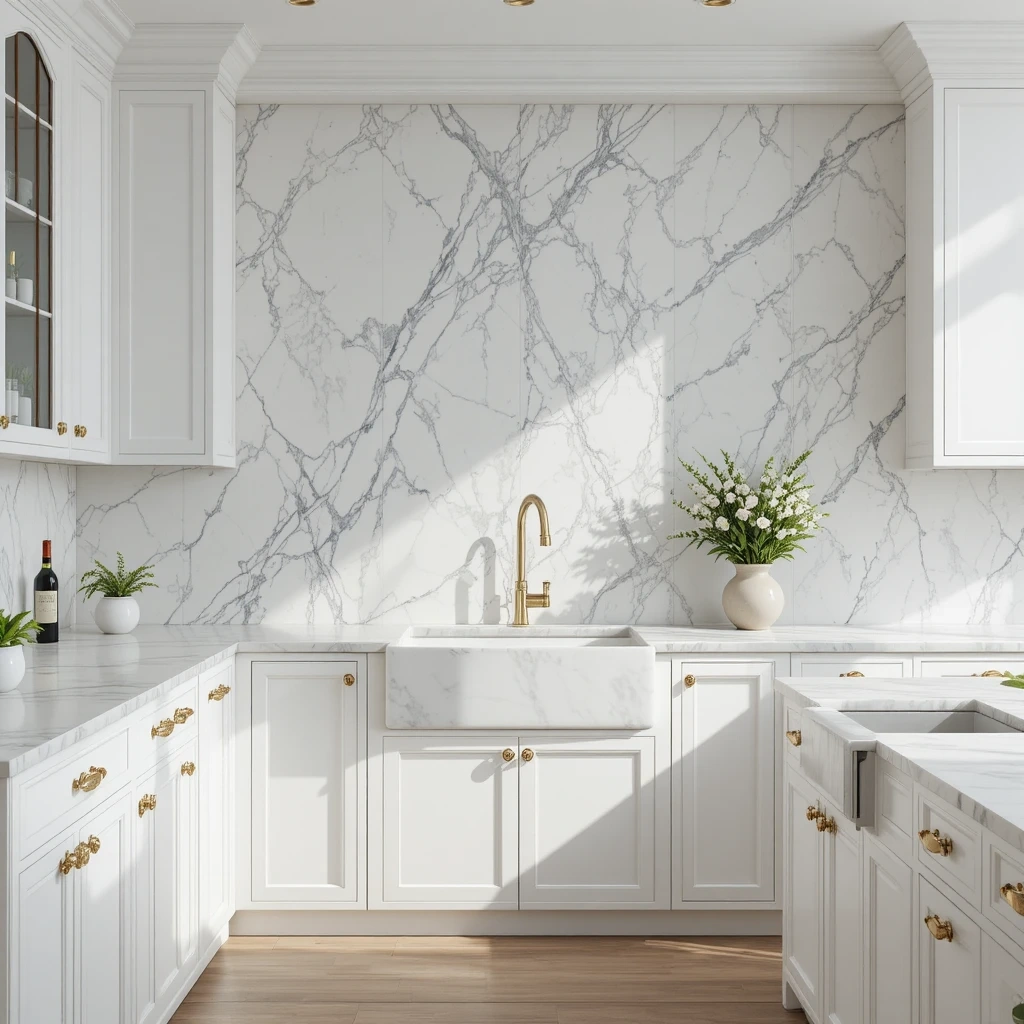
Luxurious, one-of-a-kind, and utterly beautiful.
No two slabs of natural stone are ever identical — every vein, every fleck, every variation is nature’s own signature. Stone backsplashes bring warmth, texture, and a genuine sense of luxury to any kitchen. Marble is the classic choice, travertine has an earthy, ancient feel, and slate brings a dramatic, moodier quality. Shop on Amazon
How to Style It
- Pair white Carrara marble with crisp white cabinets for a seamless, luxurious all-white kitchen
- Use travertine tile with warm wood tones and terracotta accents for a Tuscan-inspired space
- Slate tiles pair beautifully with industrial-style kitchens featuring concrete counters and open shelving
- Extend a marble slab from the countertop straight up as a continuous backsplash for a high-end, seamless look
- Keep grout color very close to the stone color to let the natural material do all the talking
Where to Use It
Works as a full backsplash or as a luxurious slab behind the stove. Slab stone (rather than individual tiles) looks especially stunning and seamless in premium kitchens.
Pro Tip
Seal your natural stone at least once a year with a penetrating stone sealer. Marble especially is prone to etching from acidic foods like lemon juice and tomato — sealing dramatically reduces this risk in a busy family kitchen.
5. Peel-and-Stick Tile
The renter-friendly revolution in kitchen design.
Peel-and-stick backsplash tiles have come an extraordinarily long way in the past few years. Today’s options are made from premium vinyl, composite, or even real stone veneer with adhesive backing — and they look genuinely impressive. For renters, first-time homeowners, or anyone not ready to commit to a permanent tile job, this is a complete game-changer. Shop on Amazon
How to Style It
- Choose a classic subway tile or marble look for a timeless result that photographs beautifully
- Go bold with a geometric black-and-white pattern for a stunning contrast against white cabinets
- Mix and match patterns to create a curated, eclectic feel in a breakfast nook or coffee station
- Use peel-and-stick tiles to refresh just the stove area as an affordable focal point upgrade
- Finish edges cleanly with matching peel-and-stick edge trim strips for a truly polished look
Where to Use It
Ideal for rental kitchens, laundry rooms, or as a quick refresh in any kitchen where you want impact without commitment. Works best on smooth, clean, properly primed drywall.
Pro Tip
Always clean the wall surface with isopropyl alcohol before applying, and wait 48–72 hours before exposing the adhesive to heat or moisture. This curing time makes a major difference in long-term adhesion.
6. Shiplap & Beadboard
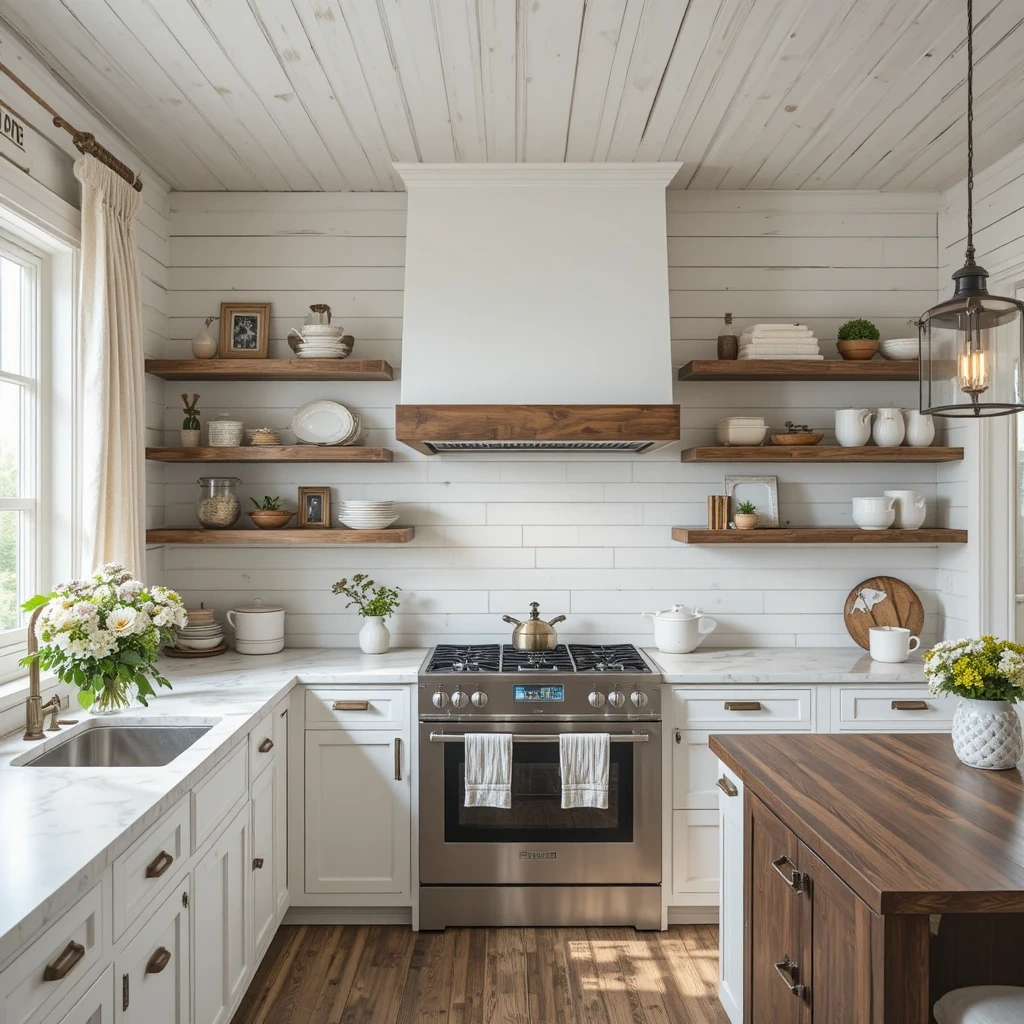
Farmhouse charm with a warm, cozy personality.
Shiplap and beadboard bring the beloved aesthetic of farmhouse and cottage kitchens to life in the most inviting way. These wood-paneled styles have a textural richness that tile simply can’t replicate, and when properly sealed, they’re far more practical in kitchens than most people expect. Joanna Gaines made shiplap a household word — and families everywhere are still in love with it. Shop on Amazon
How to Style It
- Paint shiplap in crisp white for a classic farmhouse kitchen that feels warm and bright
- Try a soft sage green or dusty blue for a cottage kitchen with a gentle pop of color
- Use beadboard in a wainscoting-height panel below a simple tile or painted section above
- Combine painted white shiplap with open wooden shelves and wicker baskets for a full farmhouse look
- Seal with a semi-gloss or satin paint that can be wiped clean easily — essential for family kitchens
Where to Use It
Works beautifully behind the stove with a proper range hood, or as a full kitchen backsplash in low-splatter zones. Best suited to areas away from the sink and dishwasher where moisture exposure is lower.
Pro Tip
Use MDF shiplap panels rather than real wood behind the stove — MDF holds paint better, stays flatter, and is significantly easier to install for DIYers.
7. Zellige Moroccan Tile
Handmade magic with soul, color, and irreplaceable character.
Zellige tiles are hand-chiseled from natural clay and individually glazed by Moroccan artisans — making every single tile slightly different from the next. That beautiful imperfection is exactly what makes them so special. Their glossy, jewel-like surfaces catch and scatter light in ways no machine-made tile can replicate, creating a living, shimmering wall that changes throughout the day. Shop on Amazon
How to Style It
- Use a single color — ivory, sage, terracotta, or cobalt — and let the natural variation do the work
- Create a stunning stove niche in deep emerald or dusty rose to make the kitchen’s focal point unforgettable
- Pair zellige with unlacquered brass or aged bronze hardware for a warm, artisan Mediterranean feel
- Contrast against flat, matte cabinetry — the zellige’s shimmer becomes even more magical against a quiet backdrop
- Mix tones of the same color family (three shades of green, for example) for a rich, layered effect
Where to Use It
Most powerfully used as a stove niche feature wall where the light-catching quality can truly be appreciated. Also extraordinary as a full backsplash in kitchens that can handle the visual richness.
Pro Tip
Zellige tiles are not perfectly flat — use a flexible tile adhesive rather than standard cement-based mortar. This accommodates the natural variation in tile thickness and prevents cracking.
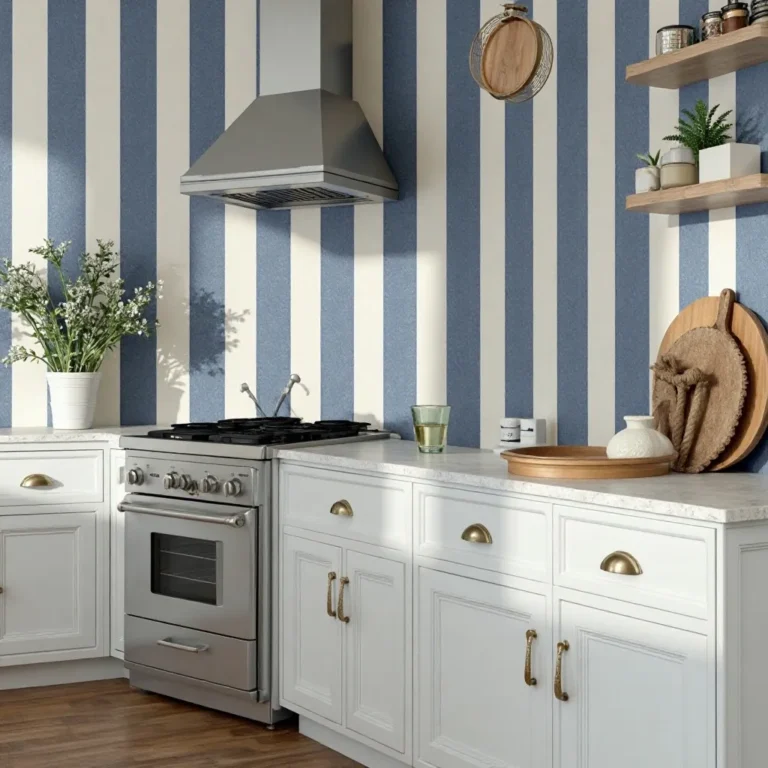
8. Bold Colored Tile
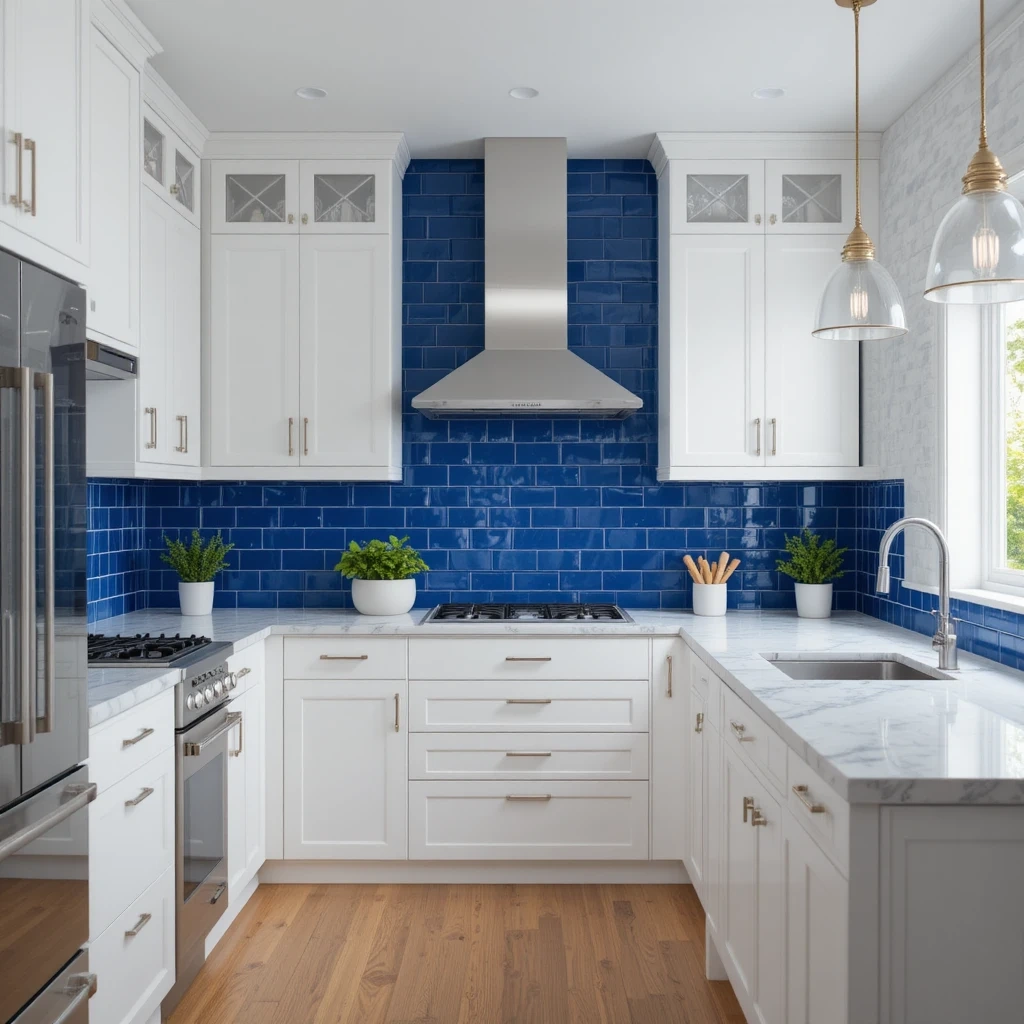
Life is short — use color. Make your kitchen unforgettable.
Color is perhaps the most underused tool in kitchen design, and the backsplash is the single safest place to experiment with it. A bold color on your backsplash is easily changed in the future, keeps your cabinetry investment neutral, and has the power to completely define the personality of your kitchen. Cobalt blue, forest green, sunny yellow, tomato red — the options are endlessly exciting. Shop on Amazon
How to Style It
- Choose one bold color and commit to it confidently — restraint in everything else amplifies the backsplash’s impact
- Pair a cobalt blue tile backsplash with crisp white cabinets for a classic, coastal-inspired kitchen
- Use forest green tiles against raw oak cabinetry for a rich, nature-inspired, deeply modern look
- Try sunny canary yellow subway tiles for a kitchen that radiates warmth and joy — especially lovely with kids
- Keep countertops neutral (white, gray, or black) to let the color backsplash be the undisputed star
Where to Use It
Works brilliantly as a full backsplash or as a focused accent behind the stove. Bold color is most successful in kitchens that get good natural light.
Pro Tip
Order a sample tile first and live with it in your kitchen for a week before committing. Color reads very differently under artificial kitchen lighting than it does in a showroom or on a screen
9. Glass Mosaic Tile
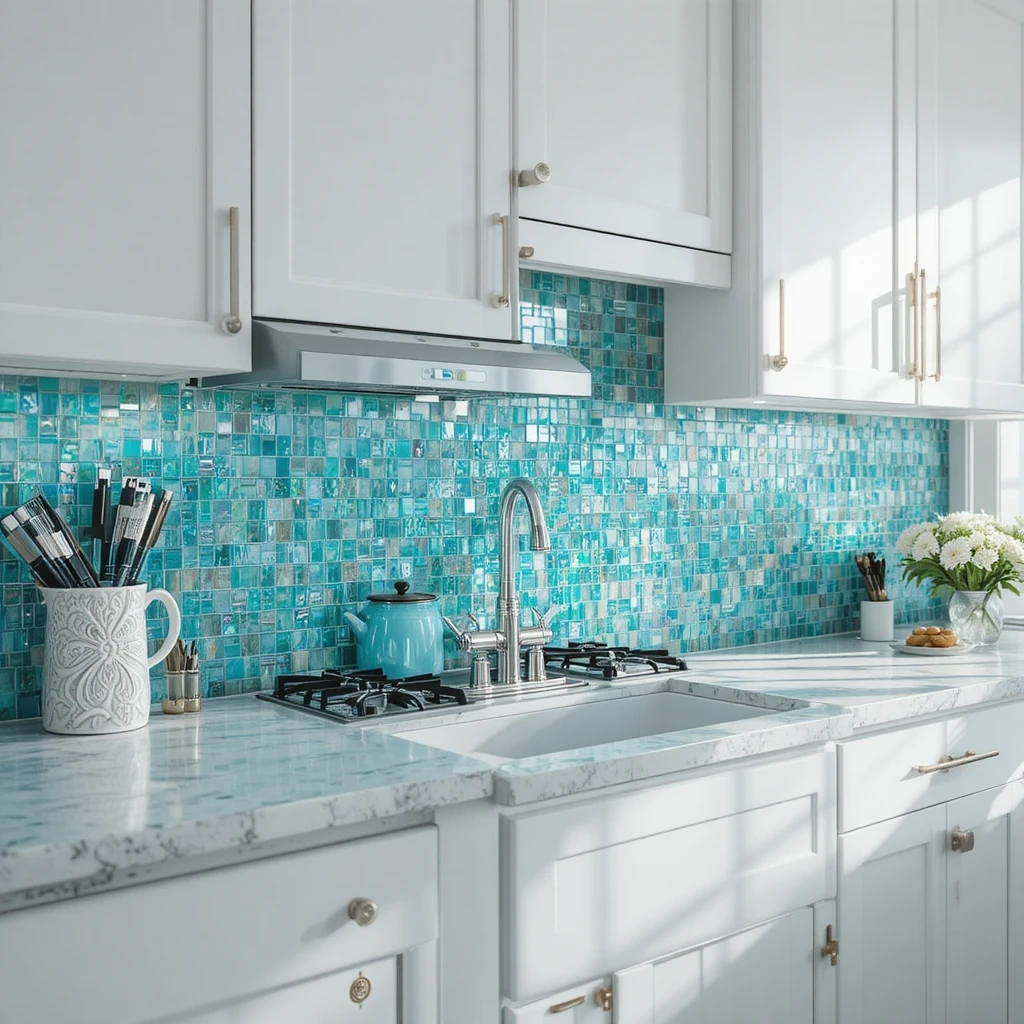
Luminous, glamorous, and uniquely light-catching.
Glass mosaic tiles bring a dimension of light and shimmer that is completely unique in the world of backsplash materials. Because glass is translucent, light doesn’t just bounce off the surface — it passes through it and reflects back in endlessly complex, beautiful ways. The result is a backsplash that genuinely glows and changes character as the light shifts throughout the day. Shop on Amazon
How to Style It
- Choose a single color mosaic in sea glass tones for a serene, coastal kitchen with a spa-like quality
- Use iridescent glass mosaic tiles for a subtle, pearlescent shimmer that’s stunning without being overwhelming
- Try a gradient blend from soft aqua to deep teal for a stunning, artistic focal point behind the stove
- Mix glass mosaic tiles with plain subway tiles — mosaic as the feature insert, subway for the field — for a balanced, layered look
- Pair glass tiles with under-cabinet LED lighting to maximize their light-catching magic at night
Where to Use It
Most impactful as a stove niche feature or in the area above the sink where natural light can hit the tiles during the day. Also beautiful as a full backsplash in kitchens with good lighting.
Pro Tip
Use white or light-colored tile adhesive when installing glass mosaic tiles — the adhesive color shows through the translucent glass, and a dark or gray adhesive will significantly dull the tile’s luminous quality.
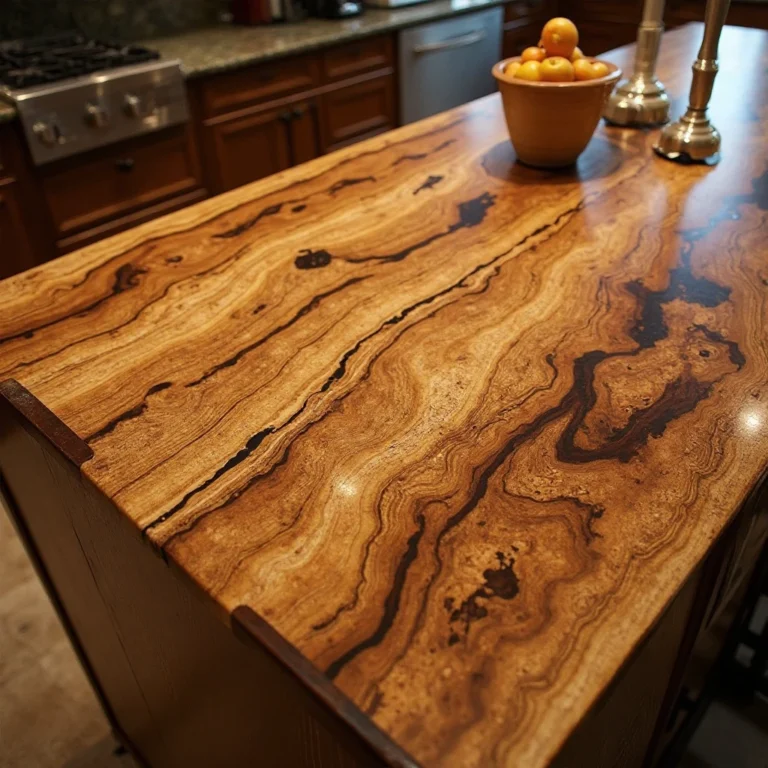
10. Butcher Block & Wood Panel Backsplash
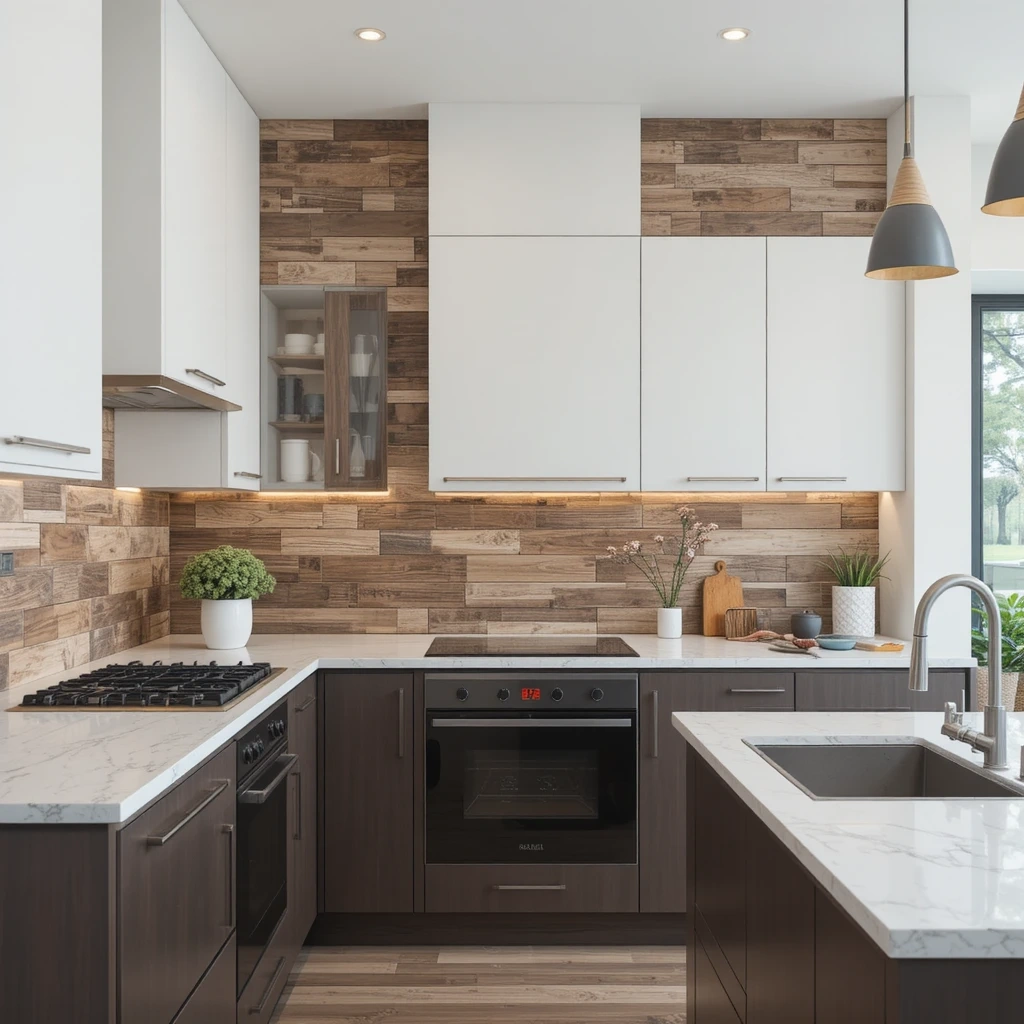
Organic warmth and natural beauty in an unexpected place.
Using wood as a kitchen backsplash is a bold, creative choice that rewards you with unmatched warmth and character. Whether you opt for full butcher block panels, thin wood slices, or reclaimed shiplap-style planks, the result is a kitchen that feels genuinely alive and deeply personal. Properly sealed, wood performs beautifully even in kitchen environments. Shop on Amazon
How to Style It
- Use horizontal teak or walnut panels for a sleek, Scandinavian-inspired kitchen with warmth and depth
- Reclaimed barnwood planks create an irresistibly rustic, one-of-a-kind character wall that cannot be replicated
- Combine a wood panel backsplash with a white or pale stone countertop for a beautiful natural contrast
- Apply a food-safe hardwax oil finish for a natural-looking result that’s still water-resistant and wipeable
- Pair with black matte hardware and fixtures for a sophisticated, editorial look that balances rustic and modern
Where to Use It
Best suited for areas away from the stove and sink. Works beautifully as a full backsplash between upper and lower cabinets, or as a feature wall in a kitchen-dining open-plan space.
Pro Tip
Seal wood backsplash panels with multiple coats of food-safe polyurethane or hardwax oil, and reseal annually. Avoid steam-heavy positions directly beside the stove — steam causes wood to warp over time.
Choosing the Right Backsplash for Your Family
Before you fall in love with any single option, consider a few practical family-first questions:
- Cleaning ease: Smooth, non-porous surfaces (glass, glazed ceramic, porcelain) are the simplest to wipe down after a cooking session with children.
- Durability: Ceramic, porcelain, and glass are among the most durable options. Natural stone requires more care but lasts a lifetime.
- Budget: Peel-and-stick tiles and standard subway tiles offer the best value; zellige and natural stone sit at the premium end.
- Your kitchen’s personality: A boisterous, colorful family kitchen might love a bold blue tile; a calm, minimalist family kitchen would shine with clean white marble.
Common Mistakes to Avoid
1. Skipping a sample before buying Always order sample tiles and hold them against your actual cabinets, countertop, and flooring in your real kitchen light before placing a full order. Colors shift dramatically between showroom and real life.
2. Ignoring grout color Grout covers roughly 20% of your backsplash surface. Choosing the wrong grout color is one of the most common (and painful) backsplash mistakes. White grout looks pristine but stains easily — especially in family kitchens with young children.
3. Forgetting to seal natural stone Marble, travertine, and other natural stones are porous and will absorb oils, acids, and moisture without proper sealing. Seal before grouting and reseal annually.
4. Underestimating tile quantity Always order 10–15% extra tiles to account for cuts, breakage, and future repairs. Running out mid-project and discovering the tile is discontinued is every homeowner’s nightmare.
5. DIYing a complex pattern without experience Herringbone, arabesque, and mosaic tiles require skill, patience, and planning. If you’re new to tiling, choose a simple horizontal subway tile pattern for your first project — or hire a professional for complex designs.
6. Not waterproofing properly near the sink The area immediately behind the sink receives the most moisture in any kitchen. Ensure grout is sealed and consider a smooth, non-porous tile (glazed ceramic or porcelain) in this specific zone.
7. Choosing style over practicality for a family kitchen Heavily textured tiles look beautiful but trap grease and food crumbs. If you have young children, prioritize smooth, easy-clean surfaces — you’ll thank yourself at every mealtime.
Frequently Asked Questions
Q: What is the most popular kitchen backsplash choice right now? Classic white subway tile remains the most popular choice globally, followed closely by natural stone and zellige tile, which have surged in popularity due to social media design trends.
Q: How much does a kitchen backsplash cost to install? Costs vary widely by material and region. Peel-and-stick tile can be as low as $2–$5 per square foot DIY. Ceramic and porcelain tile professionally installed typically runs $10–$25 per square foot. Natural stone and zellige can reach $30–$60+ per square foot installed.
Q: Is a kitchen backsplash necessary? While technically optional, a backsplash protects your wall from grease, moisture, and food splashes — making it a highly practical addition, not just a decorative one. Without it, painted drywall deteriorates quickly behind a stove.
Q: What backsplash is easiest to clean for a family with young kids? Glazed ceramic tile, porcelain tile, and glass tile are the easiest to clean. Smooth surfaces with minimal texture and dark or medium-toned grout lines are the most practical choice for busy family kitchens.
Q: Can I install a backsplash over existing tiles? Yes, in many cases — provided the existing tiles are in good condition, firmly adhered, and the added thickness won’t cause issues with outlets, switches, or countertop edges. Consult a professional before proceeding.
Q: How long does it take to tile a kitchen backsplash? A professional tiler can typically complete a standard kitchen backsplash in 1–2 days, plus an additional day for grout curing. Complex patterns like herringbone or mosaic may take longer.
Q: What’s the best backsplash for a rental property? Peel-and-stick tile is the ideal choice for rentals — it’s affordable, looks great, causes no permanent damage, and can be removed cleanly when moving out.
Q: Are wood backsplashes practical in a kitchen? Yes, when properly sealed with a waterproof finish and maintained regularly. Keep wood away from direct steam exposure (stoves and dishwashers) and reseal once per year for best results.
Final Thoughts
Your kitchen backsplash is one of the most personal design decisions you’ll make — and one of the most rewarding. Whether you choose the timeless simplicity of white subway tile, the artisan soul of Moroccan zellige, or the brave personality of bold-colored tile, the right backsplash will make your kitchen feel more like you.
Choose with your family in mind: how you cook, how often you clean, how your kids interact with the space. The best backsplash isn’t just the prettiest one in a magazine — it’s the one that makes your everyday life more beautiful, more joyful, and a little bit easier.
Happy designing! 🏡
Article last updated: 2025 | Tags: kitchen backsplash ideas, backsplash tiles, kitchen renovation, family kitchen, home decor, kitchen design