12 Unique Garden Rock Art Ideas for Easy Painting Fun
There’s something magical about turning ordinary stones into extraordinary art. Whether you have a sprawling backyard or a cozy balcony corner, garden rock art brings color, personality, and a touch of whimsy to any outdoor space. The best part? It’s affordable, eco-friendly, and endlessly creative.
From painted pebbles to stacked stone sculptures, garden rock art is one of those rare hobbies that the whole family can enjoy together. Kids love getting their hands messy with paint, and grown-ups love the meditative calm of arranging stones just right. Ready to get inspired? Let’s rock!
12 Stunning Garden Rock Art Ideas (With Pro Styling Tips)
1. Painted Rock Butterflies
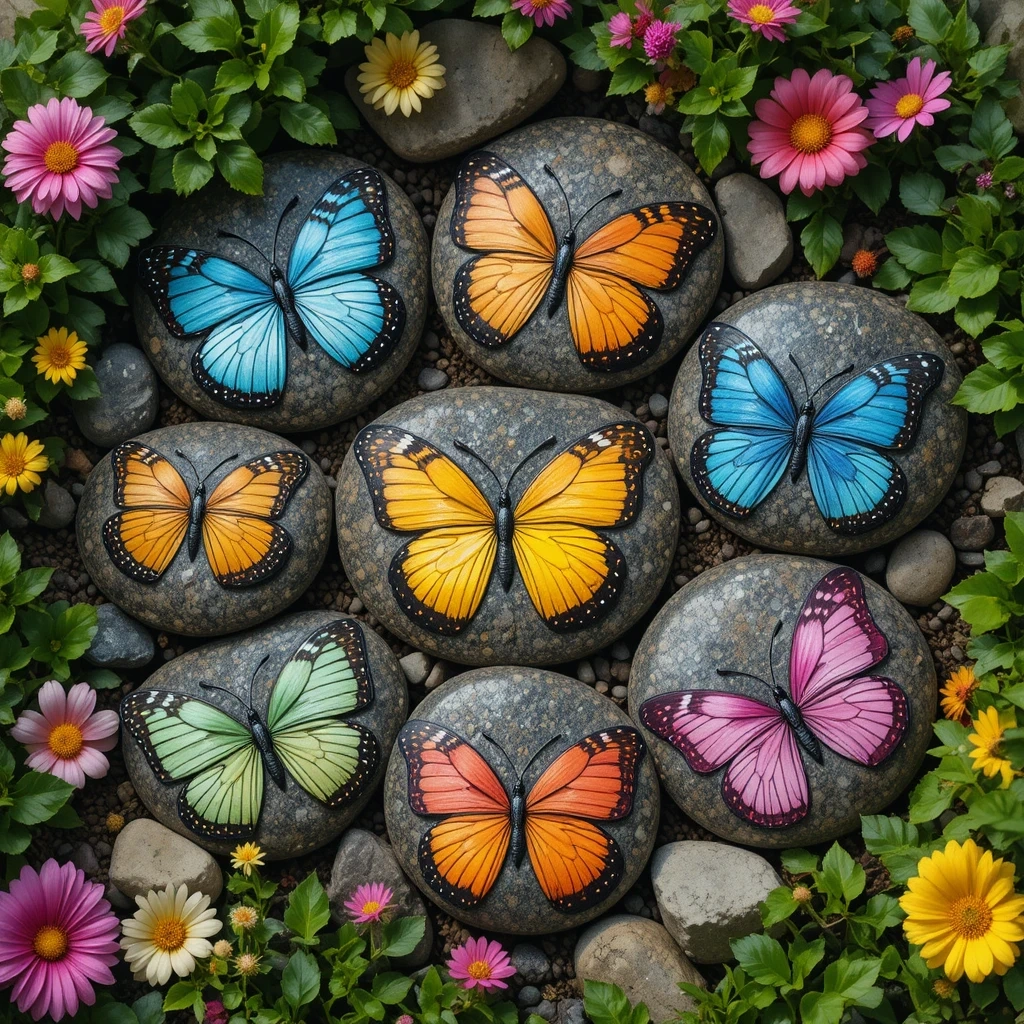
Smooth river rocks painted in vibrant patterns to resemble butterflies — think bold wings with dots, swirls, and bright colors like turquoise, yellow, and magenta. When arranged in clusters among garden flowers, they look like real butterflies have landed in your garden. Shop on Amazon
How to Style It:
- Paint 5–10 rocks in coordinating color families (warm tones or cool tones)
- Add white dot details using the eraser end of a pencil
- Seal with outdoor waterproof varnish for longevity
- Arrange at varying heights using small plant stakes if desired
Where to Use It: Flower beds, potted plant arrangements, pathway edges, or near a birdbath
Pro Tip: 💡 Use flat river rocks — they’re the easiest surface for detailed painting and resist cracking better than rough stones.
2. Zen Stacked Stone Tower (Cairn)

A carefully balanced tower of stones of decreasing size, stacked one on top of another in a graceful column. Often placed near water features, Zen cairns create a sense of peace and mindfulness. The natural grey and beige tones of the stones contrast beautifully against lush green garden foliage. Shop on Amazon
How to Style It:
- Start with your largest, flattest stone as a base
- Choose stones that naturally fit together — don’t force it
- Place near water or a sand garden for full Zen effect
- Keep it to 5–7 stones for stability and visual elegance
Where to Use It: Near ponds, water features, meditation corners, or along a stepping stone path
Pro Tip: 💡 For a permanent cairn, use a tiny dab of waterproof outdoor adhesive between stones — it stays invisible but keeps wind from toppling your art.
3. Rock Mosaic Garden Stepping Stones
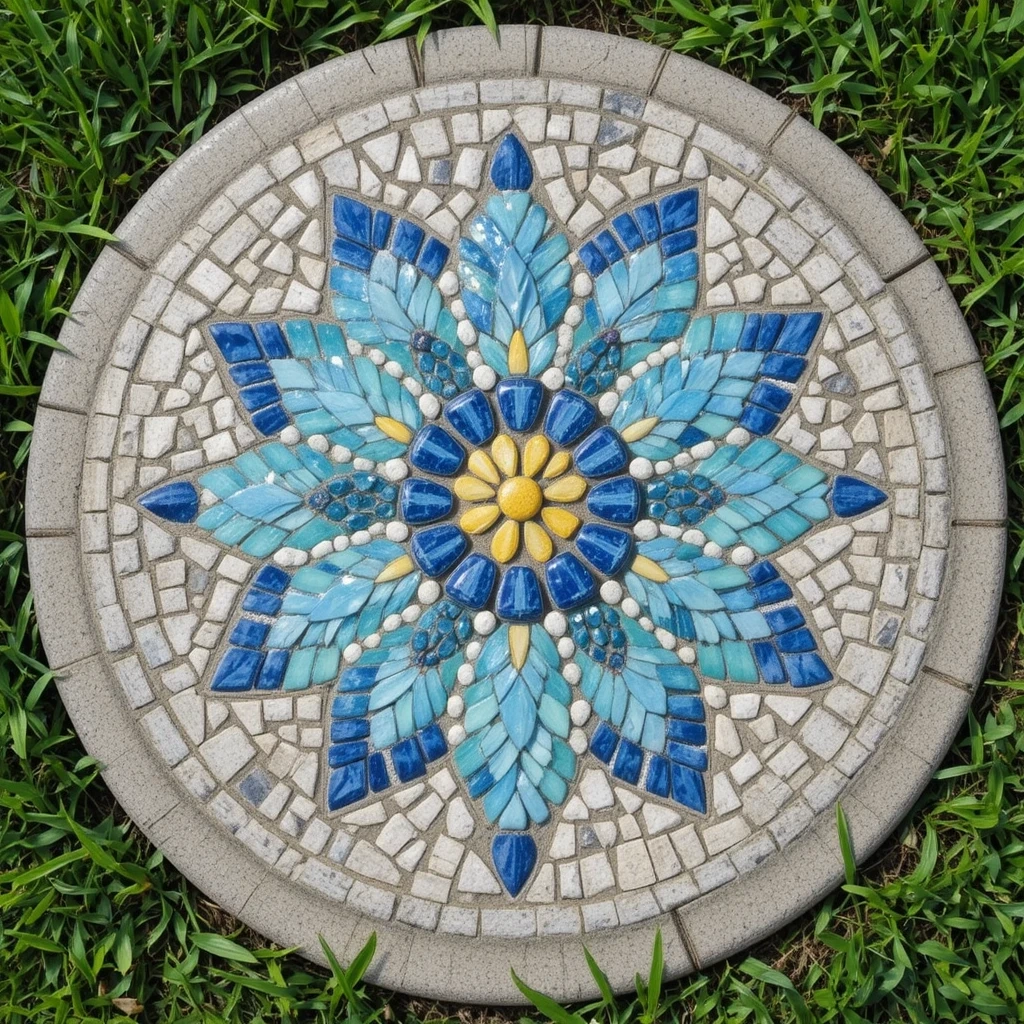
Concrete stepping stones embedded with colorful pebbles, sea glass, and flat stones arranged in flower, geometric, or mandala patterns. Each stone is a miniature mosaic artwork underfoot — functional AND beautiful. Shop on Amazon
How to Style It:
- Use a round concrete mold (or repurpose a cake pan)
- Press pebbles and sea glass into wet concrete in your chosen pattern
- Mix colors intentionally — one dominant color, two accent colors
- Space stepping stones 18–24 inches apart for a natural walking pace
Where to Use It: Garden pathways, lawn walkways, patio edges, or leading to a garden shed
Pro Tip: 💡 Wet your stones before pressing them into concrete — they grip better and the colors appear more vibrant while you work.
4. Rock Animal Family — Turtles & Bugs
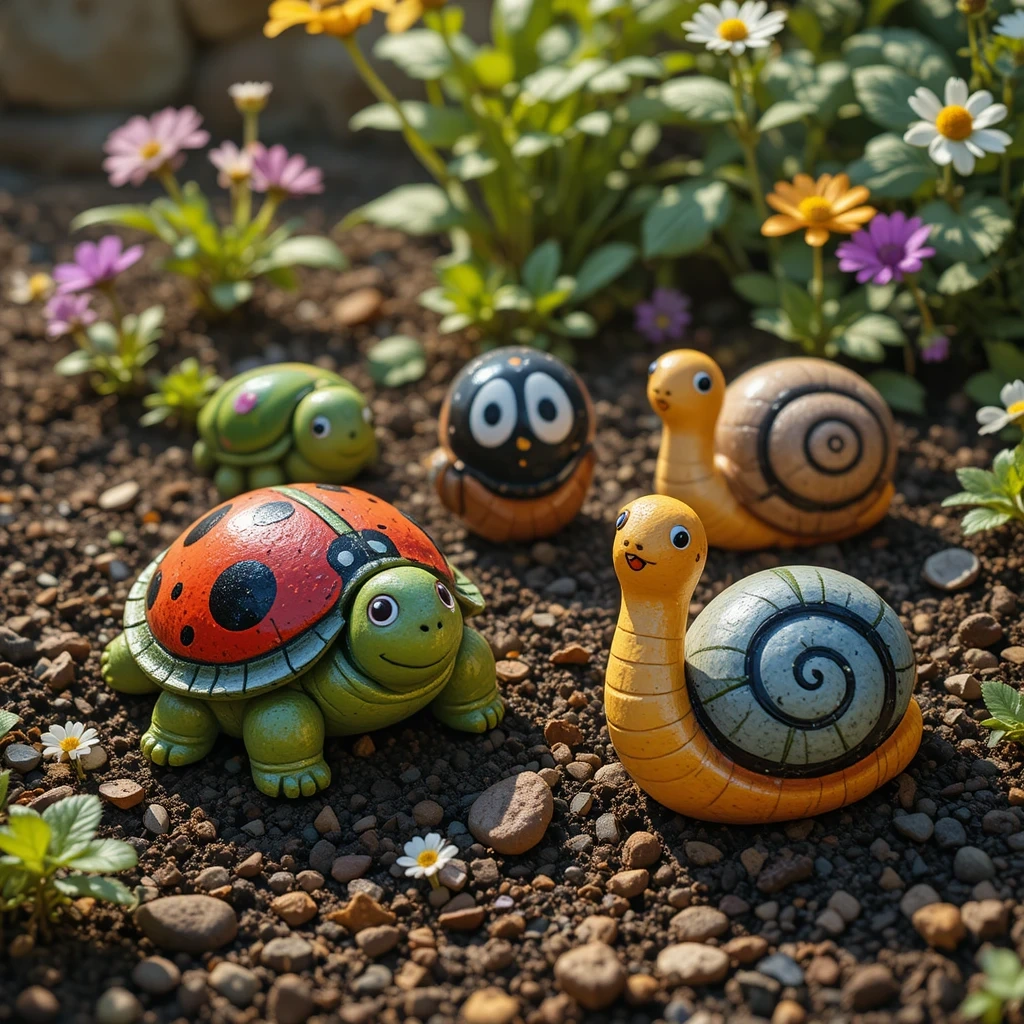
Painted rocks arranged and stacked to create adorable garden animals — turtles with large flat shell-stones, ladybugs with bright red paint and black dots, and snails with spiral shell designs. Perfect for a kids’ garden corner. Shop on Amazon
How to Style It:
- Choose rocks whose natural shape suggests the animal
- Use acrylic outdoor paint and add personality with googly eyes (glued on)
- Group animals together in a “habitat” — turtles near water, bugs near flowers
- Seal with UV-resistant outdoor varnish
Where to Use It: Children’s garden areas, fairy gardens, veggie patch borders, or near a garden pond
Pro Tip: 💡 Let kids name each rock animal and make a little sign for them — it builds connection and gets children excited about spending time in the garden.
5. Rock Word Markers for Herb & Veggie Gardens
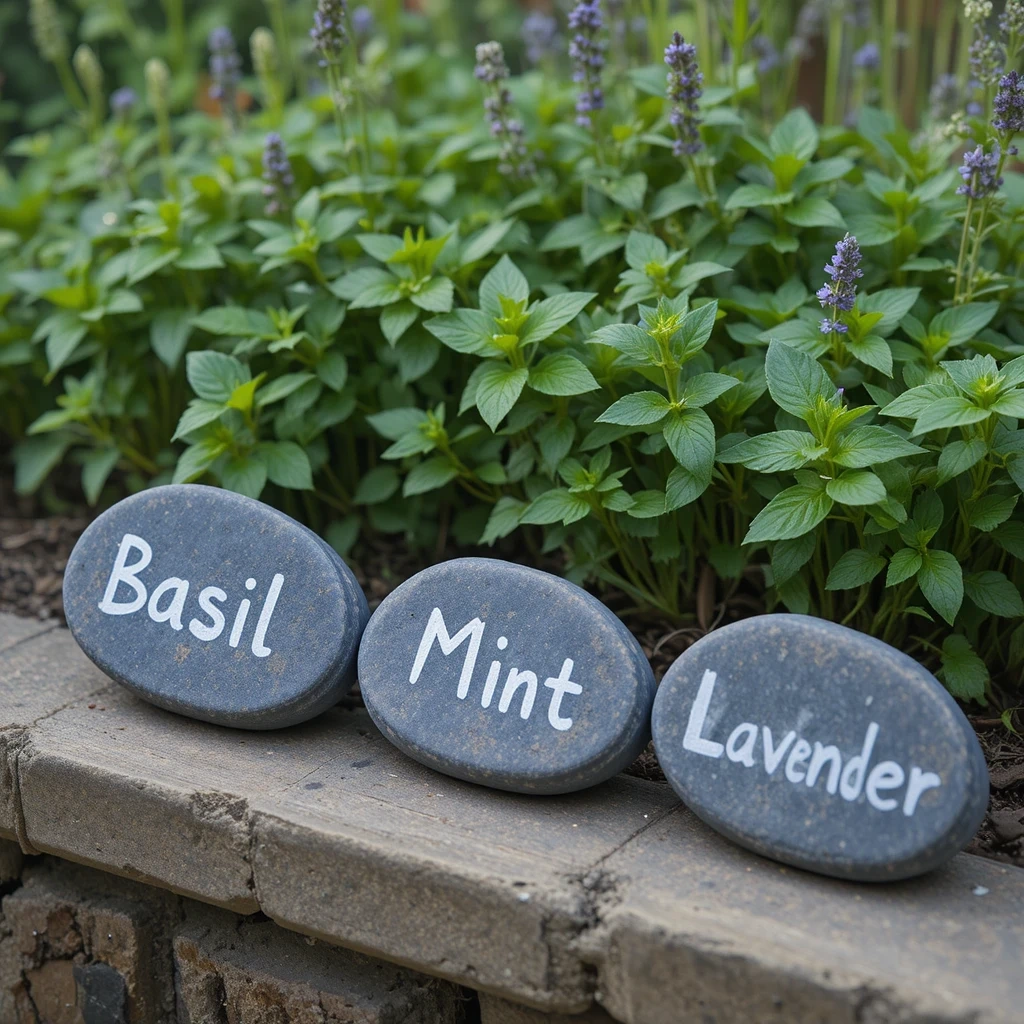
Smooth flat stones painted or engraved with the names of herbs and vegetables — “Basil,” “Mint,” “Tomatoes,” “Lavender” — in beautiful hand-lettered fonts. Natural, rustic, and endlessly practical. Shop on Amazon
How to Style It:
- Use a chalk marker or white outdoor paint pen for clean lettering
- Add a small leaf or flower doodle next to the name
- For a rustic look, leave the stone’s natural color as background
- For a polished look, paint the stone first in chalkboard black or terracotta
Where to Use It: Herb gardens, vegetable patches, flower bed borders, or potted plant labels
Pro Tip: 💡 Paint two coats of outdoor Mod Podge over the lettering — it acts as a sealant AND keeps the paint from yellowing in the sun.
7. Rock Fairy Garden Village

A miniature world built from rocks, pebbles, and stones arranged to look like a tiny village — stone walls, pebble pathways, flat stone rooftops, and moss “lawns.” Add tiny fairy figurines and mini plants to complete the magical scene. Shop on Amazon
How to Style It:
- Use a large shallow planter or a dedicated garden bed corner
- Stack flat stones to build tiny walls and structures
- Use fine gravel as “streets” between the rock buildings
- Add mini succulents, moss, and miniature accessories (mailboxes, doors, benches)
Where to Use It: Patio containers, shaded garden corners, under trees, or alongside a garden fence
Pro Tip: 💡 Moss grows naturally on rocks kept in shade and mist with water — no glue needed! It gives your fairy village an aged, enchanted look within weeks.
8. Painted Mandala Stones
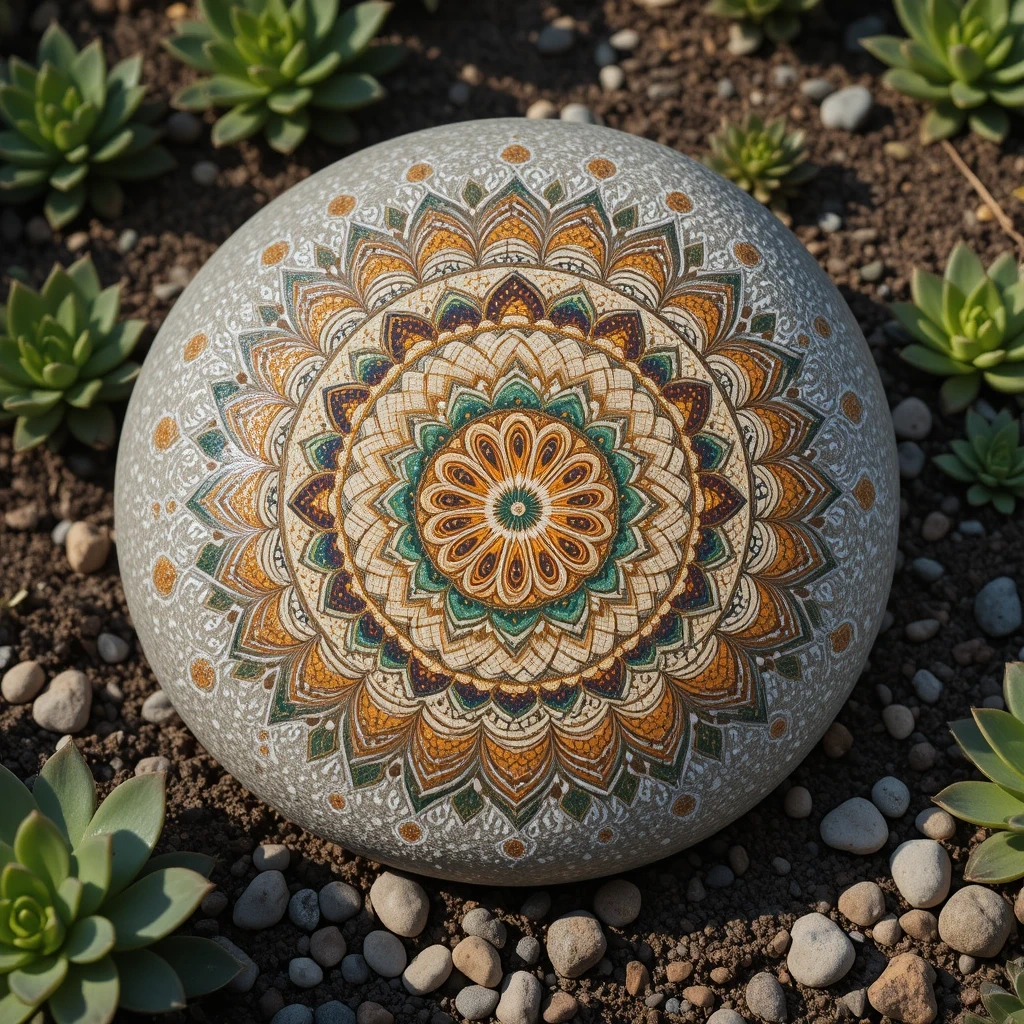
Large smooth stones painted with intricate mandala patterns using round dot-painting techniques. Concentric circles of dots in earthy tones — burnt orange, gold, cream, and forest green — radiate outward from the stone’s center like a sunburst. Shop on Amazon
How to Style It:
- Use dotting tools (or pencil erasers, skewers, cotton swabs) for perfect dots
- Start from the center and work outward — never the reverse
- Stick to a 3-color palette for a cohesive, sophisticated look
- Display on a small easel or nestle flat in a gravel garden bed
Where to Use It: Rock gardens, succulent gardens, meditation spaces, patio tables, or as garden centerpieces
Pro Tip: 💡 Watch one “dot mandala” tutorial on YouTube before starting — the technique is simple but knowing the basic sequence saves hours of frustration.
9. Stacked Stone Animal Sculptures
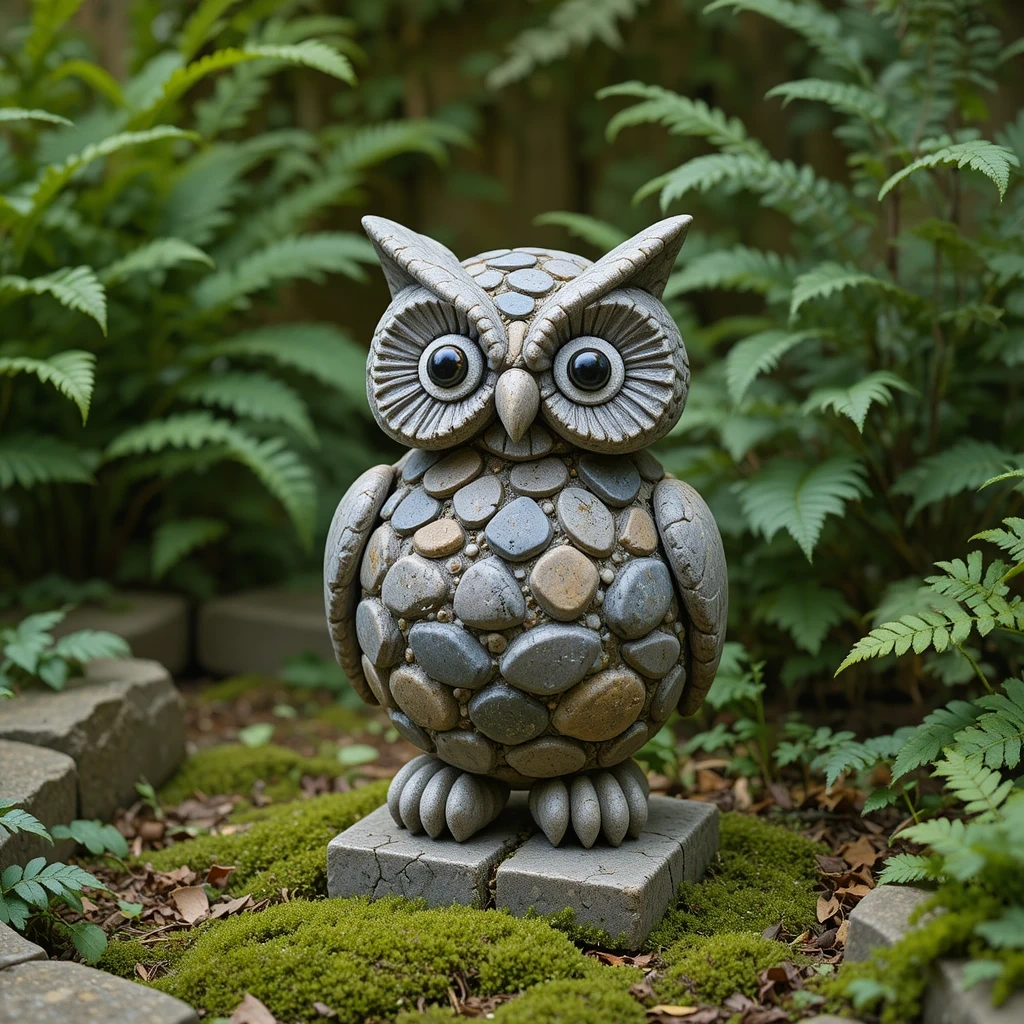
Freestanding sculptures built by stacking and gluing flat and rounded stones together into the silhouettes of animals — a fox, an owl, a bear, or a rabbit. Each sculpture uses the stones’ natural shapes, colors, and textures to suggest the animal’s form. Shop on Amazon
How to Style It:
- Sketch the animal shape first, then hunt for stones that match each body part
- Use exterior stone adhesive or strong waterproof epoxy
- Let each layer dry fully (24 hours) before adding the next
- Add painted details — eyes, ears, fur lines — with a small brush
Where to Use It: Garden entrances, flanking a gate, under trees, beside a garden bench, or on a garden wall
Pro Tip: 💡 Collect stones from different locations to get variety in color and texture — it makes the sculpture look more organic and professionally crafted.
10. Pebble Mulch Rock Garden (Japanese Style)
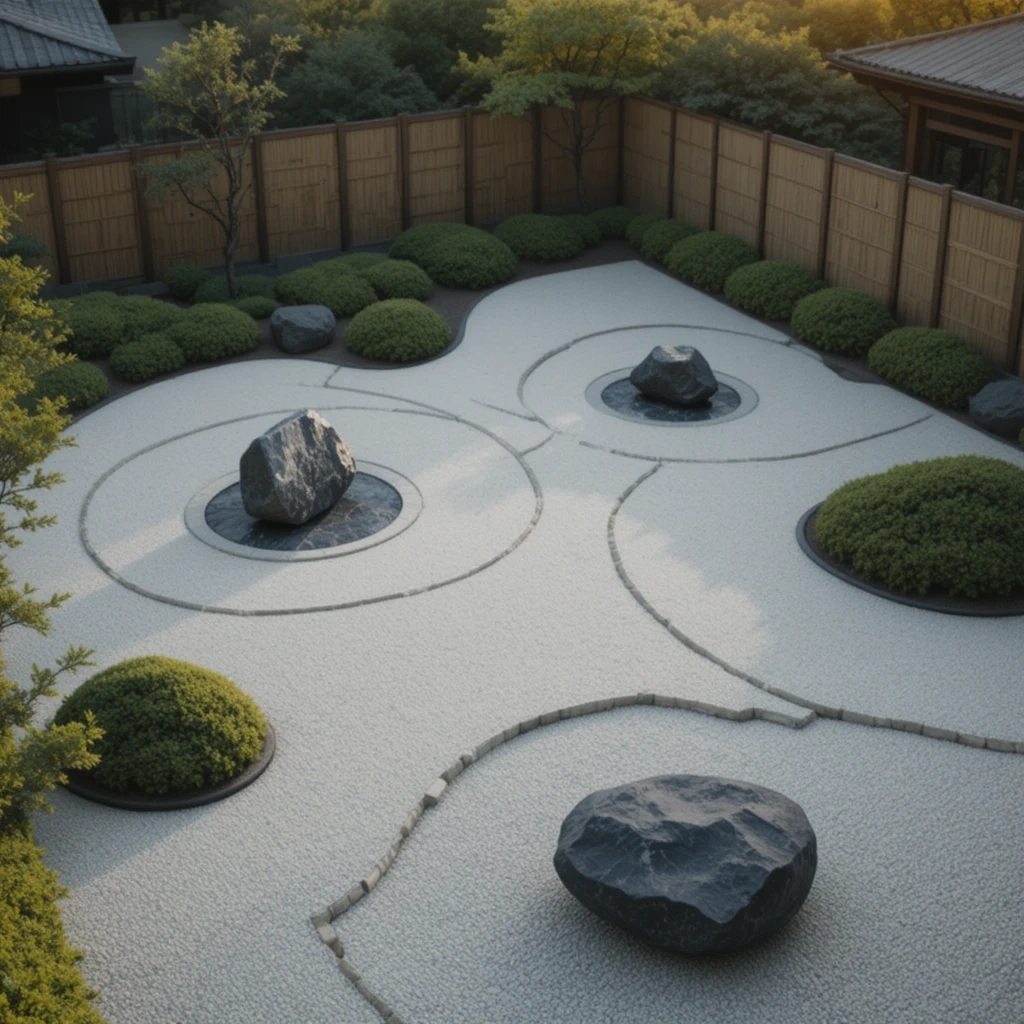
A raked gravel and pebble garden inspired by Japanese Zen garden design. Smooth white or grey pebbles are raked into wave and circle patterns, with larger accent stones placed deliberately as focal points. Minimal, serene, and timeless. Shop on Amazon
How to Style It:
- Define the garden area with wood, bamboo, or stone edging
- Use fine white or grey gravel as your base layer (2–3 inches deep)
- Place 3–5 large feature stones asymmetrically — odd numbers feel most natural
- Rake patterns weekly — it’s meditative and keeps the garden looking pristine
Where to Use It: Side yards, minimalist patio corners, between stepping stones, or as a low-maintenance front garden feature
Pro Tip: 💡 Lay landscaping fabric under your gravel before filling — it blocks weeds completely without affecting drainage. Future-you will be very grateful.
11. Rock Mural — Nature Scene Wall Art
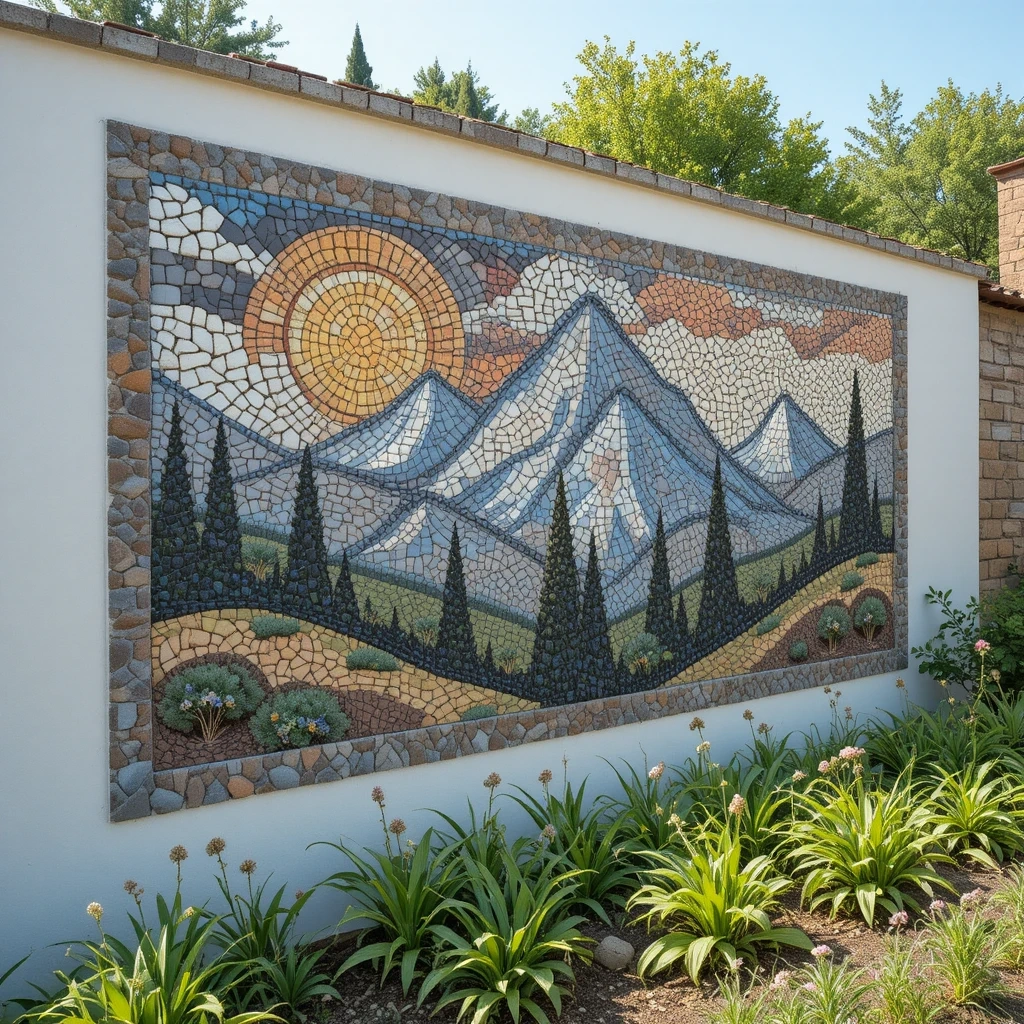
Flat stones and pebbles glued onto an outdoor wall, fence, or wooden board to create a mosaic mural — a sun rising over mountains, a tree in bloom, or ocean waves. Each stone is a pixel in a beautiful nature painting. Shop on Amazon
How to Style It:
- Sketch your design on the wall/board first with chalk
- Sort your stones by color before starting (light, medium, dark tones)
- Use outdoor tile adhesive or cement to set each stone
- Grout between stones (optional) for a polished mosaic finish
Where to Use It: Garden walls, wooden fence panels, the back of a garden shed, or a dedicated art wall
Pro Tip: 💡 Start with a simple silhouette design (a tree, a sun, a bird) for your first mural — complex scenes are rewarding but require much more sorting and planning.
12. Painted Rock Flower Garden (No Watering Required!)
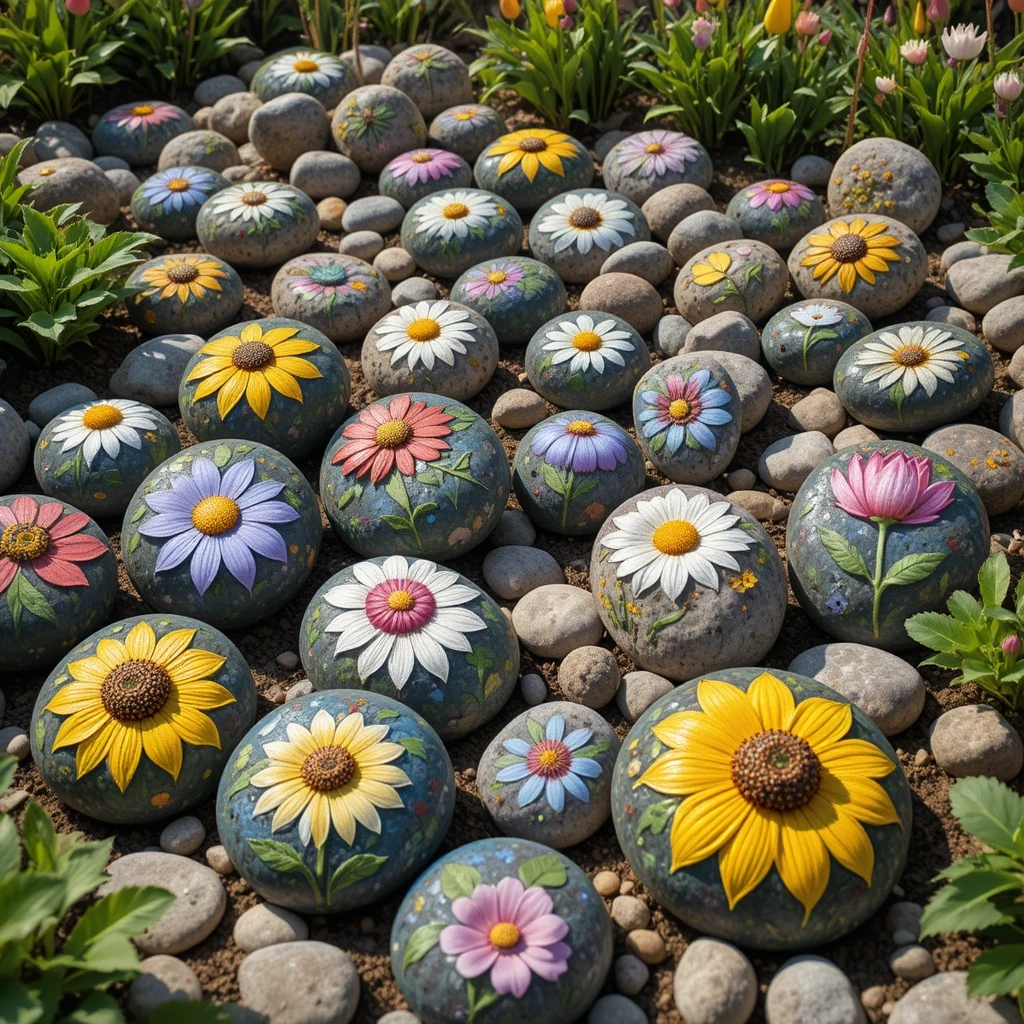
Rocks painted to look like flowers — sunflowers, daisies, roses, and tulips — arranged in a flower bed or container garden. They add permanent, all-season color to your garden without any maintenance. Perfect for areas where real plants struggle to grow. Shop on Amazon
How to Style It:
- Paint each rock as a different flower type — vary the shapes too (round rocks = daisies, oval = tulips)
- Mount rocks on garden stakes or thick wire to create varying heights
- Mix painted rock flowers with real low-maintenance plants like hostas for a natural effect
- Seal every painted rock with UV-resistant outdoor varnish to prevent fading
Where to Use It: Shady garden areas, gravel gardens, mailbox borders, window boxes, or mixed container gardens
Pro Tip: 💡 Use reference photos of real flowers when painting — even a quick glance at a real sunflower dramatically improves how realistic your painted version looks.
Common Mistakes to Avoid
1. Skipping the Sealer Outdoor paint fades fast without UV-resistant varnish. Always seal your finished rock art — it doubles the lifespan of your work.
2. Using the Wrong Paint Craft store acrylic works short-term, but exterior-grade or multi-surface acrylics hold up far better to rain, sun, and frost. Check the label.
3. Painting Wet or Dusty Rocks Always clean and dry your stones completely before painting. Dust and moisture prevent paint from adhering properly and cause peeling within weeks.
4. Overcrowding the Garden Rock art looks best with breathing room. A few well-placed pieces create more visual impact than dozens crammed together.
5. Ignoring Scale A tiny painted pebble gets lost in a large garden bed. Match the size of your rock art to the scale of the space around it.
6. Choosing Porous Rocks Rough, porous rocks soak up paint and make detailed painting nearly impossible. Smooth river rocks or slate are almost always the best choice.
7. Forgetting Kids’ Safety If children are helping paint, use non-toxic, washable paints for the activity — then touch up with weather-resistant paint once the design is done.
Frequently Asked Questions
Q: What type of rocks are best for painted garden art? Smooth river rocks and flat slate stones are the gold standard. They’re easy to paint, hold detail well, and are durable outdoors. Avoid porous or crumbly rocks.
Q: How do I make painted rocks weatherproof? Apply 2–3 coats of outdoor waterproof varnish (Mod Podge Outdoor, Krylon UV-Resistant, or similar) after your paint is fully dry. Reapply once a year in high-sun climates.
Q: Can kids help with garden rock art? Absolutely — it’s one of the best family activities! Younger children can paint simple designs, apply stickers, or arrange rocks. Use non-toxic paint and supervise with adhesives.
Q: How long does rock art last outdoors? With proper sealing, painted rock art can last 3–5 years or longer. Unsealed rocks may fade or chip within one season, especially in rainy or sunny climates.
Q: Do I need artistic talent to make garden rock art? Not at all! Many of the most popular techniques — dot painting, stamping, and basic shapes — require zero drawing skills. If you can hold a brush, you can make beautiful rock art.
Q: What’s the best paint for outdoor rocks? Multi-surface acrylic paint (DecoArt Outdoor Living, FolkArt Outdoor, or Montana Cans) performs best. Always finish with UV-resistant sealer.
Q: Can I use garden rocks I find outside? Yes! Just clean them thoroughly with a brush and mild soap, let them dry completely for 24–48 hours, then sand lightly if the surface is rough. Free is always better. 🙂
Q: How do I keep my Zen stone cairn from falling over? For decorative permanence, use a tiny amount of outdoor waterproof epoxy between stones. It’s nearly invisible once dry but completely wind-proof.
Final Thoughts
Garden rock art is one of those rare creative pursuits where the materials are free (or nearly free), the process is joyful, and the results genuinely transform your outdoor space. Whether you start with a single painted turtle pebble or go all-in on a Japanese Zen garden, you’ll find that working with stone connects you to something timeless — and endlessly satisfying.
So grab some rocks, gather the kids, and let your garden tell a story.
Happy creating!