10 Modern Pool Float Storage Ideas for Easy Organization
Picture this: It’s a sunny Saturday morning, the kids are already in their swimsuits, and everyone is excited to jump in the pool. But first — someone has to wrestle three giant unicorn floats out of the garage corner where they’ve been slowly deflating since last weekend. Sound familiar? You’re not alone! Pool float storage is one of those small problems that causes big headaches for families everywhere.
The good news is that with a little creativity and the right setup, storing your pool floats can be easy, organized, and even fun. Whether you have a tiny patio or a spacious backyard, there’s a storage solution that fits your space, your budget, and your family’s lifestyle — and we’re about to walk you through ten of the very best ones.
Why Pool Float Storage Even Matters
Leaving pool floats scattered around the yard doesn’t just look messy — it shortens their life span, creates tripping hazards for little ones, and makes pool time feel like a chore before it even begins. Good storage protects your investment, keeps your backyard looking beautiful, and means your kids can grab their favorite float in seconds.
That’s a win for the whole family! Ready to dive in? Here are 10 brilliant pool float storage ideas, complete with everything you need to set them up perfectly.
1. Large Outdoor Storage Bin
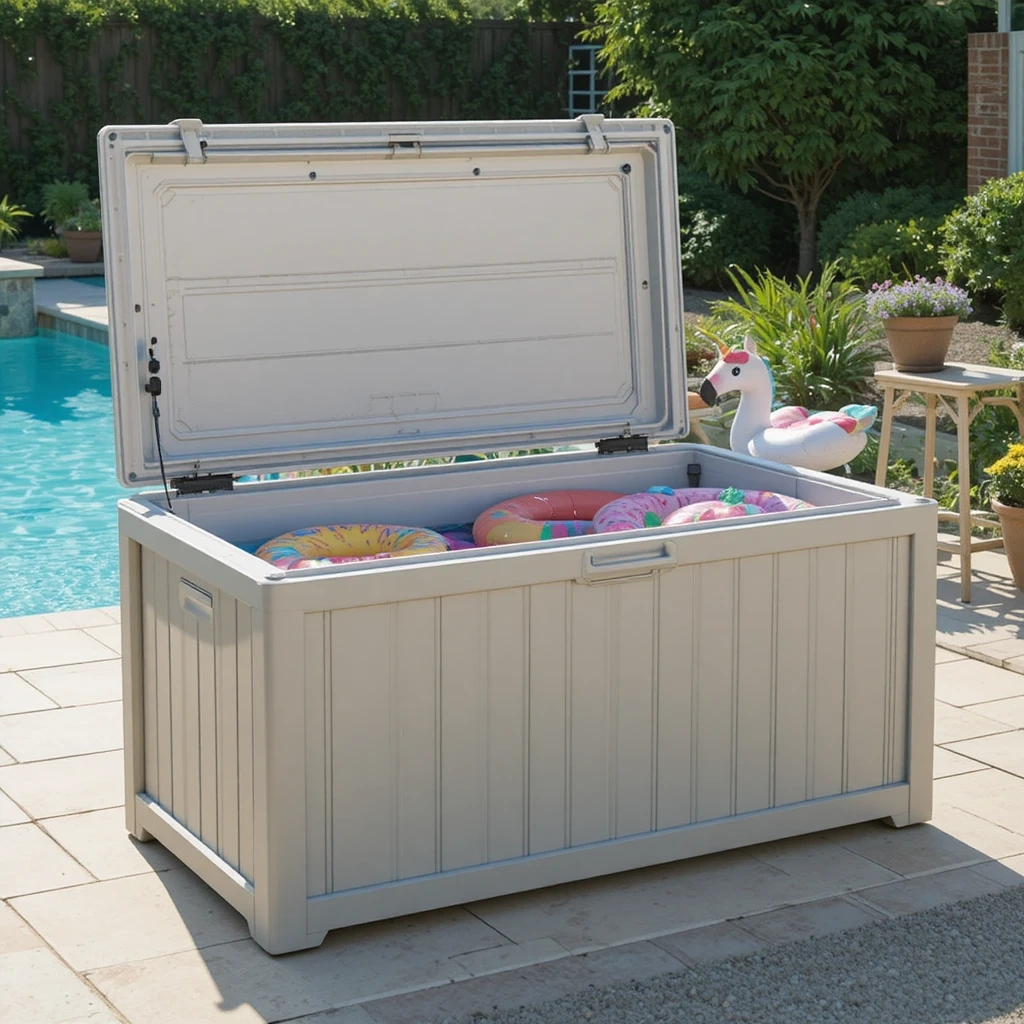
The go-to solution for busy families who just need things put away — fast.
A large outdoor storage bin (also called a deck box) is probably the most practical pool float storage solution out there. These weatherproof containers come in various sizes, snap shut to keep out rain, and can double as extra seating by the pool. You simply toss the floats in, close the lid, and you’re done. Kids can do it themselves, which means less work for you! Shop on Amazon
How to Style It:
- Choose a box color that matches your patio furniture (gray, beige, or brown are crowd favorites)
- Add a small chalkboard label on the front so kids know exactly where floats go
- Line the bottom with a pool towel to protect floats from rough surfaces
- Place it close to pool steps for the easiest grab-and-go access
Where to Use It: Patio, deck, poolside, side of the house, or even inside a garage
⭐ Pro Tip: Look for a storage bin with ventilation slits or drill a few small holes on the sides. This prevents mold and mildew from building up on damp floats — especially important in humid climates!
2. Hanging Cargo Net
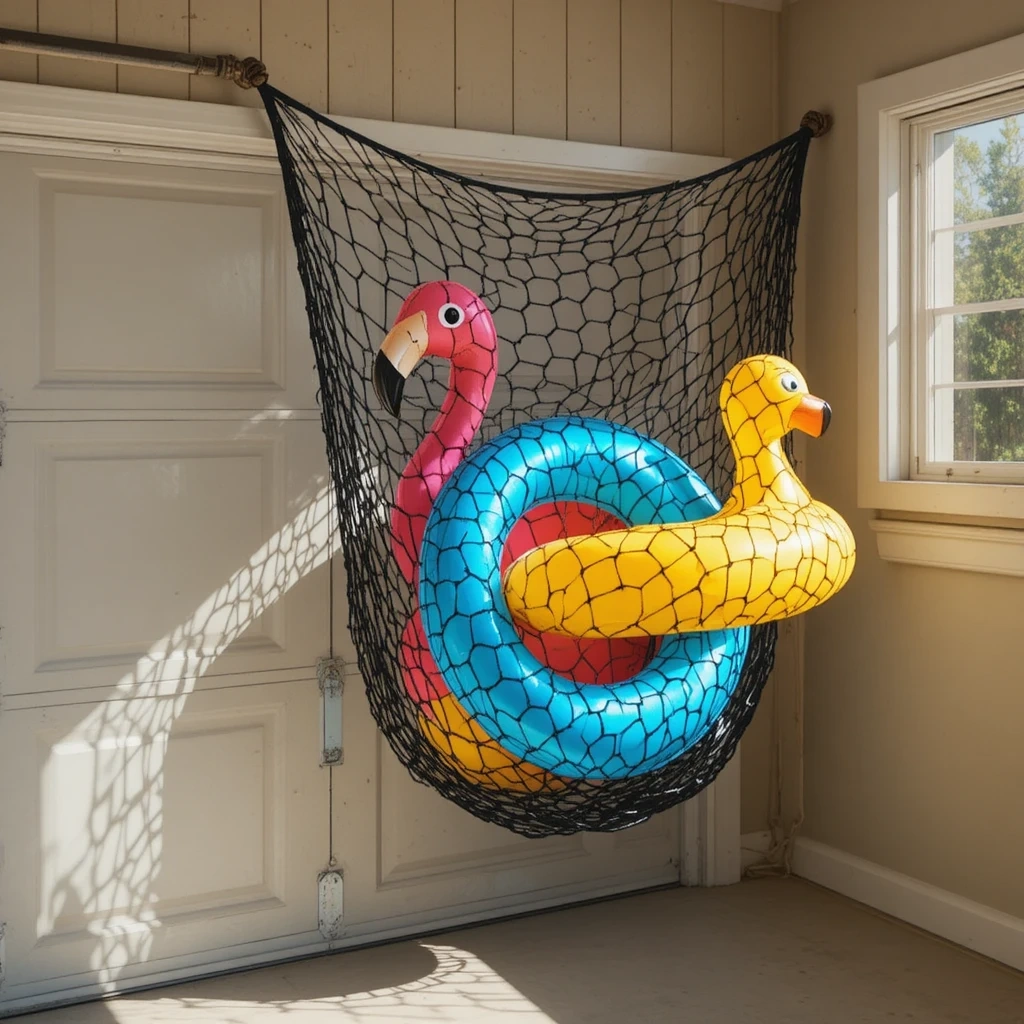
A playful and space-saving solution that kids absolutely love.
Hang a cargo net in your garage, under a covered porch, or along a fence, and suddenly you have the perfect hammock for all your inflated pool floats. Cargo nets are incredibly affordable, easy to install, and hold an impressive number of floats without taking up any floor space. The open-weave design also lets floats air out and dry after use — no mold worries here! Shop on Amazon
How to Style It:
- Mount two heavy-duty hooks into wall studs or a wooden beam for maximum support
- Use bungee cords to reinforce the corners so floats don’t spill out
- Hang the net at a height kids can reach independently — around 4–5 feet off the ground
- Mix floats of different sizes for a colorful, eye-catching display
Where to Use It: Garage walls, covered patios, wooden fences, pool houses
⭐ Pro Tip: Label each section of the net with a waterproof tag (one for big floats, one for small ones, one for pool noodles). This makes cleanup time a family game instead of a chore!
3. Oversized Wicker or Rattan Basket
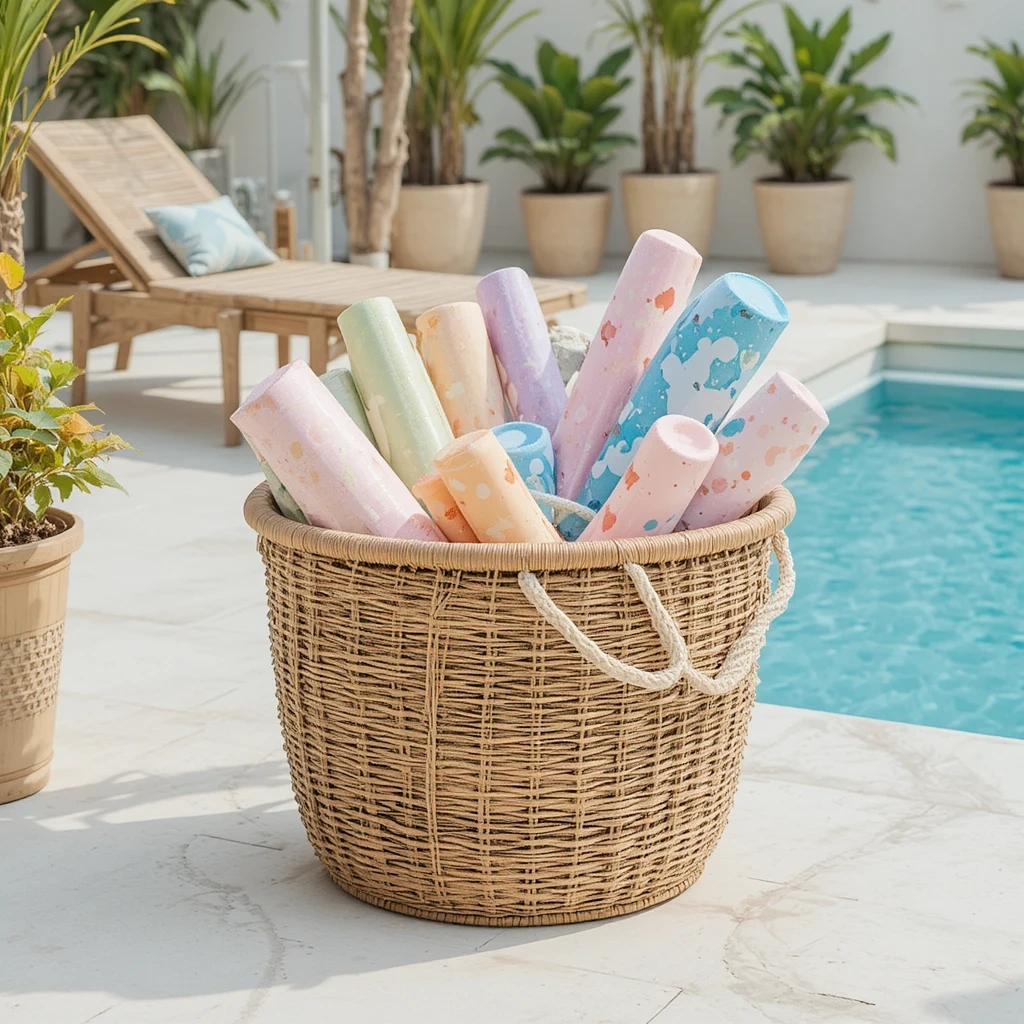
Stylish storage that looks like home décor, not a toy box.
If you want your pool area to look like it came straight from a design magazine, an oversized wicker or rattan basket is your answer. These beautiful baskets add a warm, natural touch to any patio while keeping floats contained and within reach. They work especially well for partially deflated floats or smaller inflatables that can be folded and tucked inside. Shop on Amazon
How to Style It:
- Choose a basket that’s at least 24 inches wide for generous float capacity
- Layer a waterproof liner inside to protect the basket from moisture
- Tuck a rolled-up pool towel on top for a finished, put-together look
- Pair with matching planters or lanterns for a cohesive patio aesthetic
Where to Use It: Covered patios, screened porches, pool cabanas, outdoor living rooms
⭐ Pro Tip: Spray the basket with an outdoor fabric protector (like Scotchgard) at the start of each season. This repels water and prevents the wicker from rotting — extending the life of your beautiful basket by years!
4. PVC Pipe Float Rack (DIY)
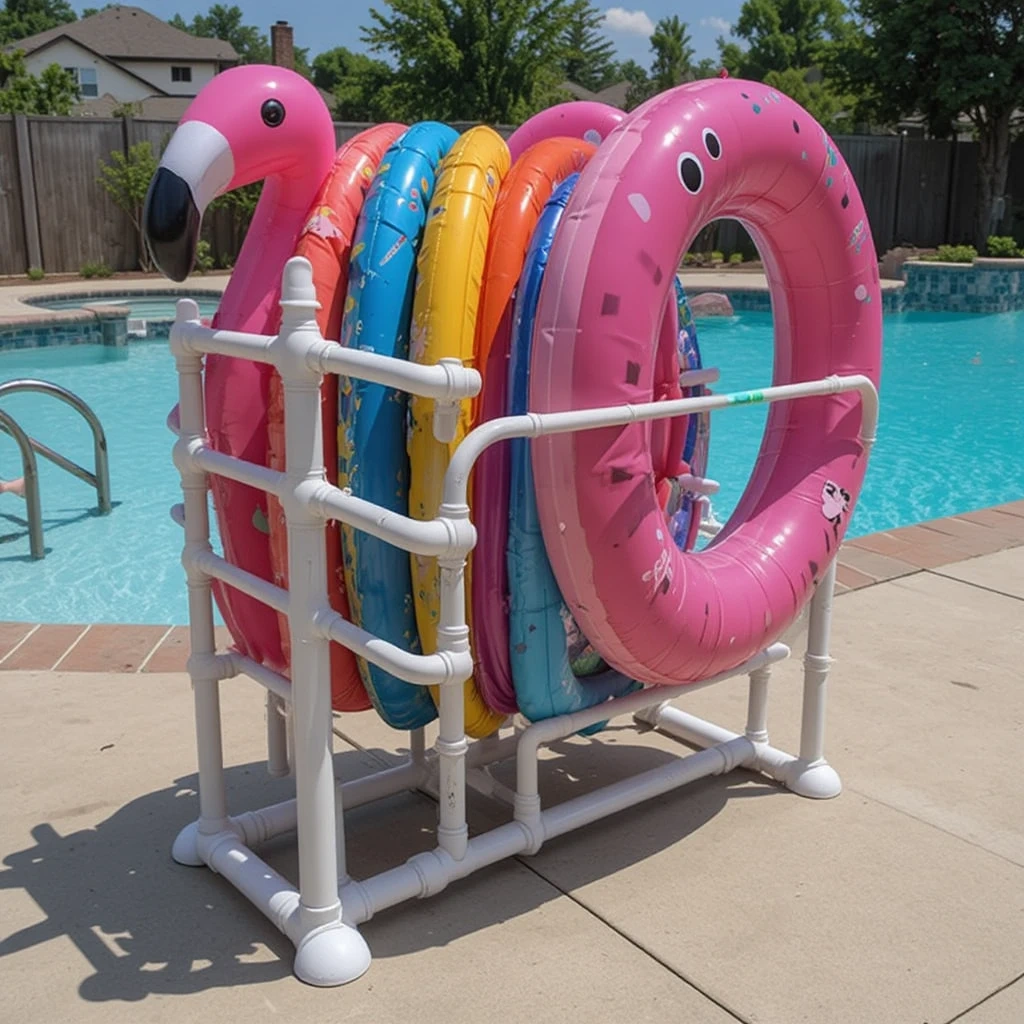
A budget-friendly DIY project the whole family can build together on a weekend.
PVC pipe racks are one of the most popular DIY pool float storage solutions — and for good reason. They’re cheap, customizable, durable, and surprisingly fun to build. With a few pieces of PVC pipe, some connectors, and an afternoon, you can create a freestanding rack that holds multiple floats upright, organized, and easy to grab. Many families paint their racks in bright colors to make them a fun part of the pool décor! Shop on Amazon
How to Style It:
- Use 1.5-inch diameter PVC for the main frame and ¾-inch for dividers between floats
- Spray paint the finished rack in a color that matches your outdoor décor
- Add rubber end caps to protect the pool deck from scratches
- Build it wide enough to separate each float — this prevents tangling and makes grabbing easier
Where to Use It: Pool deck, garage floor, backyard, patio corner
⭐ Pro Tip: Build two shorter racks side by side instead of one tall one. Kids can reach the lower rack independently, which encourages them to put their own floats away without needing help!
5. Outdoor Pool Float Hammock / Sling
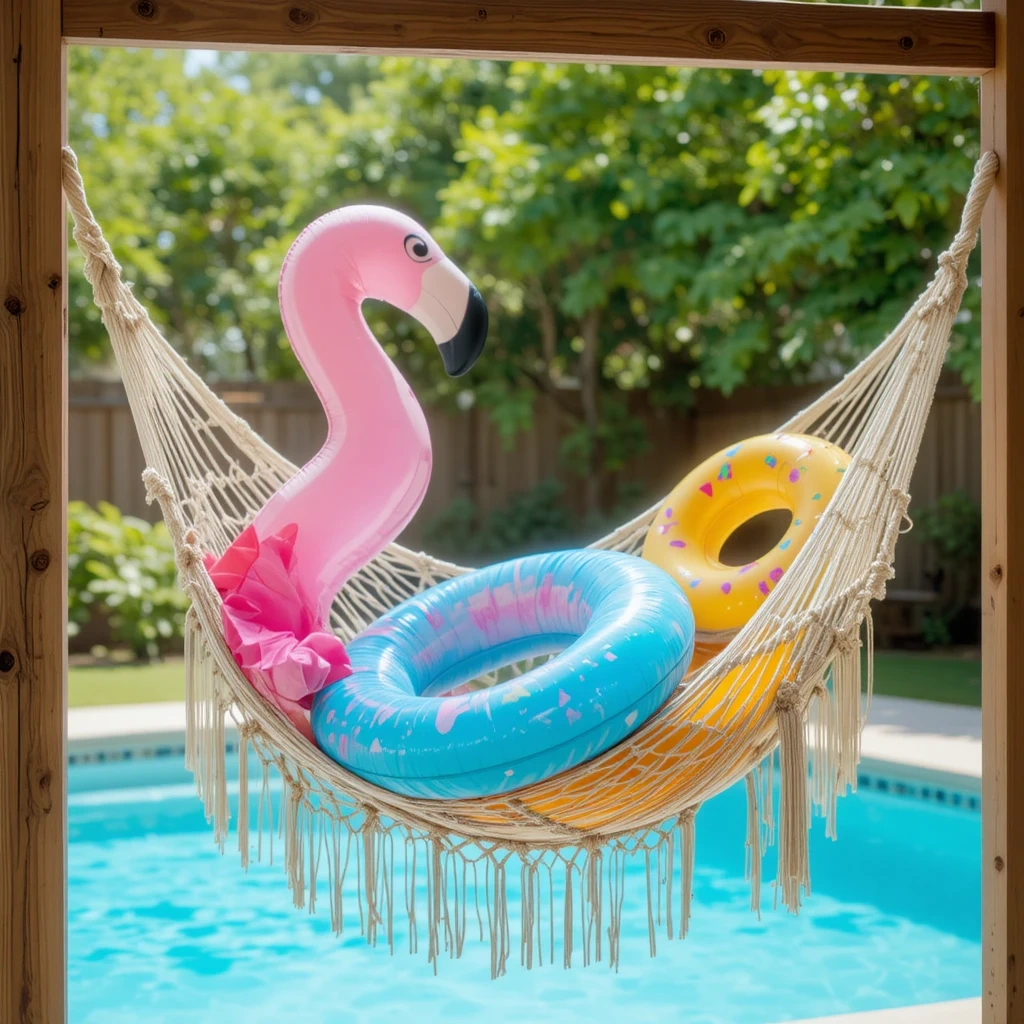
A breezy, airy solution that doubles as a charming backyard accent.
Pool float hammock slings are designed specifically for inflatables — they stretch to accommodate different sizes and hang floats off the ground, keeping them clean, aired out, and ready to use. Many styles are made from weather-resistant rope or mesh, giving them a relaxed, coastal look that fits perfectly in a pool area. This is one of those storage solutions that people actually compliment when they visit! Shop on Amazon
How to Style It:
- Install between two fence posts, pergola beams, or heavy-duty wall hooks
- Make sure the sling hangs at a comfortable height — not so high that it’s hard to reach, not so low that floats touch the ground
- Mix and match float sizes for a playful, layered look
- Choose a natural rope style or go bright and colorful with a woven cotton version
Where to Use It: Fenced backyards, pergolas, pool houses, covered patios
⭐ Pro Tip: After pool season ends, use the hammock sling to store deflated floats rolled up inside mesh laundry bags. This keeps them organized all winter and prevents them from getting tangled or creased!
6. Wall-Mounted Hook Rail System
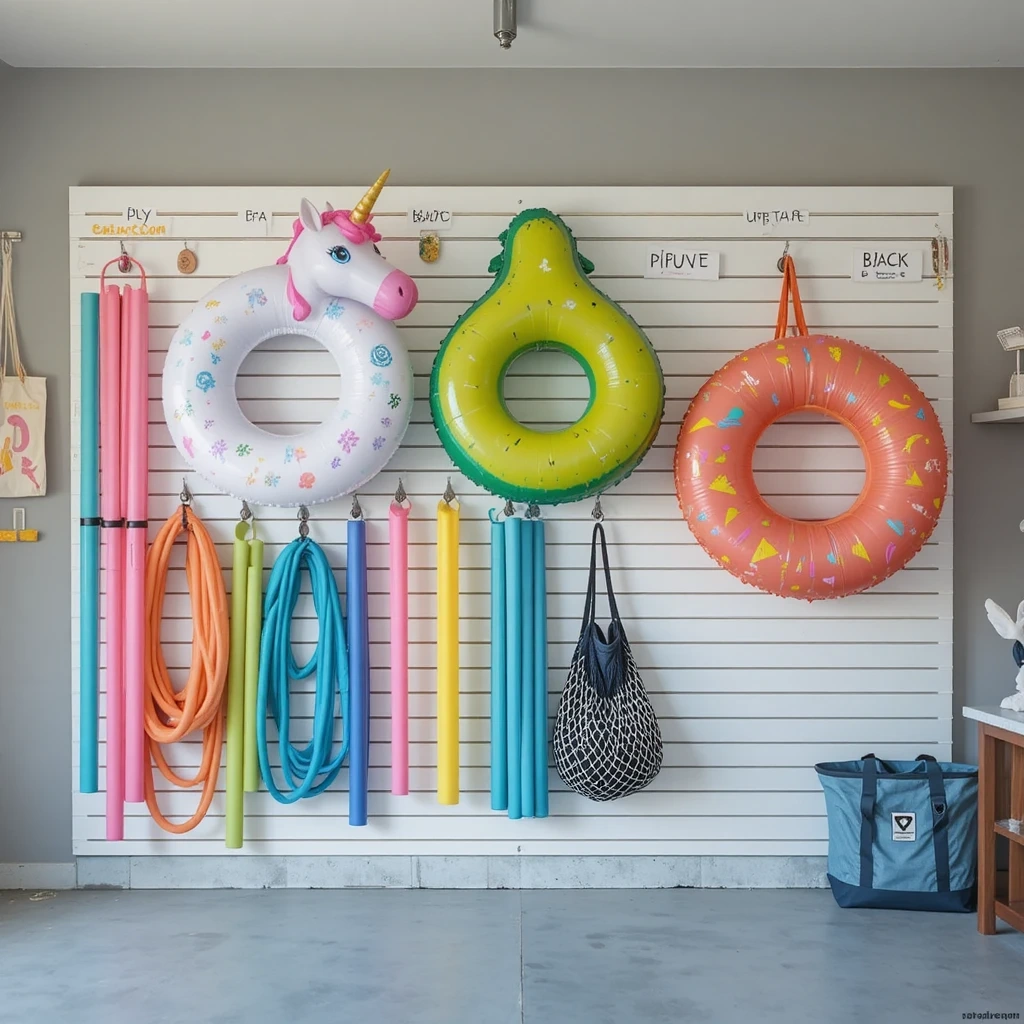
Fast, flexible, and fabulous — the perfect solution for garage or shed walls.
A wall-mounted hook rail (also called a pegboard system or slat wall system) gives you total flexibility to hang floats, noodles, goggles, water guns, and anything else related to pool fun. Install a strip of hooks along a garage or shed wall, and you suddenly have a customizable storage wall that grows with your family’s needs. Hooks can be rearranged, added, or removed in seconds — no tools required! Shop on Amazon
How to Style It:
- Use S-hooks for floats and J-hooks for pool noodles — they hold different shapes best
- Label each hook section with a category (floats, noodles, accessories) using printed signs or chalkboard tags
- Install the system at two heights: upper hooks for adults to store bigger floats, lower hooks for kids’ items they can reach themselves
- Add a small shelf on one end for sunscreen, pool toys, and goggles
Where to Use It: Garage walls, pool shed, basement, mudroom
⭐ Pro Tip: Take a photo of your hook wall fully organized and post it inside the door or on the fridge. Kids can use the photo as a reference during cleanup so everything goes exactly back where it belongs!
7. Mesh Laundry Bags + Ceiling Pulley System
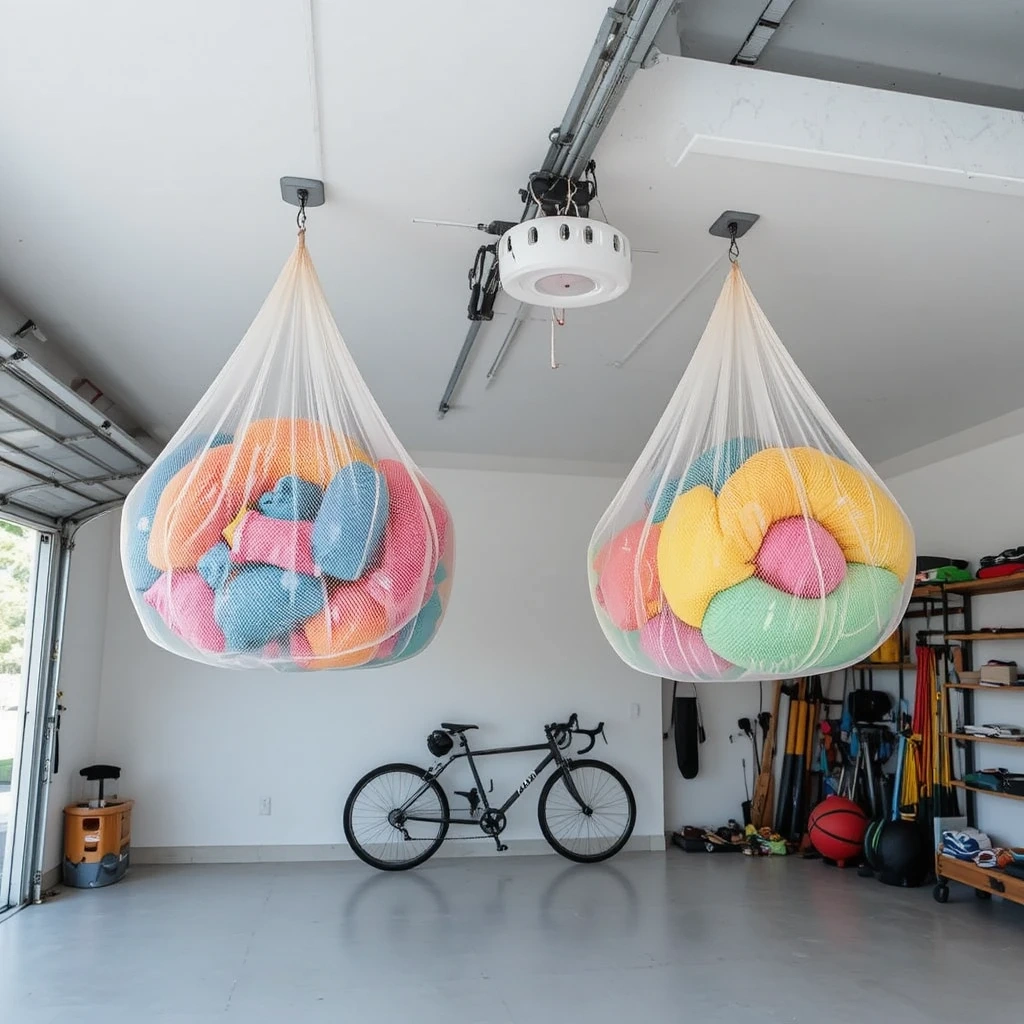
A clever space-saver for people who want maximum floor space in the garage.
Here’s a genius two-part solution: deflate your pool floats, stuff them into large mesh laundry bags, and hoist them up to the ceiling using a simple pulley storage system. Ceiling pulley systems (designed for kayaks, bikes, and holiday items) are surprisingly affordable and give you back your entire floor space. The mesh bags let air circulate, preventing mildew — and when pool season arrives, you just lower everything back down! Shop on Amazon
How to Style It:
- Use extra-large mesh laundry bags (60L or bigger) to fit multiple floats per bag
- Attach each bag to its own pulley hook using a heavy-duty carabiner clip
- Label each bag with a waterproof tag (e.g., “Big Floats,” “Pool Noodles,” “Swim Toys”)
- Keep one bag easy to lower at the front — the “pool day essentials” bag for your most-used items
Where to Use It: Garages, storage sheds, basements with high ceilings
⭐ Pro Tip: Before packing floats away, make sure they are 100% dry. Even a little moisture trapped inside a sealed bag can lead to mildew that ruins floats over winter. Leave them in the sun for a few hours before deflating and storing!
8. Repurposed Laundry Hamper or Pop-Up Storage Bin
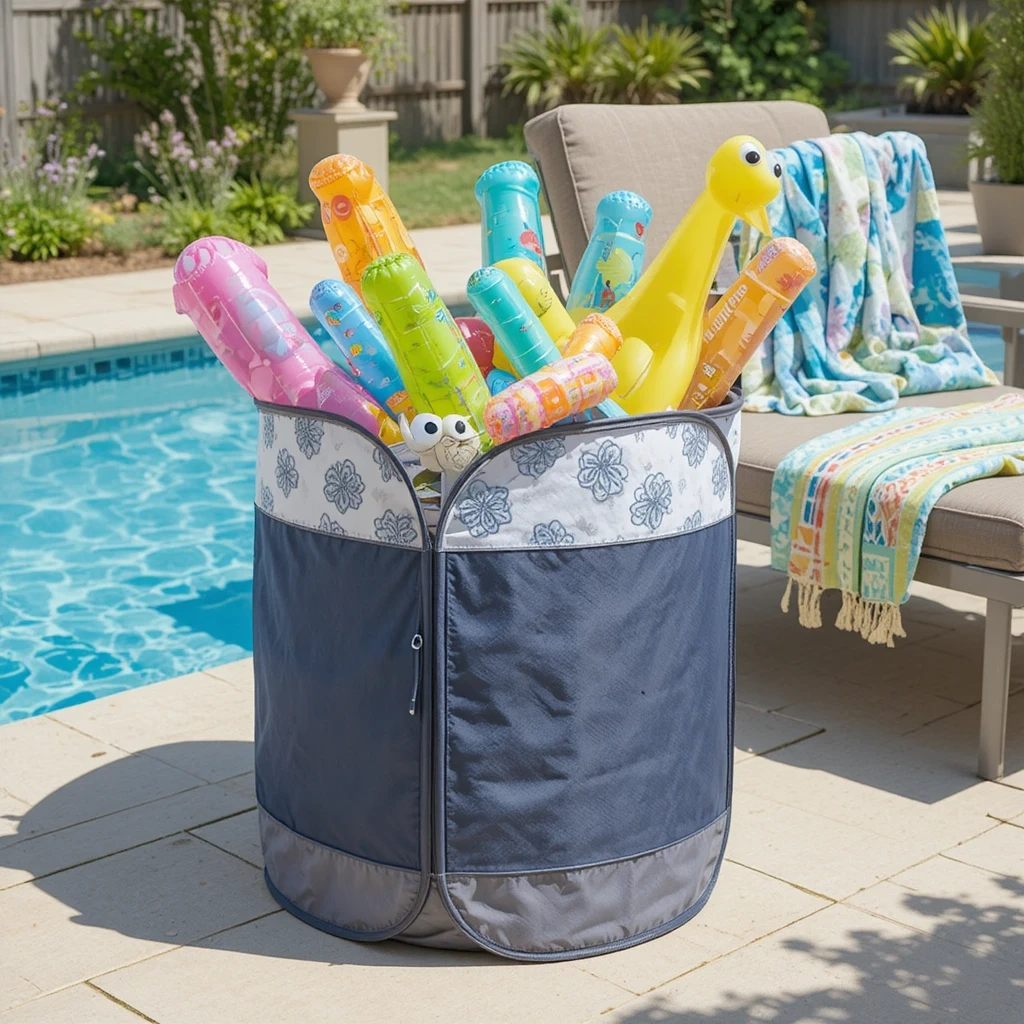
The fastest, cheapest, and most kid-friendly storage solution on this list.
Sometimes the simplest solution is the best one. A large laundry hamper — especially the collapsible pop-up style — makes a surprisingly effective pool float storage bin. It’s lightweight, easy to move, and kids can stuff floats into it in about 10 seconds.
When pool season ends, the hamper collapses flat and stores itself! This is the ultimate zero-effort, zero-budget option for families who want a clutter-free pool area without spending money on specialty organizers. Shop on Amazon
How to Style It:
- Choose a hamper in a fun pattern or color that adds to your pool area’s personality
- Use one hamper for inflated floats that are in regular use, and a second for overflow items
- Place inside a corner or against the fence to keep it out of the main walking path
- Throw a decorative cushion on top to disguise it as casual seating in a pinch
Where to Use It: Patio, pool deck, screened porch, garage — anywhere!
⭐ Pro Tip: Keep a small, battery-powered inflator pump inside the hamper too. That way, everything you need for float setup is in one spot, and pool time starts faster!
9. Freestanding Outdoor Ladder Shelf
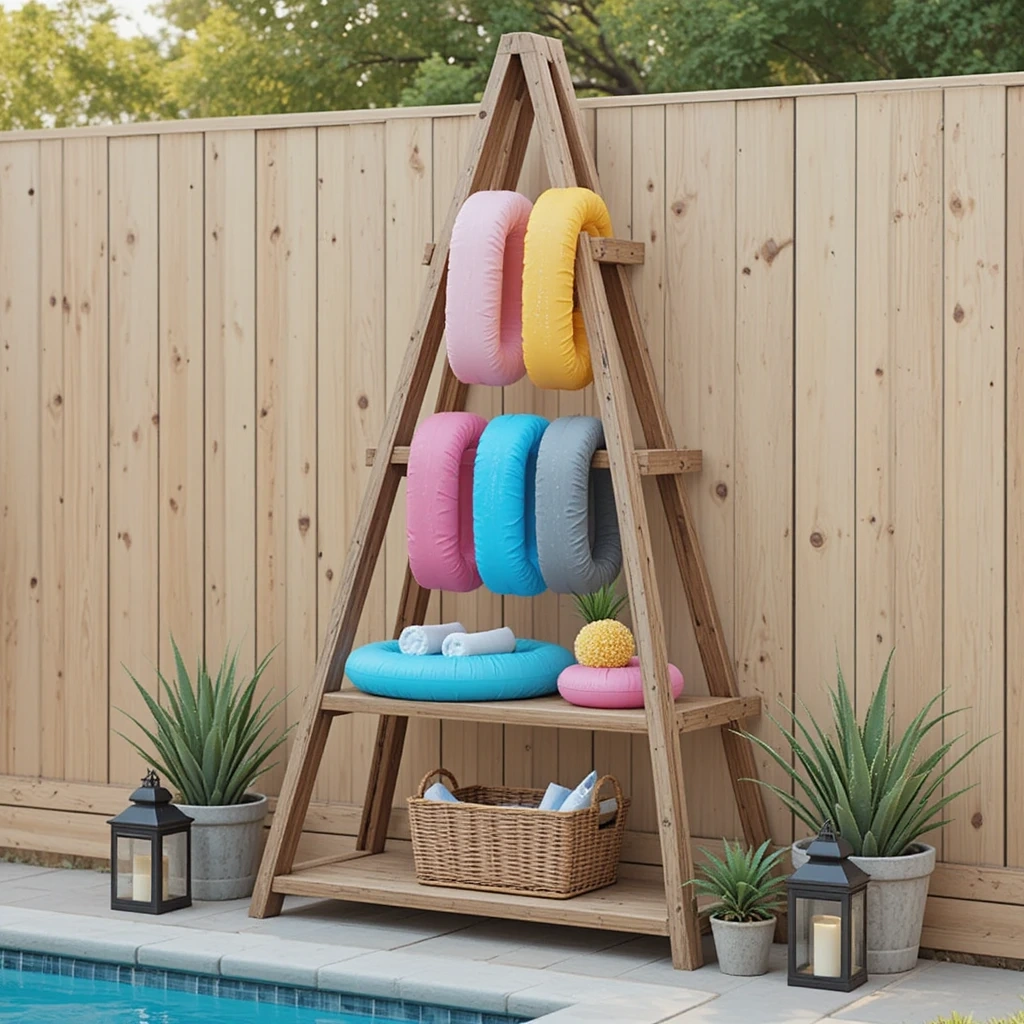
A stylish vertical solution that displays your floats like art.
A freestanding wooden or metal ladder shelf adds height, character, and tons of storage to any pool area. Lean it against a fence or wall, drape floats over the rungs, roll up pool noodles and prop them against the sides, and suddenly your storage is a decorative feature. This works especially well for families who love a boho, rustic, or farmhouse aesthetic — and it’s something the whole neighborhood will compliment. Shop on Amazon
How to Style It:
- Choose a ladder with at least 4–5 rungs to maximize storage space
- Use the top rungs for large floats and lower rungs for smaller items and accessories
- Weave string lights through the ladder for a magical evening glow by the pool
- Add a small sign on top that says something fun like “Float Life” or “Pool Rules”
Where to Use It: Pool fences, patio walls, garage walls, screened porch corners
⭐ Pro Tip: Secure the top of the ladder to the fence or wall with a simple L-bracket or bungee cord. This prevents it from tipping over during windy days or if an excited kid grabs a float too quickly!
10. Custom Built-In Storage Bench with Float Cubby
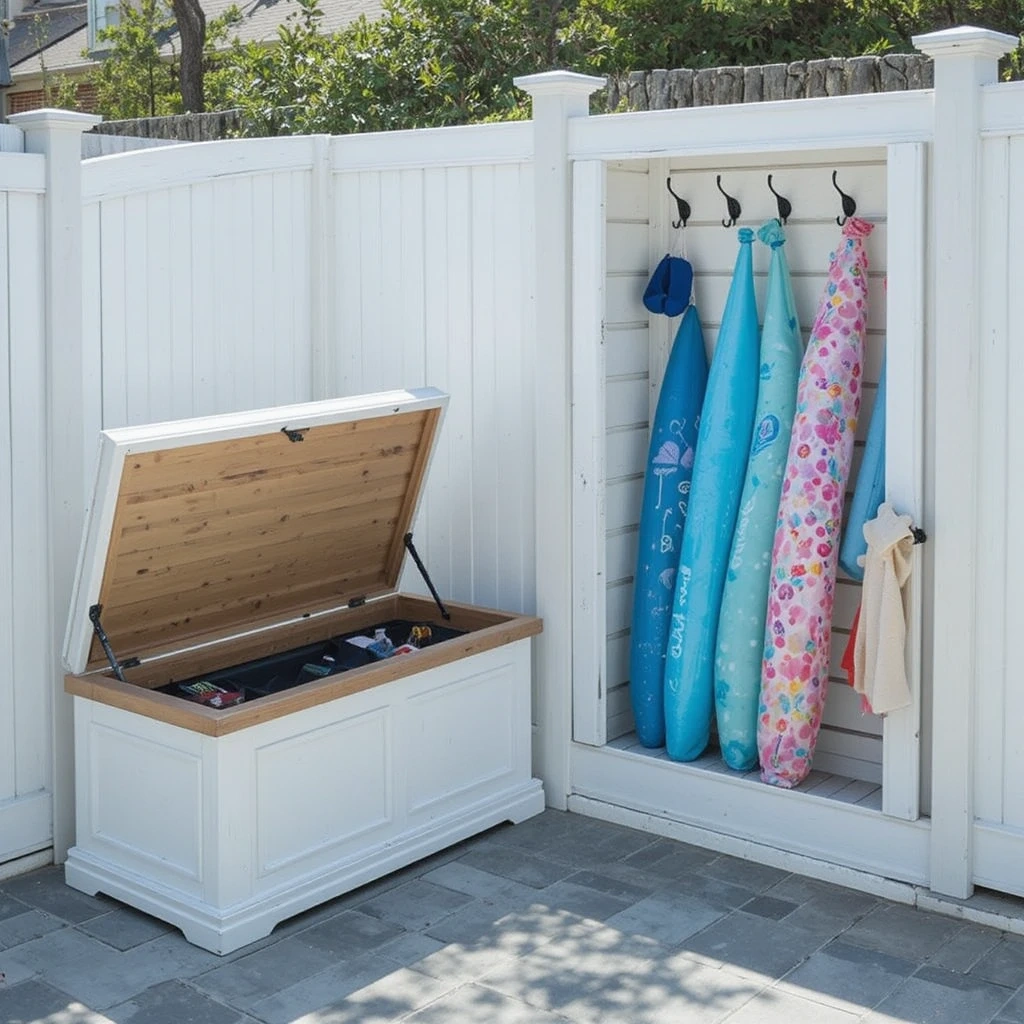
The ultimate long-term investment for families who are serious about their pool space.
If you want the most polished, permanent, and impressive pool float storage solution, a built-in storage bench with a dedicated float cubby is it. This can be custom-built by a contractor or a handy DIY parent, and it serves double duty as poolside seating.
The cubby area (usually a tall, narrow cabinet or open shelving behind the bench) holds inflated floats upright and is sized perfectly for your family’s collection. This is the kind of thing that makes guests say “wow!” Shop on Amazon
How to Style It:
- Build the bench at standard seat height (18 inches) so it’s comfortable to sit on
- Make the float cubby at least 24 inches wide and 5–6 feet tall to accommodate large floats
- Paint everything in a weather-resistant outdoor paint that matches your home’s exterior
- Add a personalized family name sign or house number above the cubby for a polished touch
Where to Use It: Permanent pool areas, fenced backyards, pool houses
⭐ Pro Tip: Build a separate, smaller cubby just for the kids — with lower shelves they can reach themselves. Label their cubbies with their names. This teaches kids ownership and responsibility while making cleanup genuinely fun!
Bonus Idea: The “Float Station” Concept
Take any of the storage ideas above and combine them into a dedicated Pool Float Station — a single, organized corner of your backyard where everything pool-related lives. Think: a storage bin for floats, hooks for towels, a small shelf for sunscreen and goggles, and a basket for pool toys.
When everything has a home, pool time becomes seamless and stress-free. Families who create a float station report that cleanup happens faster (yes, even with kids!) and the pool area stays cleaner all season long.
Common Mistakes to Avoid
Storing floats while they’re still wet. This is the number one way to end up with mold, mildew, and ruined floats. Always let floats dry in the sun for at least an hour before packing them away.
Deflating floats unnecessarily every time. For floats you use multiple times per week, keeping them partially inflated (not fully) saves time and extends the valve’s life. Only fully deflate for end-of-season storage.
Ignoring weight limits on hooks and racks. Large inflated floats are bigger and bulkier than they look. Always check that your hooks, racks, and shelves are rated to hold the combined weight of your float collection.
Storing floats in direct sunlight year-round. UV rays degrade vinyl over time. If possible, store floats in the shade or indoors during off-seasons.
Not involving the kids in the system. If kids don’t know where things go, they can’t put them away. Make sure your storage solution is kid-accessible, clearly labeled, and simple enough for young children to use independently.
Packing too many floats into one container. Overcrowding causes creasing, cracking, and valve damage. Give your floats space to breathe!
Frequently Asked Questions
Q: How do I store pool floats over winter? Fully deflate them, clean with mild soap and water, let them dry completely, then roll (don’t fold) and store in a cool, dry indoor location inside mesh or breathable bags. Avoid plastic bags, which trap moisture.
Q: Can I leave pool floats outside all summer? You can, but UV rays and weather will shorten their lifespan. Bringing them into a shaded storage area when not in use will keep them looking newer for longer.
Q: What’s the best storage solution for small patios or apartments? Hanging cargo nets or wall-mounted hook rails are your best friends. They use vertical space instead of floor space, so even a tiny patio can have a neat, organized float collection.
Q: How many pool floats can I realistically store? This depends on the solution! A large outdoor storage bin can hold 3–5 large inflated floats. A wall hook system can hold 6–10. A ceiling pulley system (using deflated floats) can hold virtually unlimited floats.
Q: Are there storage solutions that work for both pool noodles AND floats? Yes! Wall-mounted hook rails, cargo nets, and custom built-in cubbies work great for both. Use J-hooks or PVC pipe sections for pool noodles and standard hooks or open cubbies for floats.
Q: How do I stop pool floats from getting tangled? Give each float its own designated hook, cubby, or section. Avoid tossing multiple floats into one bin without some separation — try using bungee cords or mesh bags within a larger bin to keep things separated.
Q: What’s the most budget-friendly storage option? Repurposing a large laundry hamper or building a simple PVC pipe rack are both extremely affordable options — and they work just as well as expensive specialty products!
Final Thoughts
Keeping your pool floats organized doesn’t have to be complicated or expensive. Whether you go with a $15 laundry hamper or invest in a custom-built storage bench, the most important thing is finding a system that your whole family will actually use.
Start simple, involve the kids in setting it up, and watch how much more enjoyable your pool days become when everything is easy to find and easy to put away.